您的当前位置:首页 > TG > **Micromax Canvas Juice 2 AQ5001 Unveiled: Boasts 2 GB RAM and is Priced at INR 8,999****Micromax Introduces the Canvas Juice 2 AQ5001: A Budget-Friendly Smartphone with 2 GB RAM Available at Rs. 8,999****Micromax's Latest Canvas Juice Series Adds the AQ5001 Model: 2 GB RAM and MSRP Rs. 8,999****Meet the Micromax Canvas Juice 2 AQ5001: It Brings 2 GB of RAM to Market for Just INR 8,999 正文

**Micromax Canvas Juice 2 AQ5001 Unveiled: Boasts 2 GB RAM and is Priced at INR 8,999****Micromax Introduces the Canvas Juice 2 AQ5001: A Budget-Friendly Smartphone with 2 GB RAM Available at Rs. 8,999****Micromax's Latest Canvas Juice Series Adds the AQ5001 Model: 2 GB RAM and MSRP Rs. 8,999****Meet the Micromax Canvas Juice 2 AQ5001: It Brings 2 GB of RAM to Market for Just INR 8,999

时间:2024-09-24 05:16:29 来源:网络整理 编辑:TG

核心提示

**Refreshedon19thMarch2015:TheMicromaxCanvasJuicehitsthemarketbelowourforecastedbudgetatjust8,999INR

**

Refreshed on 19th March 2015: The Micromax Canvas Juice hits the market below our forecasted budget at just 8,999 INR, while its sleek design reduces the horizontal bezel显著.

With a surprising new trend, budget enthusiasts are having a field day with a surge of battery powered phones, the Celkon Millennia Epic, Gionee Marathon M3, Intex Aqua Power, and many more Lava Iris fuel models vying for attention.

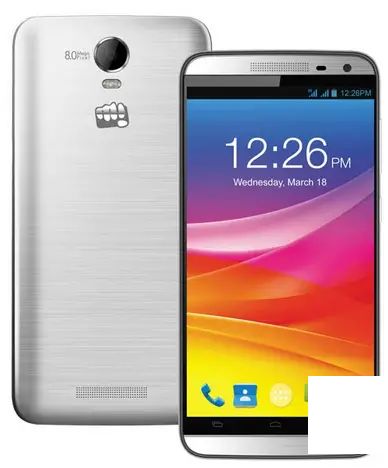
Canvas Juice 2 elevates usage with a 5-inch HD display offering 720p HD clarity, safeguarded by Gorilla Glass 3, all set against the backdrop of the 1.3 GHz quad core processor, 2 GB RAM, and 8 GB internal storage it boasts.

Equipped with an 8 MP rear camera, and a dual LED flash as shown in images, this device runs on the latest Android 5.0 Lollipop.

подчеркнуть

1.3 GHz quad core processor

2 GB RAM

8 GB internal storage

8 MP rear camera

dual LED flash

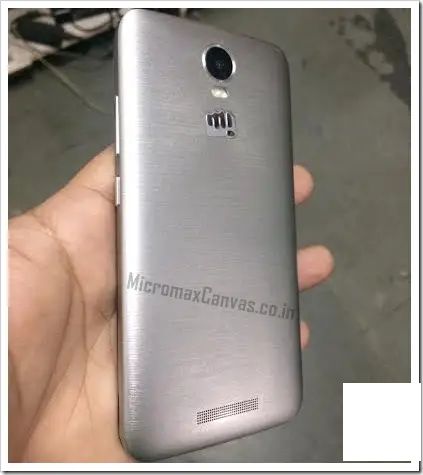
This sleek device not only boasts a brushed metal finish on the rear cover but also includes Wolfson Stereo DAC Speakers for an immersive audio experience. Eyes set, as this gadget is speculated to go official with a sum expected to exceed 10,000 INR. Its raw specifications mirror the Lenovo S860, which sports a 4,000 mAh battery and currently sells for roughly 14,000 INR in India.

4,000 mAh battery

Primary Specifications

上一篇:### Guide to Backing Up Your WhatsApp Pictures to Google Photos & Texts to Google DriveLearn how to easily backup your WhatsApp memories and important conversations to two secure and accessible platforms: Google Photos for your cherished images, and Google Drive for your text messages.---**Step-by-Step Guide to Secure Your WhatsApp Content****Step 1: Set Up Google Photos for Your Pictures**1. **Open Google Photos on Your Phone:** - Download and install Google Photos from the [Google Play Store](https://play.google.com/store/apps/details?id=com.google.android.apps/photos) (Android) or [Apple App Store](https://apps.apple.com/us/app/google-photos/id598866737) (iOS).2. **Sign in to Your Google Account:** - Once installed, open the app and sign in using your Google Account credentials.3. **Optimize Your Storage:** - Choose between High Quality to save storage space or Original to keep the highest resolution pictures. 4. **Enable Back Up:** - Go to the app's settings, find the backup section, and ensure it’s turned on. This will automatically upload your WhatsApp images to your Google Photos library.*Pro Tip:* Check your data usage or enable local backups (if mobile data is preferred) to manage your internet consumption.**Step 2: Transfer Your WhatsApp Texts to Google Drive**1. **Update WhatsApp:** - Ensure you have the latest version of WhatsApp installed from the [Google Play Store](https://play.google.com/store/apps/details?id=comWhatsApp) (Android) or [Apple App Store](https://apps.apple.com/us/app whatsapp/ (iOS)).2. **Access Backup and Restore:** - In WhatsApp, go to 'Settings' > 'Chats' > 'Chat Backup.' 3. **Back Up Your chats:** - Choose Google Drive as your backup location if it has not already been selected. Enter your Google account credentials if prompted.4. **Set Backup Preferences:** - Select how often you want your chats to back up (daily, weekly, monthly) and if you wish to use local or cloud storage.5. **Complete the Backup:** - Click Backup or Back Up Now when ready. Wait for the process to finish, and your WhatsApp texts will now be stored in Google Drive.**Step 3: Access Your Backed-Up Data**- **For Images:** - Access your WhatsApp pictures directly within the Google Photos app or visit [Google Photos online](https://photos.google.com/) with your Google account.- **For Messages:** - Visit [Google Drive](https://drive.google.com/) and log into your Google account. Navigate to the WhatsApp backup folder, and you'll find your text messages stored efficiently.**Final Consideration**Remember, backing up regularly ensures that you don’t lose important memories and conversations. Consider setting up automated backups for both Google Photos and Google Drive to keep your data secure and always up-to-date.
下一篇:Certainly! Here's a revised version of your copy with improved clarity and flow:---**5 Strategies to Dismiss the Android Setup Notification Permanently**Navigating through the setup phase of an Android device can be a seamless experience, but what if it's interrupted by a persistent notification? Here are five effective ways to wave goodbye to the Android setup notification forever:1. **Update Your Software**: Ensure your device is running the latest software version. Sometimes, outdated firmware can lead to disrupted setup notifications.2. **Restart Your Device**: A simple reboot can often resolve temporary issues causing this notification to appear. Just wait for your device to power off, then turn it back on.3. **Check App Permissions**: Verify that the app responsible for the notification has the necessary permissions. Go to your phone's settings, navigate to Apps & Notifications, and review the app's permissions to prevent future interruptions.4. **Clear Cache and Data**: Deleting the app’s cache and data can resolve issues with the setup process. You can do this by going to your device’s settings, selecting Apps, locating the problematic app, and then choosing 'Storage' followed by 'Clear Cache' and 'Clear Data'.5. **Uninstall or Disable the App**: If the notification persists, consider uninstalling the app. Alternatively, you can disable the notification for just that app by going to your device’s settings, accessing 'Notifications', selecting the application, and then toggling 'Notifications' to 'Off'.Implementing these strategies should help you enjoy a smooth setup experience with no打扰ing notifications.