您的当前位置:首页 > TG > BenQ India Introduces the 24-Inch XL2411T LED Monitor 正文

BenQ India Introduces the 24-Inch XL2411T LED Monitor

时间:2024-09-24 08:34:20 来源:网络整理 编辑:TG

核心提示

StepintotheFPSrevolutionwithBenQ'snewXL2411T,tailoredforgamingenthusiastsseekingthoseheart-poundingm

Step into the FPS revolution with BenQ's new XL 2411T, tailored for gaming enthusiasts seeking those heart-pounding moments in Counter Strike, Call of Duty, and Delta Force. This marvel boasts a 120Hz refresh rate, ensuring an uninterrupted and lag-free gaming experience, where every graphic nuance of high-definition games comes to life effortlessly.

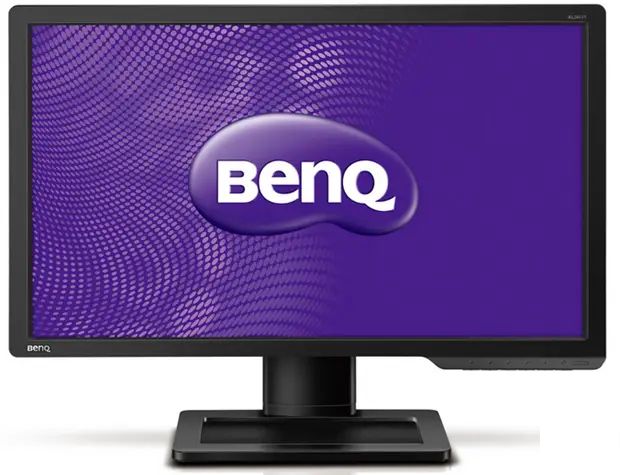
View the battlefield in stunning clarity, featuring a Full HD 1920 x 1080 pixel resolution enhanced by NVIDIA's 3D Vision 2 Technology. With a 1ms response time, you'll capture the action's swift movements with unparalleled sharpness.

Customize your gaming landscape with a versatile display scaling feature, allowing you to adjust the screen size from 17-inch to 24-inch, toggling between Aspect Ratios like (4:3), (16:10), and (16:9) for a perfectly tailored game view—change them up with a simple touch in the comfort of your post.

The XL 2411T offers an impressive 170/160 viewing angle, dimensionally catering to your gaming posture. Priced at Rs 22,500, it's an affordable indulgence for the optimal gaming setup across India.

上一篇:### How to Share Private Albums on Google Photos---#### Share Your Private Memories with Google PhotosWould you like to share select moments with friends and family without publicly displaying your entire collection? Google Photos allows you to easily share private albums with specific individuals. Follow these simple steps to keep your cherished memories private while still sharing them on your terms.---#### Step-by-Step Guide to Sharing Your Private Google Photos Albums**1. Choose the Album You Want to Share** Start by navigating to your Google Photos library. Select the album you wish to share. If you haven't created an album yet, tap on the '+' button, choose 'New album,' and organize your photos accordingly.**2. Open the Album Settings** With the album selected, tap the three vertical dots in the upper right corner of the screen to access the menu. From the dropdown, tap on 'Album settings'.**3. Go to the Share Option** In the Album settings menu, find the 'Triangle gear' icon or 'Share' link to open sharing options for that specific album.**4. Add Recipients** Here, you can type in the email addresses or phone numbers of the individuals you want to add as recipients. Each recipient will receive an invitation to view your album.**5. Set Access Permissions** You can decide whether the album is visible to 'Anyone' with the invitation link or keep it secure by choosing Password required or See only.**6. Customize the Sharing Link** If you want to share the album via a link, click on 'Shareable link' and copy it to share it outside of email and messaging apps. You can also use the built-in sharing function on Google Photos to select the app or service where you want to share the link.**7. Send the Invitation** Once everything is set to your satisfaction, tap 'Send invite' or 'Share'. Recipients will receive a message with a link to your private album. **8. Monitor Activity (Optional)** Should you wish to keep an eye on who is accessing your album, navigate back to the 'Sharing settings' and enable 'See who has access'. You'll receive notifications whenever someone gains access or views the album.---**Remember:** Always keep privacy in mind when sharing your photos. Regularly review your shared albums and adjust the permissions as needed to protect your personal content.
下一篇:### 6 Methods for Typing Copyright, Trademark, and Registered Symbols on Mac, iPhone, and iPadNavigating the nuances of creative and brand recognition is an essential aspect of legal and professional writing. To ensure accuracy and clarity, incorporating the appropriate symbols involves a few distinct steps. Here's a guide on how to type the Copyright ©, Trademark ™, and Registered ® symbols across Mac, iPhone, and iPad devices:1. **Using the Character Palette on Mac and iPad:** - For Mac users, access the Character Palette from the 'View' menu or press `Cmd + Control + Space`. - iPad users should tap the keyboard’s globe icon to display the emoji keyboard, then select ‘Software Keyboard’ from the options.2. **Using Keyboard Shortcuts on Mac:** - On a Mac, you can press `Option + 6` for the Copyright symbol (©), - Or `Option + 0` for the Trademark symbol (™). - Meanwhile, for the Registered symbol (®), hold `Option` and press `R`.3. **Finding Symbols with the Keyboard on iPhone:** - On iPhone, swipe left on your keyboard to find the symbols section. - Tap the 'G' or 'R' to reveal the Copyright and Registered symbols, respectively. - For the Trademark, swipe down on the top left row to see the T or simply tap the 'T' key to input the symbol (™).4. **Accessing Symbols in the PDF Markup Tools:** - On both Mac and iPad, when viewing or editing a PDF, you can use the 'Markup Tools' function to insert the symbols. - For Macs, click on the pen icon in the top menu bar and choose the ‘Text Tool.’ Then, click the symbol icon on the menu left, and select the symbol you need. - On iPad, tap the document to reveal the tools panel and find the 'Text' or 'Sticky Note' tool to add symbols.5. **Utilizing the System’s Dictionary:** - If you frequently need these symbols, right-clicking on the letter 'R' in your text editor will often show a menu or palette with the registered symbol (®). - Some operating systems may enable you to access the Copyright symbol (©) by selecting it from a drop-down menu when typing the word 'copyright' in alphabetical order.6. **Download Custom iOS Keyboards:** - For users who need these symbols frequently, downloading a custom keyboard app for iOS can be handy. - Install a custom keyboard that includes the necessary symbols, then switch to this keyboard when you need to type the symbols in your document.By applying these techniques, you can effortlessly integrate the essential copyright, trademark, and registered symbols into your documents on Mac, iPhone, and iPad, reinforcing the integrity of your intellectual property and brand identity.