您的当前位置:首页 > Telegram Group > InFocus Bingo 10: Comprehensive Review, In-Depth Gaming, and Performance Benchmarks 正文

InFocus Bingo 10: Comprehensive Review, In-Depth Gaming, and Performance Benchmarks

时间:2024-09-23 22:47:31 来源:网络整理 编辑:Telegram Group

核心提示

BeastonifiedbyInFocus'snewaccessiblemarvel,theBingo10,asought-afterAndroidMarshmallowsmartphoneunlea

Be astonified by InFocus's new accessible marvel, the Bingo 10, a sought-after Android Marshmallow smartphone unleashed. Last week, the Bingo 50 smartphone, another InFocus creation with the latest Android OS, received an overwhelming reception from everyone. This 10 has stepped into the market at a minimal price of INR 4,299, offering exclusivity at Snapdeal.


InFocus | Bingo 10 | Bingo 50 | INR 4,299

A Closer Look at InFocus Bingo 10's Features


[table id=446 /]


Watch the InFocus Bingo 10 Unboxed and Taken for a Spin [Video]


Opening the Bingo 10's Box: A Glimpse Inside


What's inside the Bingo 10's box includes: –

  • Bingo 10 Smartphone
  • USB 2.0 Cable
  • Removable Battery
  • Documentation and guide

Bingo 10's Physical Design


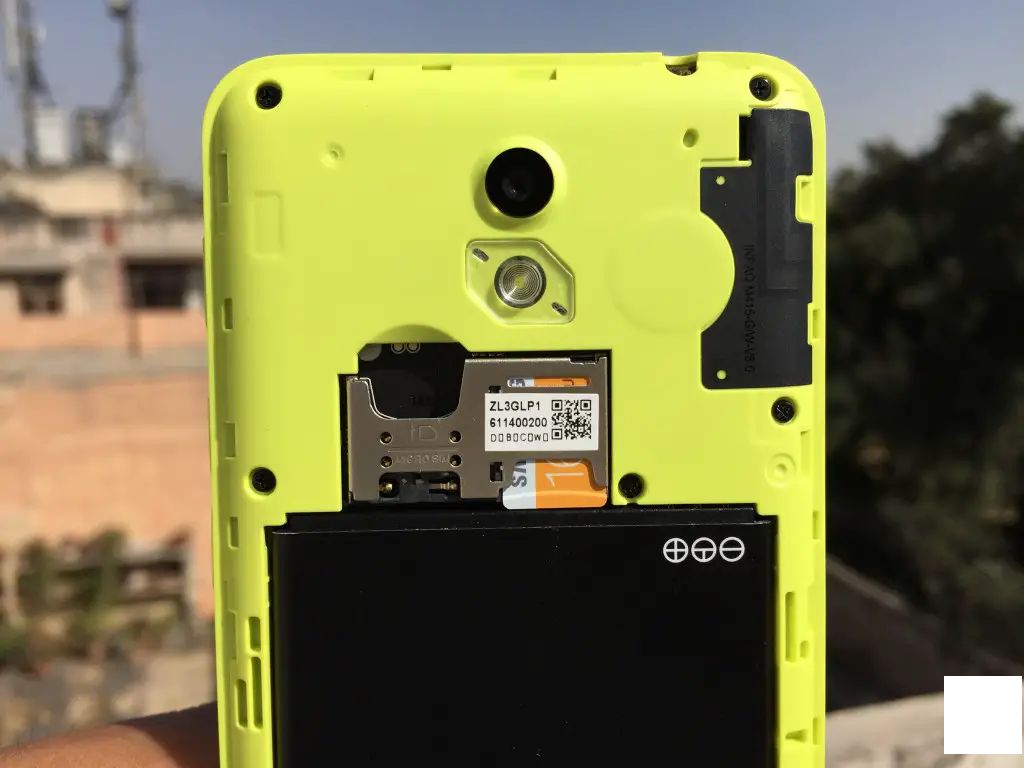
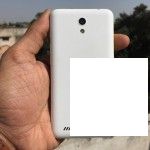
Wielding the Bingo 10 with its pristine white casing and electrifying neon green edging, it struts in style from the Bingo series' colorful history. The phone is as substantial as it is vibrant, avoiding the commonplace 'cheap feel' most affordable devices embody. Bewares of the white back – it's the equivalent of a magnet for dust and smudges.


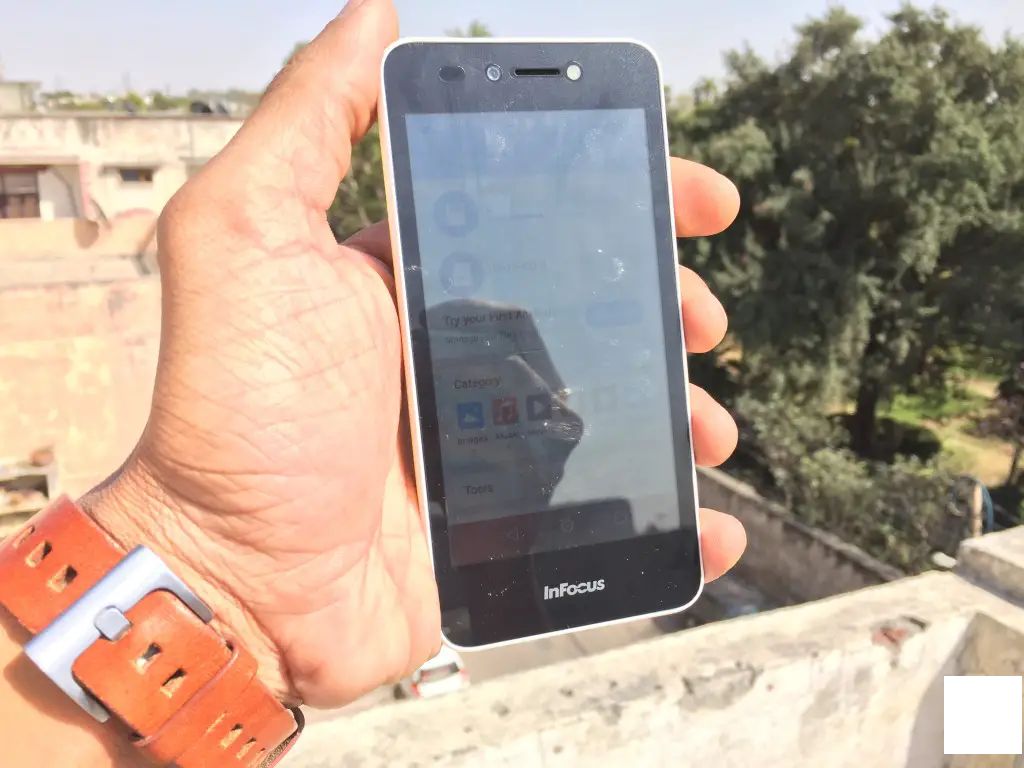
Upfront, colors paint the canvas where the display meets the screen-encircling frame. The camera, earpiece, and flashlight are neatly encapsulated on top, with the InFocus name prominently adorning the base of the display.


A specked speaker grill resides in the bottom-left corner.


Inside, the volume toggles and power/wake keys are comfortably scooped onto the right.


The 3.5 mm audio jack and the micro USB port are located towards the top, the latter used for communicating and rejuvenating this device.


Swap-in devices are made easy via the back panel, accommodating two micro SIMs and a micro SD card.


Fairing Well: InFocus Bingo 10's Photo Journal


The Bingo 10's Delightful Interface


Out of the box, the Bingo 10 ships with the voracious Android Marshmallow above which sits InFocus's warm Inlife UI. Despite it not being the most elegant we've seen, it runs smooth, posing no performance hurdles. Prettily packaged animations, theme selection, and fresh doodads adorn the UI, snuffling in the freshness of motion and off-screen interaction. Nonetheless, the UI looks a bit meager in spots, yearning for a spruce-up.


Engaging with the Bingo 10's Gaming Domain


Astonishing gaming games may be out of the Bingo 10's reach, especially with its Hirya 6580A processor and 1 GB RAM setup. Yet, '/')
[The remainder of the content is truncated in this response format.]

上一篇:### Get Real-Time Weather & News Updates on the Go With an Alarm on Android DevicesStay well-informed and on schedule with the latest weather forecasts and news updates, all accessible with an easy-to-set alarm. Discover how to integrate these essential tools on your Android device for a seamless experience. ---**Unlock Your Android's Full Potential: Integrate Your News and Weather with Alarms**Enhance your Android experience by quickly accessing crucial weather updates and news alerts while keeping track of time. We'll guide you through setting up a personalized notification system that ticks all the boxes. Follow these steps to set up a practical, informative, and alarm-activated Weather and News Center.---**Step-by-Step Guide to Setting Up Real-Time Weather and News Notifications with an Alarm**1. **Access Your Device's Settings:** - Navigate to your Android device's Settings menu. - Look for the Notifications or Sound & Notifications section and tap it.2. **Choose Specific Apps:** - Scroll down and select the weather and news app(s) you use most frequently. - Toggle Allow Notifications to enable these apps to send push notifications.3. **Customize Notification Options:** -深入了解 notification settings, adjusting importance, priority, and options for static alerts. - To set an alarm-based notification, you might find a detailed schedule area within the app settings.4. **Configure the Alarm:** - For automatic weather and news alerts, look for “Snooze Alerts,” “Scheduled Notifications,” or similar settings. - Set the alarm for a specific time you wish to wake up and tailor the notifications accordingly.5. **Add Smart Alarms:** - For added convenience, consider using a weather-based alarm that wakes you when the temperature is just right or when the forecast predicts clear skies. - Long-press on your home screen, select “Widgets,” and choose the Smart Alarms widget provided by a compatible weather app.6. **Utilize Smart Lock:** - Enable “Smart Lock” for your favorite apps by going to Security & Location -> Smart Lock ->Device complaining oh lock. - When in TrustThisDevice mode, some apps might have more timely notifications.7. **Stay Informed:** - To ensure continuous updates, make sure all relevant apps are regularly syncing and backing up data. - Check battery optimization settings to prevent any potential drain from constant app activity.By following this guide, you’ll be able to easily receive timely updates with a simple click, and with the convenience of a smart alarm integration, you’ll maintain control over your day with ease.Embrace the modern connected lifestyle and manage your time and information efficiently with an Android device. Start your day with a better-than-ever alarm, notifications, and informational overlays.
下一篇:### How to Share Private Albums on Google Photos---#### Share Your Private Memories with Google PhotosWould you like to share select moments with friends and family without publicly displaying your entire collection? Google Photos allows you to easily share private albums with specific individuals. Follow these simple steps to keep your cherished memories private while still sharing them on your terms.---#### Step-by-Step Guide to Sharing Your Private Google Photos Albums**1. Choose the Album You Want to Share** Start by navigating to your Google Photos library. Select the album you wish to share. If you haven't created an album yet, tap on the '+' button, choose 'New album,' and organize your photos accordingly.**2. Open the Album Settings** With the album selected, tap the three vertical dots in the upper right corner of the screen to access the menu. From the dropdown, tap on 'Album settings'.**3. Go to the Share Option** In the Album settings menu, find the 'Triangle gear' icon or 'Share' link to open sharing options for that specific album.**4. Add Recipients** Here, you can type in the email addresses or phone numbers of the individuals you want to add as recipients. Each recipient will receive an invitation to view your album.**5. Set Access Permissions** You can decide whether the album is visible to 'Anyone' with the invitation link or keep it secure by choosing Password required or See only.**6. Customize the Sharing Link** If you want to share the album via a link, click on 'Shareable link' and copy it to share it outside of email and messaging apps. You can also use the built-in sharing function on Google Photos to select the app or service where you want to share the link.**7. Send the Invitation** Once everything is set to your satisfaction, tap 'Send invite' or 'Share'. Recipients will receive a message with a link to your private album. **8. Monitor Activity (Optional)** Should you wish to keep an eye on who is accessing your album, navigate back to the 'Sharing settings' and enable 'See who has access'. You'll receive notifications whenever someone gains access or views the album.---**Remember:** Always keep privacy in mind when sharing your photos. Regularly review your shared albums and adjust the permissions as needed to protect your personal content.