您的当前位置:首页 > Facebook > **Get Ready for the Google Nexus 6 (Lollipop 5.0.1 Version) at Flipkart This Evening!**Join the latest tech revolution as the sought-after Google Nexus 6, featuring Android 5.0.1 Lollipop, hits the shelves on Flipkart tonight. Stay tuned; availability begins at precisely midnight! 正文
时间:2024-09-24 03:20:49 来源:网络整理 编辑:Facebook
Bornintothearmsofmidnight,theGoogleNexus6debutsforeagercustomers.Lastmonth,ameresprintsto44,000INRFe
Born into the arms of midnight, the Google Nexus 6 debuts for eager customers. Last month, a mere sprints to 44,000 INRFetch began the countdown, and now, for the Google Online Shopping Extravaganza, it surges forth with excitement.

Wind through the import data, the Nexus 6 counts 1240 souls taken in this grand land. Yet, with the increased perch of Nexus, the oh-so cobertura wallet chimes fortissimo.
Erected with a 6-inch Super AMOLED screen in Quad High Distinction purity, the Nexus 6 operates with the Snapdragon 810 quad-core CPU at an unapologetic 2.7 GHz. The Adreno 420 GPU and an robust 3 GB RAM team up with precision.
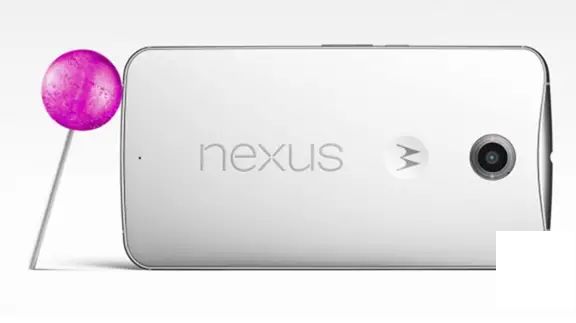
Choice in the variant of your wants: 32 GB or 64 GB, both with wallets drawn for 44,000 INR and up. Where CAMERAiline leads, treat your eyes with a 13 MP sensor that zooms in with love and records 1080p video essays with panache from 2 MP of the front.
Swathed in Android Lollipop’s bold stride, treat your fingers to the most audacious Android fps yet. In India as it is, Nexus 6 winks out of the box with 5.0.1 Lollipop, the defective SXileged. Measuring force within a 3220 mAh battery bubble, power stays vital, and turbo charging is just around the recharge corner.
Flipkart interception on Nexus 6_radiant.
Chrome to Debuted Enhanced version with Integrated Ad-Blocking Capability, According to New Reports2024-09-24 03:17
The Alcatel One Touch Idol X+ is Set to Debut in India on May 29th, Available Exclusively Through Flipkart2024-09-24 03:04
Fluid Motion Showcase Gesture-Controlled Drones at Auto-Expo 20142024-09-24 02:23
Why Do Large-Sized Consumer Batteries Not Always Promise Enhanced Display Longevity? Unveiling the Little-Known Truths2024-09-24 01:51