您的当前位置:首页 > Telegram Account > ### Efficiently Manage Your Android Phone's Music with Windows 11: Two User-Friendly Methods#### Method 1: Utilize the Windows Subsystem for Android**Integrate Your Phone’s Music Library into Windows with Ease***Streamline your music collection and manage your Android phone's music directly from your Windows 11 PC.* With the Windows Subsystem for Android, you can easily access your phone's music and related apps, allowing you to have greater control over your audio experience.1. **Enable the Windows Subsystem for Android on Your PC:** - Visit **Settings** on your Windows 11 PC. - Go to **System**, then select **Developer**. - Enable the **Virtualization** option to install the required components.2. **Download an Android Emulator:** - From the Microsoft Store, download one of the compatible Android emulators available (e.g., Amazon Appstore or Samsung Galaxy Store).3. **Access Your Phone’s Music:** - Use the downloaded emulator to connect your Android phone to your PC. - Download a stable music-playing app, like Google Play Music or any other music app you prefer. - Enjoy managing and controlling your Android phone’s music from Windows 11.#### Method 2: via Bluetooth Tethering**Seamlessly Play Music from Your Android Phone to Your Windows 11 PC***Play your favorite tracks without leaving your Windows 11 desktop.* By using Bluetooth tethering, you can stream music directly from your Android phone to your PC.1. **Connect Your Phone to Your PC via Bluetooth:** - On your Windows 11 PC, go to **Settings** > **Devices** > **Bluetooth & other devices** and turn on Bluetooth. - Pair your Android phone following the on-screen instructions provided by the Bluetooth settings on your phone.2. **Enable Bluetooth on Your Android Phone:** - Turn on Bluetooth from your phone’s settings to make it discoverable by your PC.3. **Play Music from Your Phone:** - With both devices connected, play the music on your Android phone as usual. - The audio will stream straight to your Windows 11 PC.Implement either of these methods to take full advantage of your Android phone’s music collection while working on your Windows 11 PC. Enjoy seamless, stress-free control over your audio library! 正文
时间:2024-09-24 00:37:22 来源:网络整理 编辑:Telegram Account
EmbracetheharmonyofmelodiesonyourAndroidwithaWindowsPCincontrol.intriguedbytheability?Diveintothiscu
Embrace the harmony of melodies on your Android with a Windows PC in control. intrigued by the ability? Dive into this curated guide designed just for you. Uncover the simplest ways to symphonize your music experience, connecting your Windows 11 PC and Android smartphone like an enchanted handbell. And guess what? You'll also receive a bonus tip on serenading your tunes on the go – even as your lid leaves knowledge behind.
Delve Deeper| Seamlessly Activate Windows 11's Star Feature.
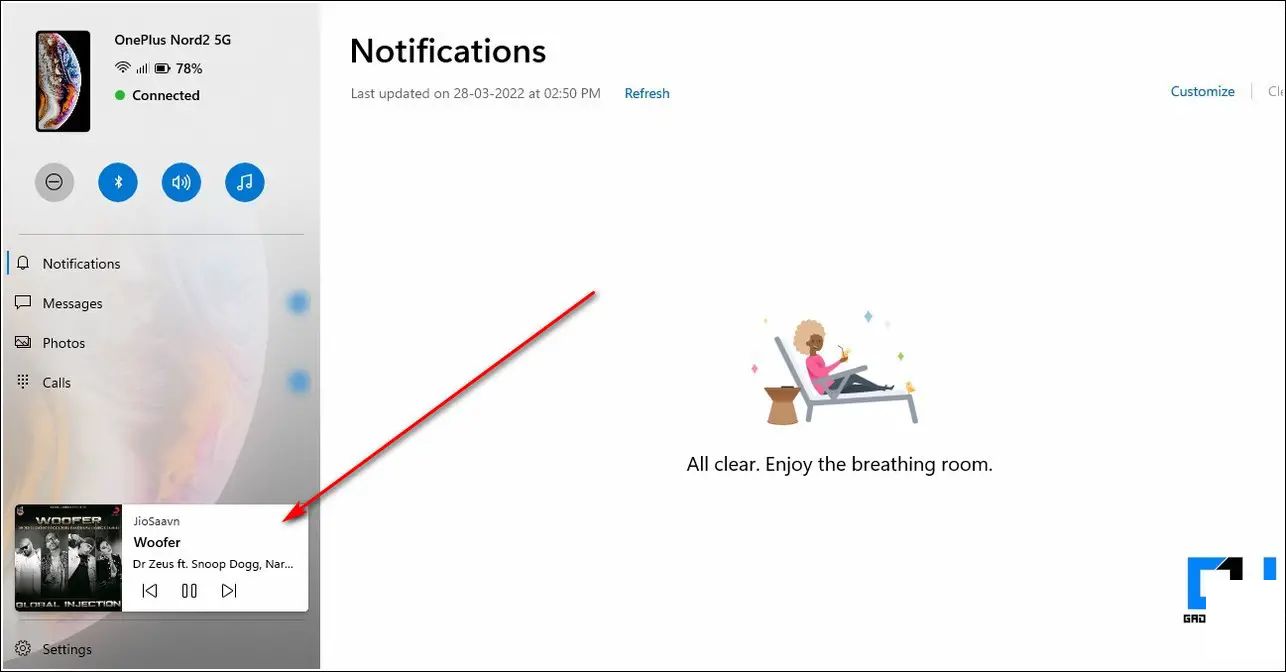
A rare melody echoes through the Microsoft vaults – it’s the inveterate companion that dances alongside Windows, the Phone app, known for the melody of continuity in our digital world. Tune in, for this reconciliation reveals your Android's soulful symphonies through this harmonious app. Step forward into the harmony with simplicity!
Phone app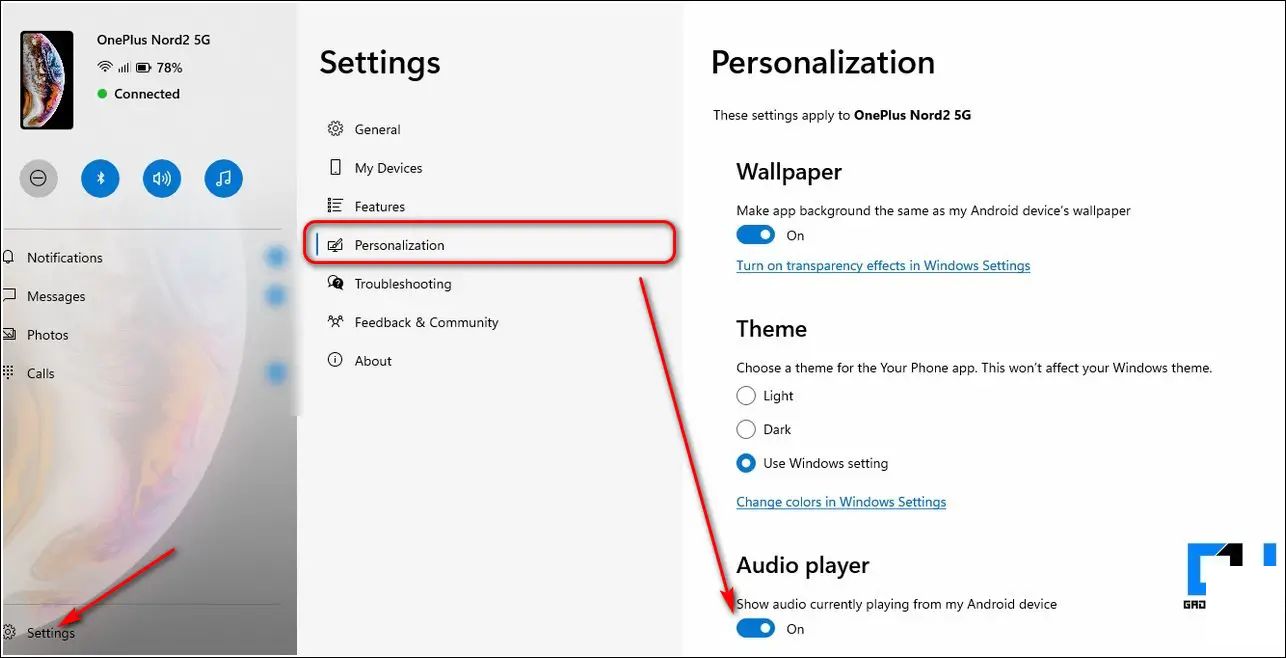
Engage| Insights to隋ting and Synchronizing Music on Passwords and Android TV.
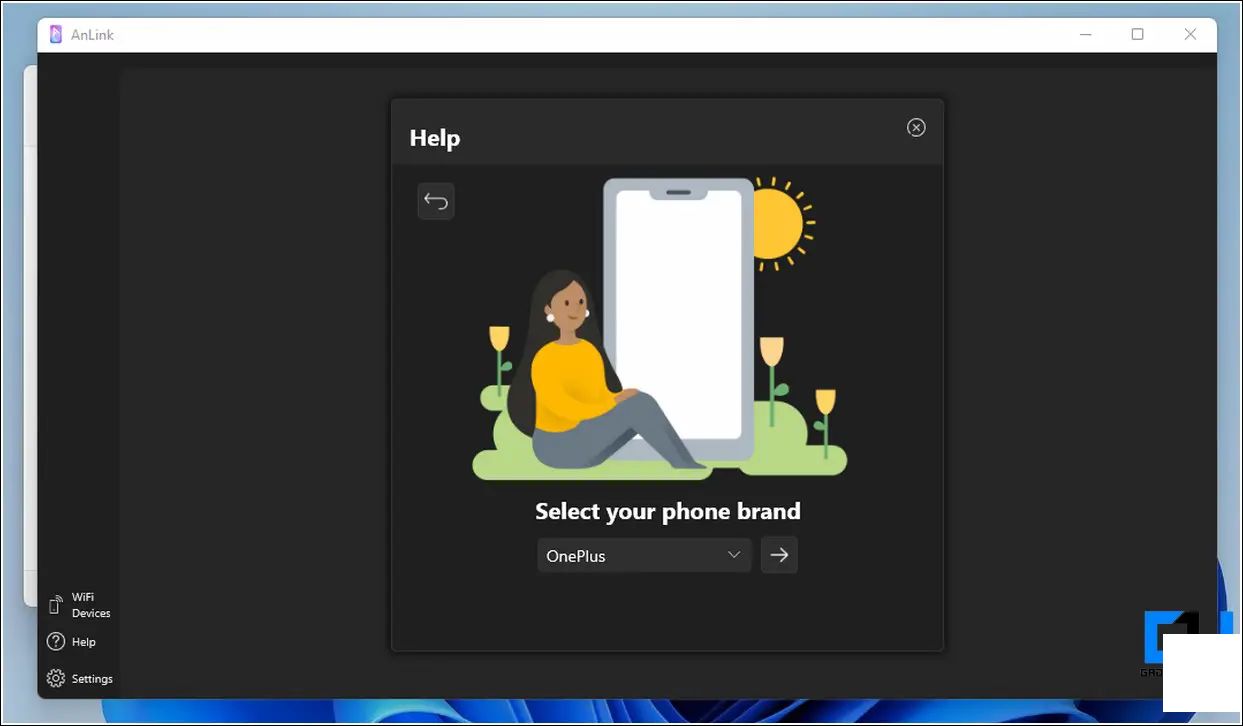
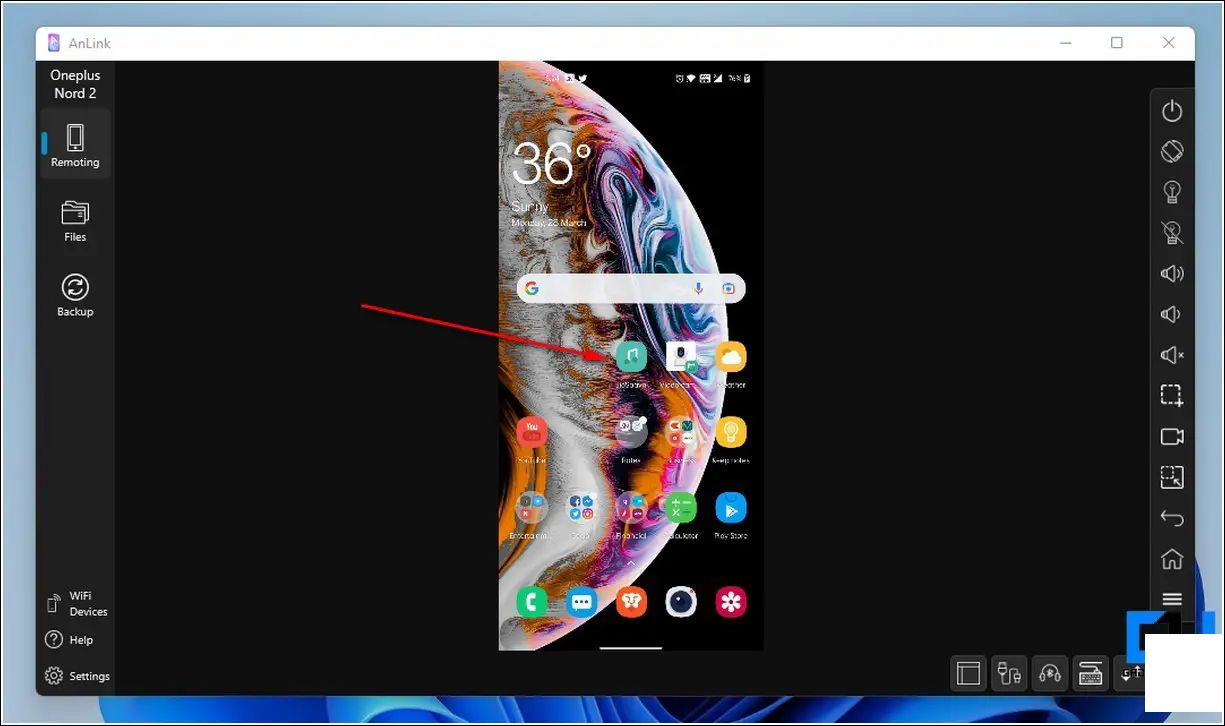
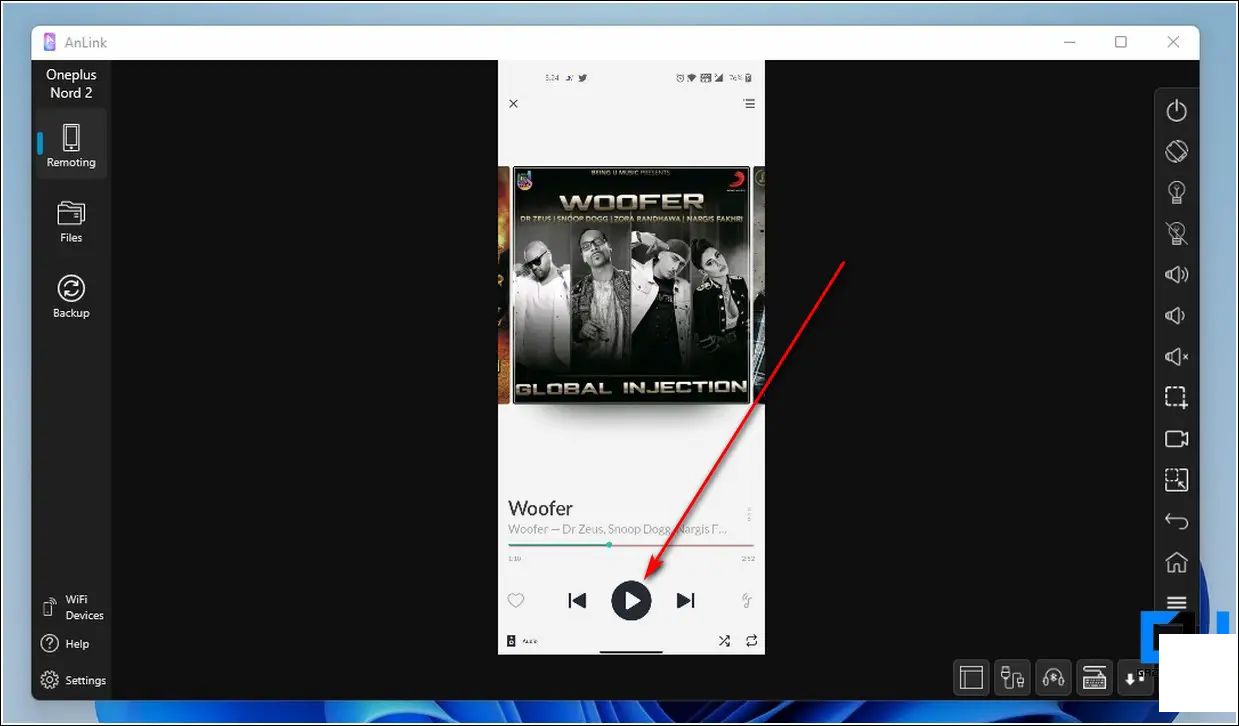
Engage| Insights to隋ting and Synchronizing Music on Passwords and Android TV.A universal conductor beckons from the echoes of the digital arena, offering operas free of charge. Rejoice in the ensemble that promises to be your backdrop, AnLink—the maestro who reigns supreme over both phones safely and silently.
free third-party Windows appsAnLink


Oyez, iPhones! The clarion call blares from the conductors who have faced neither adversity nor music selection foibles. The journey to serenate your melodies on Windows 11 is a guided voyage for all who seek it.
Clustered Insight | 3 Far-Reaching Alternatives to Windows 11 Taskbar Drag and Drop.
Clustered Insight | 3 Far-Reaching Alternatives to Windows 11 Taskbar Drag and Drop.May our harmonious convergence teach you a new melody of productivity and pleasure. If this tutorial is a victory, press the applause button and spread the rhythm to those yearning to control their tunes. This symphony is ever revolving with more how-tos to play and share!