您的当前位置:首页 > Telegram > **CES 2015: Acer Unveils the Liquid Z410 — a Cutting-Edge 4G LTE-Supported Smartphone**Acer has officially introduced the Liquid Z410 at CES 2015, showcasing a new smartphone that boasts 4G LTE support, further enhancing the brand's portfolio of advanced mobile devices.:Paper airplane desktop version software download 正文

**CES 2015: Acer Unveils the Liquid Z410 — a Cutting-Edge 4G LTE-Supported Smartphone**Acer has officially introduced the Liquid Z410 at CES 2015, showcasing a new smartphone that boasts 4G LTE support, further enhancing the brand's portfolio of advanced mobile devices.:Paper airplane desktop version software download

时间:2024-09-23 05:47:25 来源:网络整理 编辑:Telegram

核心提示

Beneaththeneon-washedhallsofCES2015'sshadow,thespotlightSuddenlyflashedonAcer'sshinynewLiquidZ4104Gs

Beneath the neon-washed halls of CES 2015's shadow, the spotlight Suddenly flashed on Acer's shiny new Liquid Z410 4G smartphone. Crafted for the expansive inquisitive souls of EMEA, this sleek marvel hits the shelves at a budget-setting 129 euros (a powerhouse of Rs 9,700). Here’s a surprising pitch: 4G LTE (Cat.4) power at an undeniably wallet-friendly price – watch it hit stores starting February.

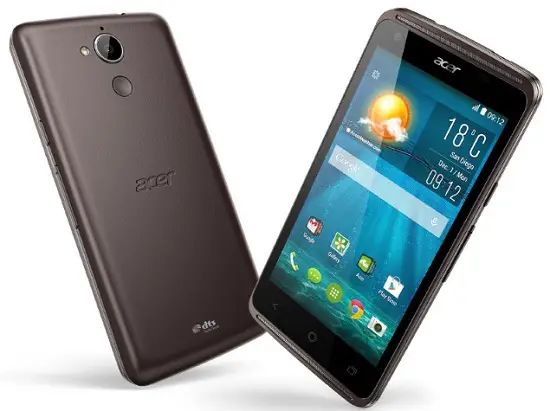
The Liquid Z410 dresses in a 4.5 inch qHD showdown, bursting at the edges with a 960×540 pixel resolution and a pixeling precision of 245 DPI._drive

Under the hood, it’s powered by a silent powerhouse of a quad-core 64-bit processor of yet-to-be-named chipset and keeps its cool with a software-as billed, Android 4.4 KitKat – the purr of efficiency.

上一篇:### How to Auto-Translate Chrome Web Pages for PC and Mobile DevicesLooking to easily translate content on web pages directly within the Google Chrome browser on your computer or mobile device? This guide will walk you through the simple steps to activate automatic translation on both your PC and mobile browsers.---#### Auto-Translate Chrome Web Pages on PC1. **Access Chrome Settings:** - Open Google Chrome on your PC. - Click on the three dots in the upper right corner to open the menu. - Select “Settings” from the dropdown list.2. **Navigate to the Advanced Section:** - Scroll down or use the search bar and type in “Language.”3. **Enable Translation:** - Under the “Languages” section, click on “Translate spoken and written languages automatically.” - Toggle the switch to enable automatic translation. Chrome may ask for permission to access your language preferences and text content on web pages, so be sure to give the necessary permissions.4. **Select Your Preferred Languages:** - Click on “Language” in the settings menu. - In the list of languages, select “Add languages.” - Choose the languages you want Chrome to automatically translate from and to.5. **Start Browsing:** - Open a web page as normal. - Chrome will automatically translate French or other foreign language text into your chosen target language.---#### Auto-Translate Chrome Web Pages on Mobile DevicesThe process is similar for mobile users:1. **Open Chrome on Your Mobile Device:** - Launch the Google Chrome app on your smartphone or tablet.2. **Go to Settings:** - Tap on the three dots in the upper right corner to access the menu. - Choose “Settings” from the menu.3. **Access Language Settings:** - In the settings menu, scroll to find “Languages” or “Languages & input.”4. **Turn on Translation:** - Look for an option related to automatic translation and toggle it on. - If prompted, grant permission for Chrome to access the text content on your webpages.5. **Set Your Language Preferences:** - Go to the language settings and add the languages you wish Chrome to automatically translate.6. **Browsing with Translation:** - Browse any web page. - Chrome will then show the translations automatically, either in_place as you read, or after you select the translate button on the webpage.---By following these steps, you can now enjoy seamless automatic translation for web pages in Chrome, regardless of whether you're using a PC or a mobile device.
下一篇:### Install iOS 7 Style Control Center on Your Android DeviceAre you ready to upgrade your Android experience with the sleek, practical design of iOS 7's Control Center? Follow our step-by-step guide to download and install this stylish update on your Android device. Get ready to enjoy lightning-fast access to your favorite features and settings!#### Step-by-Step Instructions:1. **Find a Compatible Control Center App:** - Search for iOS 7 Style Control Center in the Google Play Store to find a variety of apps that mimic this feature.2. **Install the App:** - Once you locate an app that fits your needs, tap Install. The app will be downloaded and installed on your device.3. **@Enable Root Access (If Needed):** - If you're using a rooted device and the app requires root permissions, you’ll need to verify this within the app’s settings.4. **Customize Your Control Center:** - Open the Control Center app to see a menu with various customization options. - Choose which toggles, shortcuts, and apps you want to see in the center. Popular choices include WiFi, Bluetooth, flashlight, and music controls.5. **Access Your Control Center:** - Look for the Control Center icon in your notification shade or app drawer. It will resemble the familiar iOS 7 control icon. - Long press or swipe down from the status bar to reveal the Control Center. From here, you can toggle various settings and open your preferred apps with ease.6. **Synchronize Your Wallpapers and Appearance:** - For the complete iOS 7 experience, you may want to find a suitable wallpaper to match the style of your new Control Center. - Add custom ringtones, notifications sounds, or icons for an even greater personal touch.7. **Update Application Settings:** - Regularly check for app updates within the Google Play Store. These updates ensure the Control Center continues to work seamlessly and includes enhancements.8. **Backup Your Settings:** - To maintain a smooth transition to your new Control Center, periodically back up your current settings, including ringtones, notification sounds, and any other personalization.By following these steps, you should have a rich iOS 7-styleControl Center available on your Android device in no time. Embrace a cleaner and more efficient way to manage your device's settings and integrate premium functionality with your everyday use.