您的当前位置:首页 > Twitter > New Copy: **A Comprehensive Face-Off: Microsoft Surface Pro 3 vs Surface Pro 2** **Comparison Overview 正文

New Copy: **A Comprehensive Face-Off: Microsoft Surface Pro 3 vs Surface Pro 2** **Comparison Overview

时间:2024-09-23 18:57:59 来源:网络整理 编辑:Twitter

核心提示

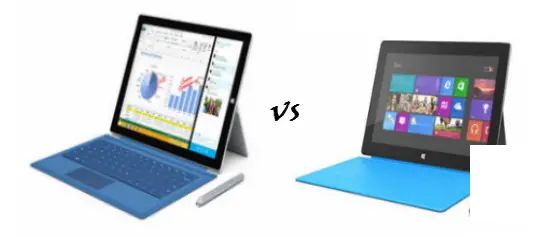
**MicrosoftboaststheversatilityoftheSurfacePro3,butitsrefinementspeaksvolumes,usheringinthethirditer

**

Microsoft boasts the versatility of the Surface Pro 3, but its refinement speaks volumes, ushering in the third iteration with leaps in key features. The unveiling on a Tuesday triggered immediate pre-orders, signaling the tablet's potential as a laptop successor. Yet, the leap from Pro 2 to Pro 3 dictates an in-depth comparison to appreciate the evolution.

Gaze at the Surface Pro 3, a tablet targeting laptop dominance. While size sports the bezels of a seasoned notebook, its worth against the Surface Pro 2 demands a meticulous look. This deep dive reveals the stark contrasts in screen size, aspect ratio, and pixel grid, painting a picture of profound difference.

Display and Processor Paradise

Revel in a 12-inch diagonal ClearType FHD display reserved for the Surface Pro 3, greeted by a horizontally slicing 3:2 aspect ratio—a departure from the standard 16:9 traditionally presented. The FHD 2160×1440 resolution promises a "Pixel-Free" spectacle, boasting 38% larger screen scope and 50% resolution punch over the Surface Pro 2's 10.6-inch, 1920x1080 canvas.

For slankness without compromising 건강, Microsoft embraced the Intel Core i7, an intimate fit for the trim frame. Multiple Core i3 to i7 powered versions grace the Surface's stage, with the Surface Pro 2 relying on a fourth-gen Core i5. The Surface Pro 3's silent SCEنشینians showcase a 30% cooler performance dance, whispering silence into the ears of PC enthusiasts.

Camera and Storage Showdown

With camera prowess stepping up a notch, the Surface Pro 3 showers users with a 5 MP front and rear stunner, tailored for crystal-clear videos and images. In contrast, the Surface Pro 2 sticks to basic server 1.2 MP snappers, a humble offering by comparison. Storage options flex with four robust configurations with storage, 64 to 512 GB, an SD card slot crouching readiness for expansion.

Battery and Design Dynamics

The Surface Pro 2 parks a 42 W-h battery, guaranteeing seven hours of“spin”on the web—a venture, yet the mystery_battery of the Pro 3 perches anticipation, rumored to stretch to nine hours of online roam, an extra tenacious 10% in endurance.

Meticulously crafted

Software Symphony and Features

Running on the familiar 8.1 Pro, the latest Surface pens the efficacy of premium efficiency, with a weightier silhouette, easy access to OneNote through gentle taps or capturing screen content with clicks. Software prowess flips the page into a canvas of enhanced productivity.

Spec Scorecard

Priced Beyond the Bounds

Feker цінуarin the arena of market leadership, the Surface Pro 3 asserts a bold profile, balancing a expansive display,orrible waifery, and feature-rich enhancements too uniquely cater to laptop-starved hands. The Core i7 stamp offers no dictates against diligence sprouting, sowing productivity blooms with every wake-up call.

上一篇:**Understanding the Differences Between 60Hz, 90Hz, & 120Hz Displays**In the world of digital displays, refresh rate is a critical factor that can greatly impact your viewing experience. The refresh rate refers to how many times per second the screen updates its image, measured in hertz (Hz). Here’s a closer look at the primary differences between 60Hz, 90Hz, and 120Hz displays:**60Hz Displays**- Standard: Most conventional monitors and TVs operate at a 60Hz refresh rate.- Visual Smoothness: Images may feel slightly less smooth to the observer compared to higher hertz rates.- Cost: Generally more affordable than displays with a higher refresh rate.- Ideal for: Watching videos, general web browsing, and simple gaming.**90Hz Displays**- Improved Responsiveness: A 90Hz refresh rate provides smoother visuals and less motion blur than 60Hz but is still budget-friendly.- Gamification: 90Hz is a good mid-range refresh rate for video games and streamers.- Cost: Slightly pricier than 60Hz models but still qualifies as an entry-level upgrade.**120Hz Displays**- Exceptional Responsiveness: Offers the most responsive visuals with much less motion blur and input lag.- Gaming Perfection: Ideal for competitive gaming and general gaming enthusiasts.- Cost: More expensive due to the enhanced technology and higher quality.- Ideal for: Professional gaming and applications requiring precise visual timing.In summary, the choice between a 60Hz, 90Hz, and 120Hz display ultimately depends on your specific needs and budget. While a higher refresh rate can significantly improve your browsing and gaming experience, it also tends to come with a higher price tag.
下一篇:### How to Eliminate the Notch on Your Android SmartphoneLooking to bid farewell to the infamous notch on your Android smartphone's screen? Here's a step-by-step guide to help you get rid of that distracting crevice for a more smooth and uniform viewing experience. ---#### Removing the Notch on Your Android Smartphone: A Comprehensive GuideReady to upgrade your smartphone's aesthetics and functionality? Follow these simple steps to say goodbye to the screen notch and embrace a seamless visual experience:1. **Check Your Device's Compatibility**: - Before diving in, ensure that your Android smartphone is compatible with a third-party app, custom ROM, or feature that allows you to hide the notch. Some devices have hardware limitations that may prevent you from doing so.2. **Download a Custom App**: - If your device is compatible, search for hide notch in the Google Play Store. You'll find various apps designed to simulate a notch-free display by stretching the screen content across the edges.3. **Root Your Device (Optional)**: - If the standard app solution isn't sufficient, or if you want complete customization, you may need to root your phone. Rooting allows you to install custom ROMs that can hide the notch at a deeper level. This is a risky endeavor and can void your warranty, so proceed with caution.4. **Install a Custom ROM (Advanced Method)**: - After rooting, download a custom ROM that's specifically designed to remove the smartphone's notch. Follow the detailed installation instructions provided by the ROM's developer to learn how to apply it to your device.5. **Adjust Your Device's Settings**: - Once the custom ROM is in place, access your device's display settings to confirm that the notch has been successfully removed. Adjust any relevant settings to ensure smooth scaling of content across the screen.6. **Test Your Setup**: - Run a visual test by displaying images and videos that are known to challenge the edges of your screen. You should not notice any artifacts or discrepancies, indicating that the notch removal method is working effectively.---Keep in mind that the process to remove a notch can vary depending on the specific make and model of your Android smartphone. It's always a good idea to consult the smartphone's manufacturer website or dedicated forums for device-specific advice and troubleshooting.