您的当前位置:首页 > Telegram Premium > **Xolo Play Tegra Note 7 Now Enjoying Android 4.3 Update, Packed with Exciting New Features**The Xolo Play Tegra Note 7 has been upgraded to run on Android 4.3, bringing a wave of new capabilities to users. Embrace the latest enhancements and discover the latest features that this update has to offer. 正文

**Xolo Play Tegra Note 7 Now Enjoying Android 4.3 Update, Packed with Exciting New Features**The Xolo Play Tegra Note 7 has been upgraded to run on Android 4.3, bringing a wave of new capabilities to users. Embrace the latest enhancements and discover the latest features that this update has to offer.

时间:2024-09-24 04:44:22 来源:网络整理 编辑:Telegram Premium

核心提示

Revolutionizeyourtechexperience–trustme,there'snothingquitelikethethrillofupdatingyourgadget'sOS.Cas

Revolutionize your tech experience – trust me, there's nothing quite like the thrill of updating your gadget's OS. Case in point: the Xolo Play Tegra Note 7 has soared with a litany of enhancements, all thanks to its monster upgrade to Android v 4.3. Let's dive into the nitty-gritty of the new features this marvel лепnosystemy bestows upon its users.

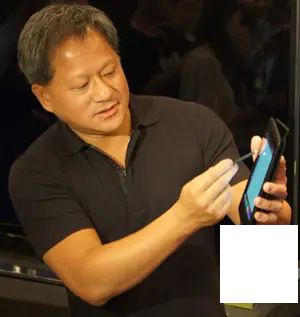
For our southpaw gadget aficionados, we've sourced a gem – a left-handed user's dream. The innovative Direct Stylus promises comfort with swipes, utilizing a passive stylus widely available at a trim 5 mm tip. The flip side? A nifty eraser ready for the delete party!

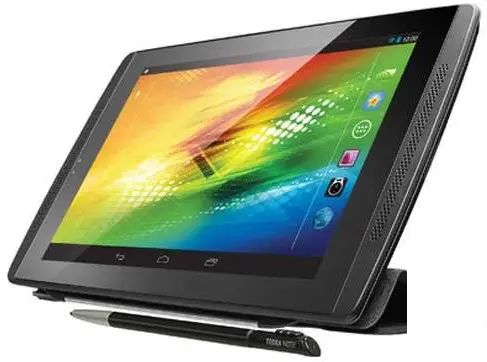
The Xolo Play Tegra Note 7's touch prowess and image-crafting skills discern pen strokes from the slip of a finger, ensuring you pick your stylus wisely – pen or eraser.

Theментов и 制作了绝佳的更新。AOHDR(始终HDR)功能默认开启,捕捉每一刻,录像稳定功能更是巧妙抵消手抖,保证每一秒都清晰流畅。

apps, it's all in the cards. Users can effortlessly utilize external memory solutions, expanding the horizon of applications and data.

Heralded fresh from the factory, the Xolo Play Tegra Note 7 hits the market upgraded – a strategic move to boost sales and set the expectations soaring. Let's keep our fingers crossed for Android 4.4 Kitkat upgrade theater!

上一篇:Sure, here's a revised version of the copy:---**How to Request the Removal of Your Data from FaceApp’s Servers**If you wish to have your data deleted from FaceApp’s server, follow these outlined steps to submit a data removal request:1. **Access Your Account** Begin by logging into your FaceApp account with your registered email and password.2. **Navigate to Privacy Settings** Once logged in, search for your account settings or privacy section. This might be listed under a category like Profile, Privacy, or Settings.3. **Find the Data Removal Option** Within the privacy settings, locate the feature or option that pertains to data deletion or user data management. This might be labeled as Delete Data, Delete Account, or something similar.4. **Read the Instructions** Before proceeding, ensure you read the instructions carefully. Deleting your data may result in some services becoming unavailable, and the process is irreversible.5. **Confirm Your Request** If you decide to proceed, confirm your request as prompted. You may need to provide additional information for verification purposes.6. **Check Your Email** After submitting your data removal request, you should receive a confirmation email. If not, check your spam folder.7. **Wait for Confirmation** FaceApp may require some time to process your request. If you do not receive a confirmatory response after a reasonable period, consider reaching out to their customer support.For any further inquiries or assistance, do not hesitate to contact FaceApp’s customer service team.---Remember that once your data is deleted, it may not be recoverable, so make sure you are ready for the change before proceeding.
下一篇:## 3 Efficient Methods to Access All File Extensions on Your Android DeviceOpening files with different extensions on an Android smartphone can sometimes present a challenge. However, there are several methods to ensure that you can open any file type you come across. Here are three effective ways to manage various file extensions on your Android device:### Method 1: Use a File Manager AppA versatile file manager app is a handy tool for navigating files and opening file extensions. Here’s how you can use one:1. **Download and Install a File Manager**: - Access the Google Play Store from your Android device. - Search for a reputable file manager with a high rating and good reviews. - Download and install the app.2. **Explore Your Files**: - Open the file manager app and navigate through your files. - Locate the file with the extension you want to open.3. **Open the File**: - Tap on the file, and it should automatically open with the appropriate app installed on your device.### Method 2: Use a Built-in File ViewerSome Android devices come with a built-in file viewer capable of handling multiple common file types. To use this method:1. **Navigate to the File**: - Access your file storage, whether it’s the internal memory or an SD card.2. **Long-Press the File**: - Touch and hold the file for a moment until a pop-up menu appears.3. **Select the File Viewer**: - Choose a viewer option from the menu that aligns with the file’s extension to open it.### Method 3: Install Apps for Specific File TypesIf you have a particular file type that won’t open on your device, you can install an app specifically designed for that purpose. Follow these steps:1. **Search for the Relevant App**: - Open the Google Play Store and search for an app compatible with the file extension (e.g., PDF reader for .pdf files).2. **Install the App**: - Select the appropriate app from the search results and tap “Install.”3. **Open the File**: - Navigate to the file, long-press it, and choose the new app from the available options.By utilizing these three methods, you should be able to open any file extension on your Android device with confidence.