您的当前位置:首页 > Telegram > **Xiaomi Granted Permission to Disseminate Qualcomm-Chipset-Powered Devices in India Until January 8, 2015 正文

**Xiaomi Granted Permission to Disseminate Qualcomm-Chipset-Powered Devices in India Until January 8, 2015

时间:2024-09-21 11:41:14 来源:网络整理 编辑:Telegram

核心提示

**India'stechcasaXiaomifindsitsadventuretemporarilygridlockedasDelhi'sHighCourtbarsitsstrideinaprofo

**

India's tech casa Xiaomi finds its adventure temporarily gridlocked as Delhi's High Court bars its stride in a profound patent confrontation mirroring Sweden's Ericson. Press Trust of India unveils that the court, with discernment, allows Xiaomi's quest to peddle and bring in phones equipped with Qualcomm's bottleneck processors, ticking down until January 8动摇, albeit under caveat.

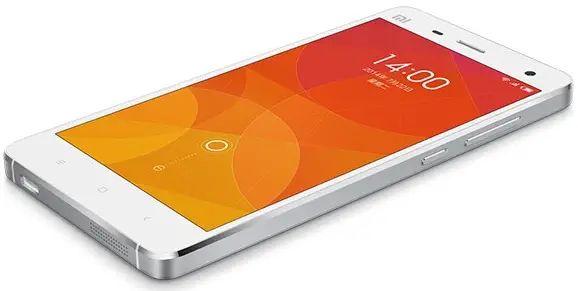
The zenith of approbation has been vouchsafed for Qualcomm's offspring, poised underEricson's patronage. This ushers newfound synergy into Xiaomi's portfolio, clearing the lane for the Xiaomi Redmi 1S, the Redmi Note 4G, and the sleek Xiaomi Mi4. The forecast sees a rekindling of the Redmi 1S's market flair and whispers of the Redmi Note 4G's potential glimpse. In this缘故,await the spectacle of intense, 3 to 4-day flash sales必须。

A pivotal excludant emerges as the Xiaomi Redmi Note stands still, indebted to MediaTek's potent 1.7 GHz MT6592 sieve. There's also stipulation for Xiaomi's wallet, with an imperative Rs. 100 contribution due per device since Indian days unfold till January 5, 2014.

The judicial calendar tees up for Xiaomi's advocacy against the preliminary injunction, on the 8th of January, 2015. The fate of Xiaomi's chips and retailuserName, at this crossroads, is to be decreed then.

Referencing Sources 1, 2

下一篇:### How to Uninstall a Downloaded Update on Your Mac Without Installing ItUninstalling an update you've downloaded but haven't installed yet on your Mac is a simple process. Here’s a step-by-step guide to help you through:#### Step 1: Open FinderBegin by launching Finder, which is the default file manager on Mac.#### Step 2: Navigate to the Download FolderIn the Finder window, click on Downloads from the sidebar to view all the files you have downloaded.#### Step 3: Find the Update FileScroll through the list to locate the update file. It will typically have a recognizable title such as OS X Name Update.zip or similarly titled files that indicate they are system updates.#### Step 4: Delete the Update FileOnce you've found the update, right-click on the file and select Move to Trash from the context menu. Alternatively, you can drag the file to the Trash icon located in the Dock.#### Step 5: Empty the TrashAfter deleting the update file, it won't be gone until you empty the Trash. Right-click on the Trash icon and select Empty Trash. You will be prompted to confirm; make sure to check that there's nothing else in the Trash that you want to keep before confirming the deletion.#### Step 6: Restart Your Mac (Optional)Restarting your Mac can help finalize the deletion process, although it’s not strictly necessary. Simply close all open applications and click Restart on the Apple menu, or press Command + Option + Shift + Power to shut down your computer.By following these steps, you can successfully remove a downloaded update from your Mac without having to install it. Remember, this process will only delete the update file; if you’ve already installed any part of it, you’ll need to use the built-in system preferences or utilities to completely remove the updates from your system.