您的当前位置:首页 > Twitter > Certainly! Here's a revised version of your copy with improved clarity and flow:---**5 Strategies to Dismiss the Android Setup Notification Permanently**Navigating through the setup phase of an Android device can be a seamless experience, but what if it's interrupted by a persistent notification? Here are five effective ways to wave goodbye to the Android setup notification forever:1. **Update Your Software**: Ensure your device is running the latest software version. Sometimes, outdated firmware can lead to disrupted setup notifications.2. **Restart Your Device**: A simple reboot can often resolve temporary issues causing this notification to appear. Just wait for your device to power off, then turn it back on.3. **Check App Permissions**: Verify that the app responsible for the notification has the necessary permissions. Go to your phone's settings, navigate to Apps & Notifications, and review the app's permissions to prevent future interruptions.4. **Clear Cache and Data**: Deleting the app’s cache and data can resolve issues with the setup process. You can do this by going to your device’s settings, selecting Apps, locating the problematic app, and then choosing 'Storage' followed by 'Clear Cache' and 'Clear Data'.5. **Uninstall or Disable the App**: If the notification persists, consider uninstalling the app. Alternatively, you can disable the notification for just that app by going to your device’s settings, accessing 'Notifications', selecting the application, and then toggling 'Notifications' to 'Off'.Implementing these strategies should help you enjoy a smooth setup experience with no打扰ing notifications. 正文
时间:2024-09-21 13:17:37 来源:网络整理 编辑:Twitter
ErasetheclutterofendlesssetupalertsonyourAndroid?Theyseemtoopersistent?Fearnot!We'vecraftedfiveingen
Erase the clutter of endless setup alerts on your Android? They seem too persistent? Fear not! We've crafted five ingenious tactics to silence Android setup alerts effectively. Plus, master the art of blocking intrusive notifications and full-screen ads seamlessly on Android!
Also, Delve into | 2 Swift Methods to Trace Notification Past on Your Android.
Fast-track to the silent zone of your Android notifications by manually force stopping the Android Set Up app and disabling it from the source.
force stoppingdisabling1. Dive into the Settings app aquamarine depths and navigate to App Management for the perfect calibration.
Settings appApp Management2. Press the epicenter of App List and summon the mystic three-dot icon with an easy-grip to interact with the Show System Apps.
App Listthree-dot iconShow System Apps.


3. Conquer the epic Android Setup app to hash out the notification chaos.
Android Setup app4. Ponch the Force Stop button with relentless precision and endorse the Disable button to nullify alerts from the app entirely.
Force Stop buttonDisable button

If the thought of silence is more your pace, then just disable the setup app notifications on your Android system. Time to take back control - here’s your formula for tranquility.
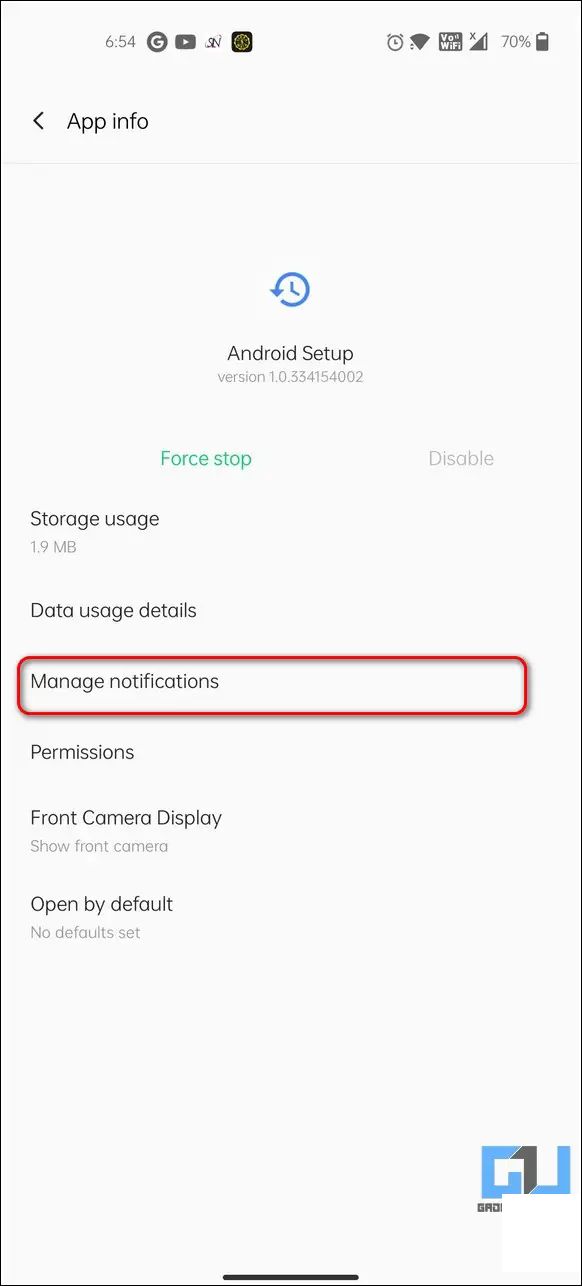
setup app notifications1. Unveil the Android Setup app within your settings ambient to initiate your silent strategy.
Android Setup app2. Tap the threshold of Manage Notifications to summon tranquility.
Manage Notifications3. Douse the cauldron of Allow notifications to put an end to intrusive alerts on your device.
Allow notifications option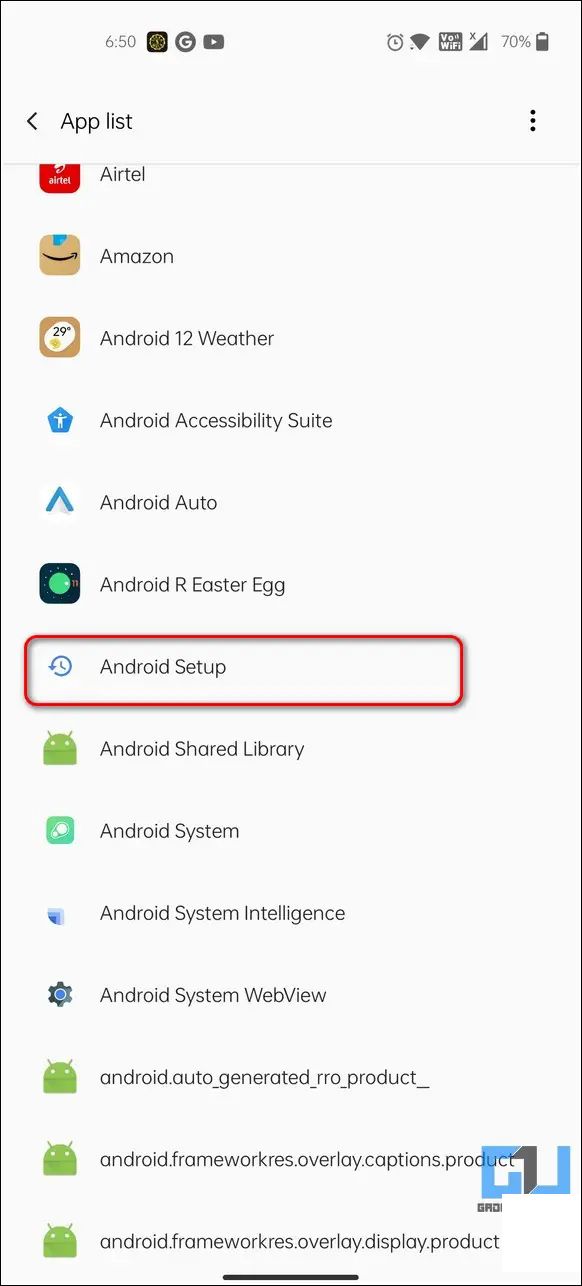

Unleashing total mayhem? Restore peace with a solid hit by revoking all approved permissions and force closing the app. Rental permissions expired; all Android setup app disturbances now cease.
splice Permissions1. Venture into the Android setup cohort through the app ranks to set your course.
Android setup2. Grant access to Permissions to see the spellbook of what’sEnabled.
Permissions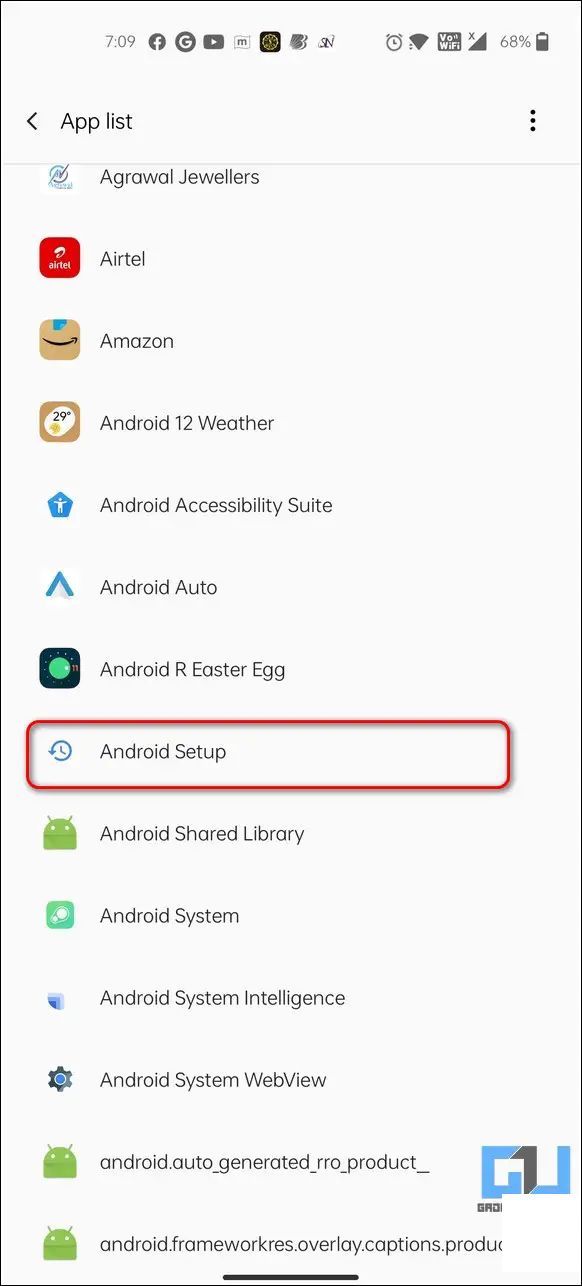

3. Obliterate each charm under the Allowed spellbook with the Don’t Allow option.
Don’t Allow option.4. Snap the Force close wand to banish the app’s apparitions.
Force close

Finalize the journey by thrilling your device with a stable WiFi connection. Alight with the attending screens to close the setup sojourn on your Android. Your study breaks free from daily setup prompts automatically.
stable WiFi connection

The 'complete account setup' urge can feel as relentless as a bad memory that won't leave you alone. Remove it with the precision of a digital maestro here's the guide:
complete account setup1. Visit the Google Play Store app within your settings realm to start the exorcism.
Google Play Store app2. Traverse to the Storage Used option and dismiss the spirits with a firm hand by clotting data and cache.
Storage Used optionClear Data and cache


3. Bane theExtraORDINARY three-dot icon and lay its Uninstall Updates magic to rest.
three-dot icon Uninstall Updates

4. Resurrect the app to see if the haunting has ceased - you can evoke it will if it hasn't.
relaunchA fingerprint of FBG? Maybe bugs are to blame. Cure the setup宜宾 with a fresh coat of all installed apps via the Google Play Store.
update all the installed apps1. Peel open the Google Play Store to vocalize your profile icon’s silent wish.
profile icon2. Wave the Manage Apps and Devices staff and man the Update All brakes to swoop in.
Manage Apps and DevicesUpdate All


3. Resume the reboot dance to saber if the issue is tiptoed away to a better world.
Also Spot | Pinpointing and Disguising Private Notification Webbings on Your iPhone.
We pray you've seamlessly bid farewell to the unwanted Android setup alerts. If our mystical connections have vacated your device of such annoyance, then extend your thumbs up and extend this enlightenment's journey to your peers. Keep watching this portal for more enchantments of tech fixes.
Introducing the iOcean X7: With a 5-Inch Full HD Display and 13MP Camera, This Device Set to Launch in India for Just Rs. 11,500 INR2024-09-21 12:21
Certainly! Here's a revised version of your copy:The Exquisite Gionee Elife E8 Now Available in India at Just INR 34,999!2024-09-21 11:59
**Exciting Announcement: Xiaomi's New Mi Notebook Air with 4G LTE Awaits Official Unveiling in the Near Future2024-09-21 11:58
The OnePlus 6 Marvel Avengers Limited Edition will go on sale at the end of today.2024-09-21 11:20
Introducing the Vivo X5 Max: A Glimpse into the World's Slimmest Smartphone on the Horizon2024-09-21 11:55
The anticipated Android 4.4 KitKat Update for the Micromax Canvas lineup is scheduled to roll out in the second quarter of 2014.2024-09-21 11:04
OnePlus' CEO confirms the OnePlus 6 will be powered by the cutting-edge Snapdragon 845 processor.2024-09-21 11:04