您的当前位置:首页 > Facebook > ### How to Pause and Resume Voice Recording in WhatsAppWhether you're aiming for pristine voice quality or need to edit bits of a conversation, mastering the pause and resume functions in WhatsApp voice recording is a valuable skill. Here’s a step-by-step guide to help you seamlessly manage your voice messages.#### How to Pause Voice Recording in WhatsApp1. **Open WhatsApp:** - Start by opening the WhatsApp application on your device.2. **Select the Voice Icon:** - Within a chat, tap on the ‘microphone’ icon to initiate the recording.3. **Begin Recording:** - Once the recording has started, you will see a voice icon followed by a waveform or a visual timer indicating the length of your recording.4. **Pause the Recording:** - To pause the recording, simply press the pause button. You might see a more subtle or double square/circle symbol, depending on your phone’s interface and the version of WhatsApp installed.5. **Paused Recording Indication:** - Once paused, the pause button often turns into a play/record button, indicating the recording status. The waveform may indicate a pause homogenously across the recording progress bar.#### How to Resume Voice Recording in WhatsApp1. **Restart the Recording (if necessary):** - If the pause was accidental or you want to discard the part before the pause, you might need to restart the recording. Just tap the microphone icon again to start over. - If you wish to resume the previous recording, without interruption, proceed to the next step.2. **Resume the Recording:** - To resume, tap the record button (which might now show as a play/pause icon, depending on your device and WhatsApp version). - If you’re not seeing the play/pause icon immediately, make sure the recording remains paused for a few seconds – some versions of WhatsApp might need time to update the interface correctly. 3. **Check Resumed Recording:** - After resuming, check the waveform or duration indicator to confirm that the recording continues from the point where it was paused.#### Additional Tips for Effective Voice Recording in WhatsApp- **Sort Out Audio Quality:** Consider speaking in a quiet environment to minimize background noise.- **Use Headphones:** If available, headphones can help with the yourself and others' pleasant experience, particularly during interviews or important conversations.Now that you know how to pause and resume voice recordings in WhatsApp, you can easily manage your messages without any abrupt cuts in content. Happy recording! 正文

### How to Pause and Resume Voice Recording in WhatsAppWhether you're aiming for pristine voice quality or need to edit bits of a conversation, mastering the pause and resume functions in WhatsApp voice recording is a valuable skill. Here’s a step-by-step guide to help you seamlessly manage your voice messages.#### How to Pause Voice Recording in WhatsApp1. **Open WhatsApp:** - Start by opening the WhatsApp application on your device.2. **Select the Voice Icon:** - Within a chat, tap on the ‘microphone’ icon to initiate the recording.3. **Begin Recording:** - Once the recording has started, you will see a voice icon followed by a waveform or a visual timer indicating the length of your recording.4. **Pause the Recording:** - To pause the recording, simply press the pause button. You might see a more subtle or double square/circle symbol, depending on your phone’s interface and the version of WhatsApp installed.5. **Paused Recording Indication:** - Once paused, the pause button often turns into a play/record button, indicating the recording status. The waveform may indicate a pause homogenously across the recording progress bar.#### How to Resume Voice Recording in WhatsApp1. **Restart the Recording (if necessary):** - If the pause was accidental or you want to discard the part before the pause, you might need to restart the recording. Just tap the microphone icon again to start over. - If you wish to resume the previous recording, without interruption, proceed to the next step.2. **Resume the Recording:** - To resume, tap the record button (which might now show as a play/pause icon, depending on your device and WhatsApp version). - If you’re not seeing the play/pause icon immediately, make sure the recording remains paused for a few seconds – some versions of WhatsApp might need time to update the interface correctly. 3. **Check Resumed Recording:** - After resuming, check the waveform or duration indicator to confirm that the recording continues from the point where it was paused.#### Additional Tips for Effective Voice Recording in WhatsApp- **Sort Out Audio Quality:** Consider speaking in a quiet environment to minimize background noise.- **Use Headphones:** If available, headphones can help with the yourself and others' pleasant experience, particularly during interviews or important conversations.Now that you know how to pause and resume voice recordings in WhatsApp, you can easily manage your messages without any abrupt cuts in content. Happy recording!

时间:2024-09-21 11:40:09 来源:网络整理 编辑:Facebook

核心提示

EmbracethenewfoundeaseofWhatsApp'slatestupgrade,agame-changerforvocalvoyagers.Now,pauseandpickuponaw

Embrace the newfound ease of WhatsApp's latest upgrade, a game-changer for vocal voyagers. Now, pause and pick up on a whim as you record with the messenger—redefining voice通讯 convenience. Dive into this piece as we explore how to flawlessly pause and resume your WhatsApp voice memos.

Master the Pause & Play Artistry with WhatsApp Voice Recording

Apple devotees and desktop beta testers are ahead of the curve with this exclusive feature. While the Android realm anticipates the rollout, iOS aficionados and desktop aficionadosinbox hold the stopwatch. Let's pause to investigate.

Briefcase Breakdown for iPhone Enthusiasts

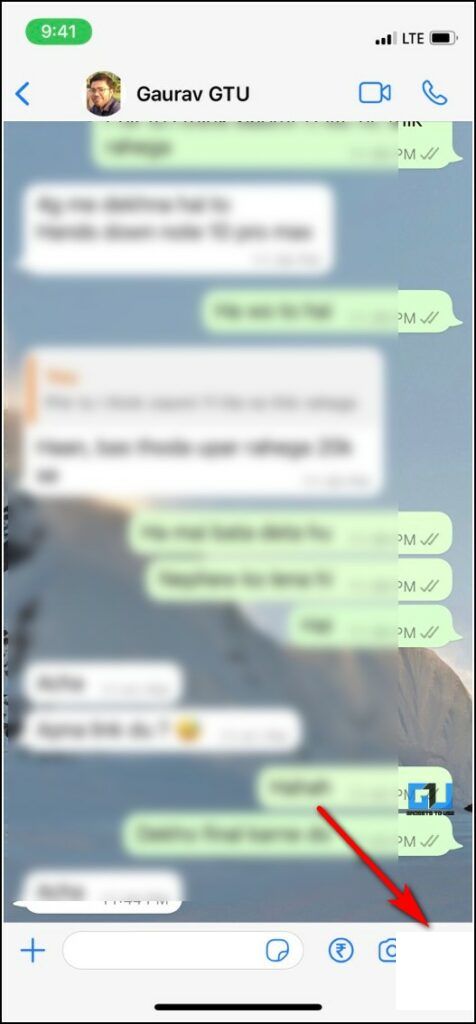
1. TreeSet WhatsApp and initiate a conversation where you yearn to share vocal gems.

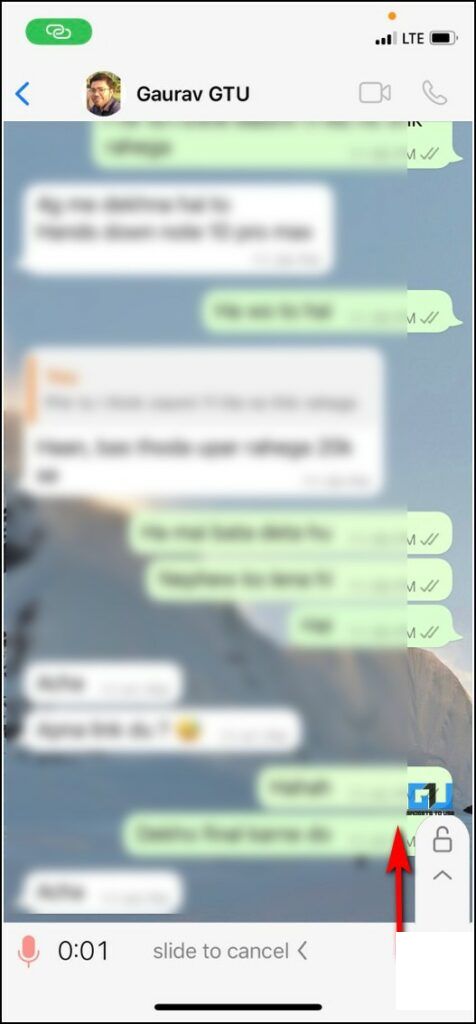
2. Press the mic button. Slide up? Lock up! Recording is on.

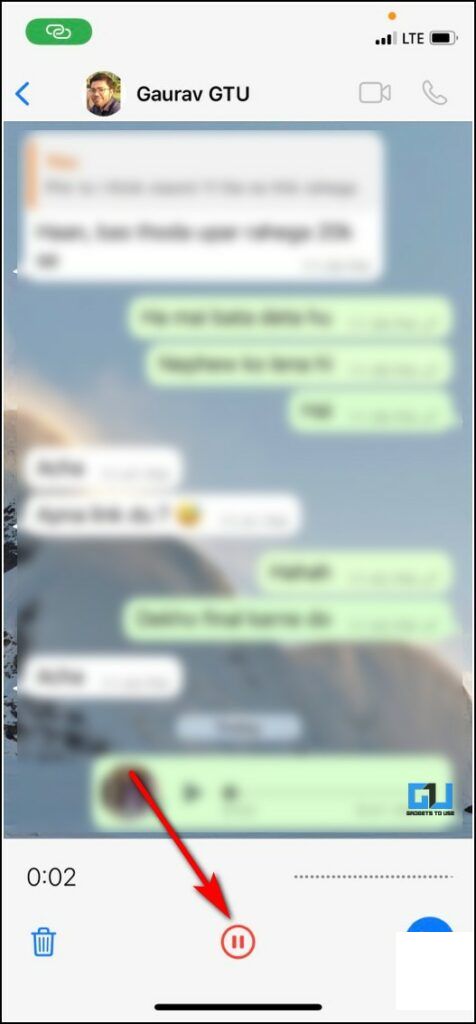
3. The app will cue you with a pause icon—hit it to freeze time.

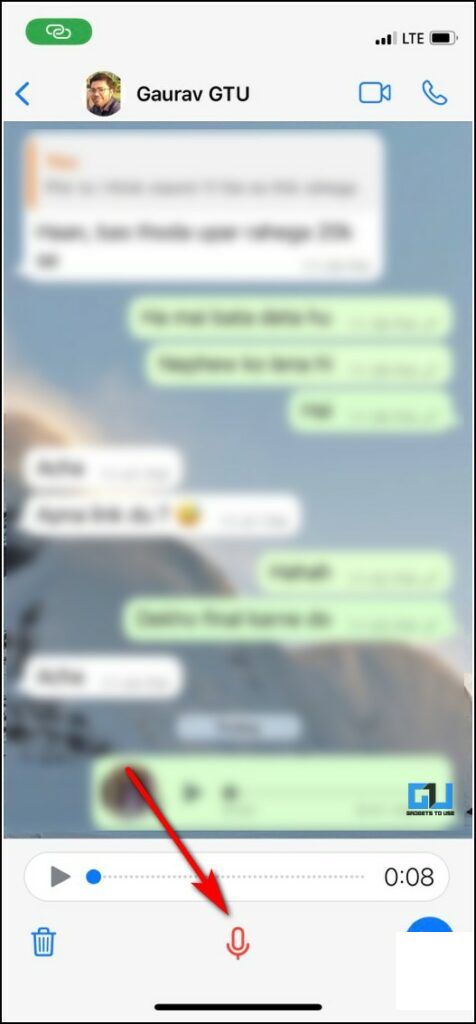
4. Need to restart, no stress—tap the mic once more for a seamless return.

Computer Check-In for Desktop users

Touch down on the desktop stage to parallel the iPhone's act—yes, the pause icon is back in town.

With a tap on the microphone, the show pauses on the spot. Resume when ready, send when perfect, and edit at your pace.

And voilà! Pandemonium pauses await with a simple tap or two.

Stay scrolled, for WhatsApp dances into the future, offering a cross-platform upgrade to migrate your Android love across to iPhone.

Keep alert for the tech LnS, where the latest must-have tips arrive with time.

下一篇:**Filing and Tracking Your Aadhaar Complaint Step-by-Step**Are you experiencing an issue with your Aadhaar card or seeking assistance with Aadhaar-related services? Learn how to navigate the process of filing a complaint, correspondingly tracking its progress, and more. Follow this comprehensive guide to take charge of your Aadhaar-related concerns efficiently.---### How to File an Aadhaar Complaint:**1. Gather the Necessary Information:**Before you begin, gather all relevant details related to your Aadhaar card—your Aadhaar number, the problem you are facing (e.g., data error, card replacement, etc.), and any supporting documents you may need.**2. Choose the Appropriate Channel:**Aadhaar complaints can be filed through various channels:- **Aadhaar Self-Service Portal:** Visit the Unique Identification Authority of India (UIDAI) self-service portal at https://uidai.gov.in/services/uid-quote-status.html.- **UIDAI Customer Care:** Call the UIDAI customer care at 1800-180-1947.- **Local Registration Center (LRC):** Visit your nearest LRC.**3. File Your Complaint:**- **Online:** If you choose the UIDAI portal, log in with your Aadhaar credentials and navigate to the complaint section. Fill in the required details and upload any supporting documents if necessary.- **By Phone:** Via the customer care helpline, provide the required information to the representative and they will file the complaint on your behalf.- **In-Person:** At the LRC, a representative will file the complaint using the information you provide.**4. Receive a Reference ID:**Once the complaint is lodged, your Aadhaar self-service portal account will generate a unique reference ID. Save this for future communication and for tracking the status of your complaint.---### How to Track Your Aadhaar Complaint:**1. Visit the Aadhaar Self-Service Portal:**Sign into your Aadhaar account on the UIDAI self-service portal.**2. Navigate to the Complaint Status Section:**Here, expect to find a section titled 'Complaint Status' or something similar.**3. Enter the Reference ID:**Input the unique reference ID you received when lodging your complaint.**4. View the Status:**The system will display the current status of your complaint, which could be anything from 'Acknowledged' to 'Solved.'**5. Communicate with UIDAI if Necessary:**If you need further assistance or if there are updates on your complaint, you may either call the customer care helpline or visit the nearest LRC.---Remember to keep all communication from UIDAI for future reference. If your issue persists or the timeline is延长 without resolution, you may need to escalate the matter directly with UIDAI through a formal appeal or by visiting the UIDAI office in person. Stay patient and follow these steps to effectively manage and resolve your Aadhaar-related complaints.