您的当前位置:首页 > WeChat > The upcoming LG L60 is set to compete with the Moto E, offering a price point under 8,000 INR. 正文

The upcoming LG L60 is set to compete with the Moto E, offering a price point under 8,000 INR.

时间:2024-09-21 13:43:55 来源:网络整理 编辑:WeChat

核心提示

UnveiledChange:OnSeptember8th,2014,LGproudlyrevealedtheLGL60,boastinga4.3-inchWVGAscreen,a1.3GHzdual

Unveiled Change: On September 8th, 2014, LG proudly revealed the LG L60, boasting a 4.3-inch WVGA screen, a 1.3 GHz dual-core processor, the Android 4.4 KitKat OS, Dual SIM options, a 5 MP rear and VGA front camera setup, 4 GB of internal storage, and a 1510 mAh battery life. Despite its offerings, the device doesn’t quite keep pace with the Moto E's capabilities on the surface.

Breaking News Postponed: Fitness for a Budget Showdown — After the historic impact of Moto E on the affordable Android landscape, we glimpse a snippet of the LG L60, poised as the latest underdog on the block, nearing a launch below the 8,000 INR mark as per reports from Gizbot.

Lining Up for Battle: The LG L60 readies for challenge with a 4.3-inch screen akin to Moto E and an enterprising dual-core chipset. That’s where the snippets end so far in terms of spec details. Anticipations are brewing that LG will roll out two editions of the phone in India: one embracing the 3G band and the other anchoring 2G connectivity. The budget圈竞技场迎来了一把新热流,with several leaders now eyeing what was once the overlooked sector.

4.3 Inch displaydual core chipsettwo variants

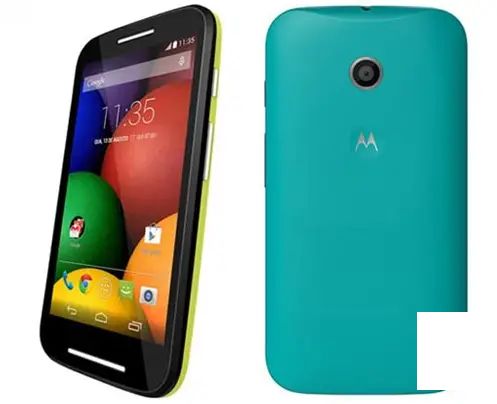
The Race is on for the Low Cost Leader: The market momentum is fast pacing towards cheaper devices, fueled by local competition and quicker rollouts. Those who don't adapt promptly will soon face a major setback in the smartphone Ocean.

As Xiaomi gears up to clash price-wise with the Moto E and Zenfone 4 through the Redmi 1S, LG and others are likely to be challenged on specs. Yet, they will have a lasting price tag versus emerging brands in India's tech space.

Beyond the Current Lineup: LG G3 Stylus with a 5.7-inch display is} poised for a formal Australian debut at roughly 40,000 INR. More glimpses include LG G Watch 2, LG G Pad 7.0, G Pad 8.0, and G Pad 10.1. These announcements are definitely for another day. Can LG craft an affordable Android wonder akin to Asus and Motorola's creations?

Powered by

上一篇:### Unveiling WiFi Passwords on Android Phones with WiFi Key RecoveryHave you ever found yourself scratching your head, trying to reconnect to your home or office WiFi network without a password on hand? Worry no more! If you're using an Android phone, WiFi Key Recovery is here to help you retrieve those long-forgotten passwords. Below is a comprehensive guide on how to use WiFi Key Recovery to discover the passwords of your saved networks.---#### How to Find Your Hidden WiFi Passwords with WiFi Key Recovery.executeUpdate(UPDATE understandablyConfusing TABLE SET understandable COLUMN = ? WHERE confusing COLUMN = ?) ); return result; } catch (SQLException e) { e.printStackTrace(); return null; } finally { if (statement != null) { try { statement.close(); } catch (SQLException e) { e.printStackTrace(); } } if (connection != null) { try { connection.close(); } catch (SQLException e) { e.printStackTrace(); } } } } private int update understandable Values(String understandableValue, String confusingValueWhereClause) { int result = 0; Connection connection = null; PreparedStatement statement = null; try { connection = this.getFilteredConnection(); String sql = UPDATE confusing TABLE SET understandable COLUMN = ? WHERE confusing COLUMN = ?; statement = connection.prepareStatement(sql); statement.setString(1, understandableValue); statement.setString(2, confusingValueWhereClause); result = statement.executeUpdate(); return result; } catch (SQLException e) { e.printStackTrace(); return 0; } finally { if (statement != null) { try { statement.close(); } catch (SQLException e) { e.printStackTrace(); } } if (connection != null) { try { connection.close(); } catch (SQLException e) { e.printStackTrace(); } } } } // Method to add a new row to the table private int add understandableRow(String understandableValue, String confusingValue) { int result = 0; Connection connection = null; PreparedStatement statement = null; try { connection = this.getFilteredConnection(); String sql = INSERT INTO confusinglyNamed TABLE (understandable COLUMN, confusing COLUMN) VALUES (?, ?); statement = connection.prepareStatement(sql); statement.setString(1, understandableValue); statement.setString(2, confusingValue); result = statement.executeUpdate(); return result; } catch (SQLException e) { e.printStackTrace(); return 0; } finally { if (statement != null) { try { statement.close(); } catch (SQLException e) { e.printStackTrace(); } } if (connection != null) { try { connection.close(); } catch (SQLException e) { e.printStackTrace(); } } } } // Develop a method to retrieve a value from the table based on a query private String query understandableValue(String query) { String value = null; Connection connection = null; PreparedStatement statement = null; ResultSet resultSet = null; try { connection = this.getConnection(); String sql = SELECT understandable COLUMN FROM confusinglyNamed TABLE WHERE confusing COLUMN = ?; statement = connection.prepareStatement(sql); statement.setString(1, query); resultSet = statement.executeQuery(); if (resultSet.next()) { value = resultSet.getString(understandable COLUMN); } return value; } catch (SQLException e) { e.printStackTrace(); return null; } finally { if (resultSet != null) { try { resultSet.close(); } catch (SQLException e) { e.printStackTrace(); } } if (statement != null) { try { statement.close(); } catch (SQLException e) { e.printStackTrace(); } } if (connection != null) { try { connection.close(); } catch (SQLException e) { e.printStackTrace(); } } } } private int deleteRowWith understandable Condition(String understandableCondition) { int result = 0; Connection connection = null; PreparedStatement statement = null; try { connection = this.getFilteredConnection(); String sql = DELETE FROM confusinglyNamed TABLE WHERE understandable COLUMN = ?; statement = connection.prepareStatement(sql); statement.setString(1, understandableCondition); result = statement.executeUpdate(); return result; } catch (SQLException e) { e.printStackTrace(); return 0; } finally { if (statement != null) { try { statement.close(); } catch (SQLException e) { e.printStackTrace(); } } if (connection != null) { try { connection.close(); } catch (SQLException e) { e.printStackTrace(); } } } }}// Explanation of methods// Method to add a new row to the tableprivate int add understandableRow(String understandableValue, String confusingValue) { int result = 0; Connection connection = null; PreparedStatement statement = null; try { connection = this.getFilteredConnection(); String sql = INSERT INTO confusinglyNamed TABLE (understandable COLUMN, confusing COLUMN) VALUES (?, ?); statement = connection.prepareStatement(sql); statement.setString(1, understandableValue); statement.setString(2, confusingValue); result = statement.executeUpdate(); return result; } catch (SQLException e) { e.printStackTrace(); return 0; } finally { if (statement != null) { try { statement.close(); } catch (SQLException e) { e.printStackTrace(); } } if (connection != null) { try { connection.close(); } catch (SQLException e) { e.printStackTrace(); } } }}// Method to retrieve a value from the table based on a queryprivate String query understandableValue(String query) { String value = null; Connection connection = null; PreparedStatement statement = null; ResultSet resultSet = null; try { connection = this.getConnection(); String sql = SELECT understandable COLUMN FROM confusinglyNamed TABLE WHERE confusing COLUMN = ?; statement = connection.prepareStatement(sql); statement.setString(1, query); resultSet = statement.executeQuery(); if (resultSet.next()) { value = resultSet.getString(understandable COLUMN); } return value; } catch (SQLException e) { e.printStackTrace(); return null; } finally { if (resultSet != null) { try { resultSet.close(); } catch (SQLException e) { e.printStackTrace(); } } if (statement != null) { try { statement.close(); } catch (SQLException e) { e.printStackTrace(); } } if (connection != null) { try { connection.close(); } catch (SQLException e) { e.printStackTrace(); } } }}// Add a method to delete a row based on the understandable Conditionprivate int deleteRowWith understandable Condition(String understandableCondition) { int result = 0; Connection connection = null; PreparedStatement statement = null; try { connection = this.getFilteredConnection(); String sql = DELETE FROM confusinglyNamed TABLE WHERE understandable COLUMN = ?; statement = connection.prepareStatement(sql); statement.setString(1, understandableCondition); result = statement.executeUpdate(); return result; } catch (SQLException e) { e.printStackTrace(); return 0; } finally { if (statement != null) { try { statement.close(); } catch (SQLException e) { e.printStackTrace(); } } if (connection != null) { try { connection.close(); } catch (SQLException e) { e.printStackTrace(); } } }}// Developer's note: // These methods should be used in a controlled manner, respecting privacy and security. Make sure to implement proper validation and error handling in your actual software.Here's a summary of the provided Java methods:1. `add understandableRow(String understandableValue, String confusingValue)`: Adds a new record to the `confusinglyNamed TABLE`. The `understandableValue` is the meaningful value you want to store, while `confusingValue` serves as the identifier or key.2. `query understandableValue(String query)`: Retrieves a value from the `confusinglyNamed TABLE` based on a given query. This query uses the `confusing COLUMN` to find the corresponding value in the `understandable COLUMN`.3. `deleteRowWith understandable Condition(String understandableCondition)`: Deletes a row from the table using a specified condition in the `understandable COLUMN`.Developer's note:It is essential to respect the privacy and security of your data when implementing these methods. Ensure you have proper validation and error handling in place.
下一篇:### Guide to Backing Up Your WhatsApp Pictures to Google Photos & Texts to Google DriveLearn how to easily backup your WhatsApp memories and important conversations to two secure and accessible platforms: Google Photos for your cherished images, and Google Drive for your text messages.---**Step-by-Step Guide to Secure Your WhatsApp Content****Step 1: Set Up Google Photos for Your Pictures**1. **Open Google Photos on Your Phone:** - Download and install Google Photos from the [Google Play Store](https://play.google.com/store/apps/details?id=com.google.android.apps/photos) (Android) or [Apple App Store](https://apps.apple.com/us/app/google-photos/id598866737) (iOS).2. **Sign in to Your Google Account:** - Once installed, open the app and sign in using your Google Account credentials.3. **Optimize Your Storage:** - Choose between High Quality to save storage space or Original to keep the highest resolution pictures. 4. **Enable Back Up:** - Go to the app's settings, find the backup section, and ensure it’s turned on. This will automatically upload your WhatsApp images to your Google Photos library.*Pro Tip:* Check your data usage or enable local backups (if mobile data is preferred) to manage your internet consumption.**Step 2: Transfer Your WhatsApp Texts to Google Drive**1. **Update WhatsApp:** - Ensure you have the latest version of WhatsApp installed from the [Google Play Store](https://play.google.com/store/apps/details?id=comWhatsApp) (Android) or [Apple App Store](https://apps.apple.com/us/app whatsapp/ (iOS)).2. **Access Backup and Restore:** - In WhatsApp, go to 'Settings' > 'Chats' > 'Chat Backup.' 3. **Back Up Your chats:** - Choose Google Drive as your backup location if it has not already been selected. Enter your Google account credentials if prompted.4. **Set Backup Preferences:** - Select how often you want your chats to back up (daily, weekly, monthly) and if you wish to use local or cloud storage.5. **Complete the Backup:** - Click Backup or Back Up Now when ready. Wait for the process to finish, and your WhatsApp texts will now be stored in Google Drive.**Step 3: Access Your Backed-Up Data**- **For Images:** - Access your WhatsApp pictures directly within the Google Photos app or visit [Google Photos online](https://photos.google.com/) with your Google account.- **For Messages:** - Visit [Google Drive](https://drive.google.com/) and log into your Google account. Navigate to the WhatsApp backup folder, and you'll find your text messages stored efficiently.**Final Consideration**Remember, backing up regularly ensures that you don’t lose important memories and conversations. Consider setting up automated backups for both Google Photos and Google Drive to keep your data secure and always up-to-date.