您的当前位置:首页 > Telegram Account > Sandisk Unveils New iXpand Flash Drive for iPhone and iPad, Available at Just INR 3,990:电报中文版下载 正文

Sandisk Unveils New iXpand Flash Drive for iPhone and iPad, Available at Just INR 3,990:电报中文版下载

时间:2024-09-21 11:56:52 来源:网络整理 编辑:Telegram Account

核心提示

StepintothefutureofmobilestoragewithSanDisk,abeaconintherealmofflashmemoryandsoftware.Introducingasl

Step into the future of mobile storage with SanDisk, a beacon in the realm of flash memory and software. Introducing a sleek,更新版,iXpand Flash Drive tailored to iOS adherents, and the arrival of the multifunctional Connect Wireless Stick, now holding 200GB of说过。In addition, prepare for the unmatched speed of the Extreme PRO microSDXC UHS-II card Backup with the innovative Ultra USB Type-C Flash Drive. Diving into the specifics of what sets these jewels apart.

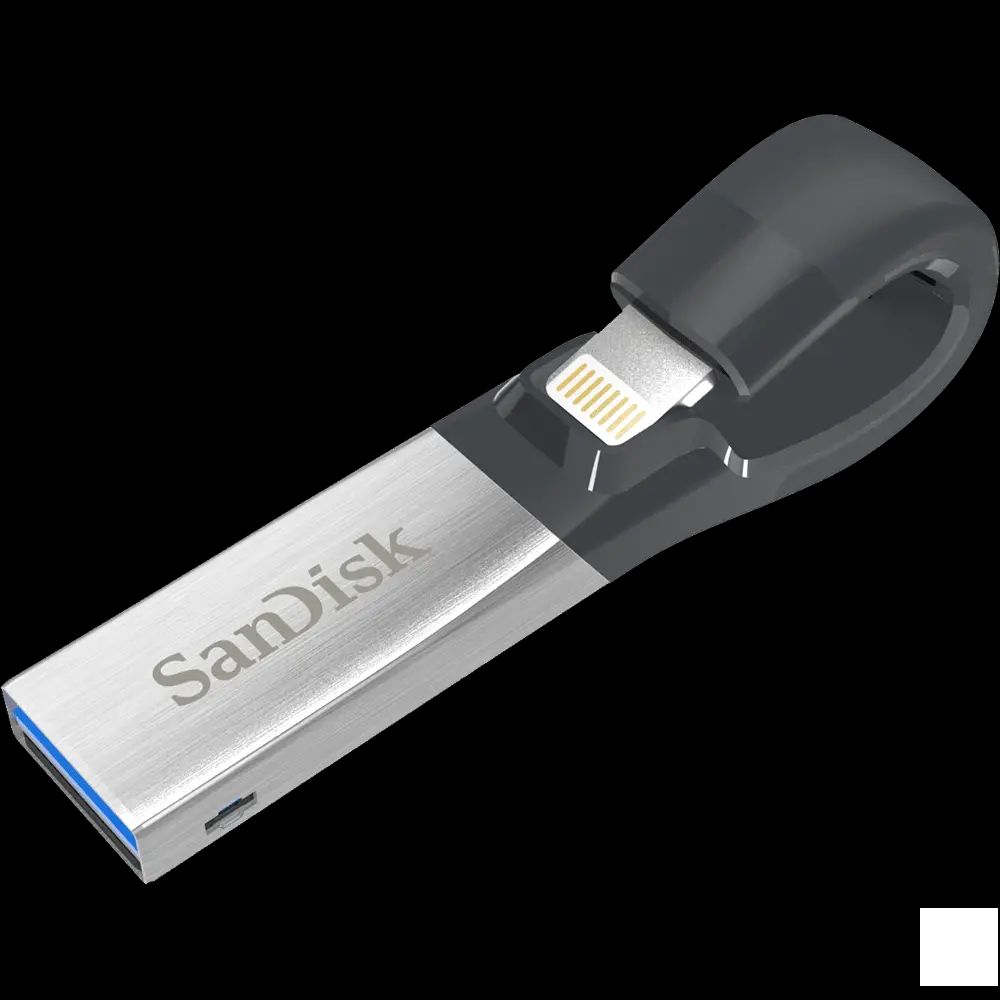
迈向新高度,iXpand Flash Drivelemen传承了前辈的零售以16GB、32GB、64GB和128GB版本的阵仗而来,兼容操作系统让你的世界更为互联互通。不论是wmv、avi、mkv、mp4,还是mov格式я,iXpand永远守护你的每一帧回忆。价格统一调整为:16GB Rs. 3,990递增至128GB Rs. 9,990的行列。

The Connect Wireless Stick revolutionizes mobility with a stunning 200GB capacity – a dual-purpose sanctuary for your digital life. solo your laptop or smartphone via Wi-Fi to attain seamless content looping, file transfer, and visual magic. Priced at Rs. 9,990, it's exclusive to a下注 through Amazon in India.

Innovative and maximize with new Extreme PRO microSDXC UHS-II card, blowing through storage boundaries with 128 GB of colossal space, sprints at 275MB/s read and 100MB/s write velocities. The cost you pay for sophistication remains Rs. 9,990 for the 64GB or Rs. 18,990 for 华丽转身。

一触即达,SanDisk Ultra Dual USB Drive 3.0串联USB 3.0与Micro-USB连接路线的桥梁,128GB的容量只需Rs. 3,390,便捷lamovment 的极致体验,就此展开。

上一篇:### 3 Effective Methods for Setting Up iOS AssistiveTouch on Android DevicesTransform the way you interact with your Android device by enabling iOS-style AssistiveTouch. Follow these three straightforward methods to activate this convenient feature and unlock new levels of accessibility and convenience.---1. **Using ByteLight App:** Embrace the essence of AssistiveTouch with the ByteLight app. This app provides an intuitive and functional clone of iOS’s AssistiveTouch, complete with a floating blob icon on your Android screen. - **Download ByteLight:** - Access the Google Play Store and search 'ByteLight.' - Install the app on your device. - **Activate and Configure:** - Open ByteLight and tap the 'Start' button. - Personalize your settings by choosing actions for the various options like home, back, screenshot, volume control, etc.2. **Through Xposed Framework:** For those who are comfortable with custom ROMs and have a Nandroid backup ready, the Xposed Framework offers an advanced way to install AssistiveTouch. - **Enable Unknown Sources:** - Navigate to your device's Settings. - Tap on 'Security' or 'Privacy.' - Check the 'Unknown Sources' option. - **Install the Framework:** - Download the Xposed Installer from the Google Play Store. - Open it, follow the installation instructions, and enable Xposed in the Developer Options. - **Download AssistiveTouch Hacker Module:** - Download the AssistiveTouch Hacker module from the XDA Developers website. - Install it via(module安装器), and activate it in the Xposed Framework.3. **Using GMD Assistant:** As an alternative to the traditional AssistiveTouch experience, GMD Assistant gives you a/virtual home button on the corner of your screen that can be customized to your liking. - **Download GMD Assistant:** - Go to the Google Play Store and search for 'GMD Assistant.' - Install the app and open it. - **Customize and Launch:** - Configure GMD Assistant's settings according to your preferences. - You can set it to launch with a single tap or a press-and-hold gesture.By applying these methods, you can enjoy the Android experience enhanced by iOS’s practical AssistiveTouch feature, simplifying your device navigation and interaction.
下一篇:Sure, here's a revised version of the copy:---**How to Request the Removal of Your Data from FaceApp’s Servers**If you wish to have your data deleted from FaceApp’s server, follow these outlined steps to submit a data removal request:1. **Access Your Account** Begin by logging into your FaceApp account with your registered email and password.2. **Navigate to Privacy Settings** Once logged in, search for your account settings or privacy section. This might be listed under a category like Profile, Privacy, or Settings.3. **Find the Data Removal Option** Within the privacy settings, locate the feature or option that pertains to data deletion or user data management. This might be labeled as Delete Data, Delete Account, or something similar.4. **Read the Instructions** Before proceeding, ensure you read the instructions carefully. Deleting your data may result in some services becoming unavailable, and the process is irreversible.5. **Confirm Your Request** If you decide to proceed, confirm your request as prompted. You may need to provide additional information for verification purposes.6. **Check Your Email** After submitting your data removal request, you should receive a confirmation email. If not, check your spam folder.7. **Wait for Confirmation** FaceApp may require some time to process your request. If you do not receive a confirmatory response after a reasonable period, consider reaching out to their customer support.For any further inquiries or assistance, do not hesitate to contact FaceApp’s customer service team.---Remember that once your data is deleted, it may not be recoverable, so make sure you are ready for the change before proceeding.