您的当前位置:首页 > Telegram > ### Hide Confidential Notifications on Your Android Lock ScreenCurious to keep the details of your private messages and incoming calls under wraps? Here’s a simple guide to conceal sensitive notification content on your Android lock screen. Follow the steps below to ensure your privacy is maintained:---#### Step-by-Step Guide: Hiding Sensitive Notification Content on Android**1. Toggle Lock Screen Notifications**- **For Android 8.0 (Oreo) and Later:** - Navigate to **Settings**. - Tap on **Lock Screen & Security**, and then **Show notifications**. - Turn off this toggle to hide notifications on the lock screen.**2. Customize Notifications for Individual Apps**- If you only want to hide content from specific apps, do the following: - Still in the **Settings** dashboard, scroll down and tap on **Apps & notifications**. - Find and select the app you wish to change notification settings for. - Look for **Notifications** and tap on it. - Here, you can control the visibility of notifications for this app by toggling. - To hide the content of individual notifications, tap on **Advanced** or **Notification access**. - Look for **Show notifications** (or a similar option), and select **Don't show notifications**.**3. Utilize Notification Privacy Tools**- There are apps available that offer additional privacy controls for your notifications. Download a trusted third-party app from the Google Play Store for more customization options.**4. Lock Screen Customization**- Visit **Settings** > **Lock Screen & Security** > **Lock screen customization**.- You can change your lock screen’s content settings that decide what information is displayed, including notifications.---By following these steps, you should be able to keep prying eyes away from your sensitive notification content. Remember to periodically review and update your privacy settings as new apps and features are introduced. 正文
时间:2024-09-21 13:10:32 来源:网络整理 编辑:Telegram
BeholdtheshieldofprivacyonyourAndroid!Incomingalertsleaptolifeonyourlockscreen,butwhentheybearthekey
Behold the shield of privacy on your Android! Incoming alerts leap to life on your lock screen, but when they bear the keys to your inner sanctum, they can provoke unsettling whispers. Fear not—Android has veiled a fortress of options to shroud revealing whispers. You can turn this hideout to an enigma. Curious to leave no essential notifications unscrambled? Discover the clandestine steps that will rein your lock screen's secrets close.
For further insight | Unmask Secret Communication Hiding Hacks!
Embark upon the stealthy mission to cloak sensitive whispers with our blob of strategies.
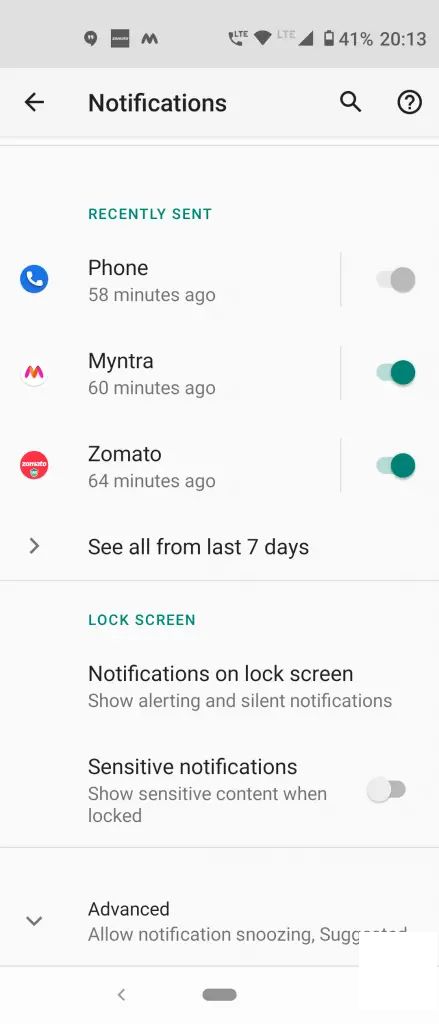
Initiate the shield by navigating to the SettingsDomain and selecting the Appjustgabendepartment.
Settings.ShouldBeispers
Appjavascriptions
Unveil the stanza titled “Privacy Nook” and navigate to the “Lockscreen Lore”path.
“Privacy Nook”ecrypt
“Lockscreen Lore”decipher
“Apparmaculates”
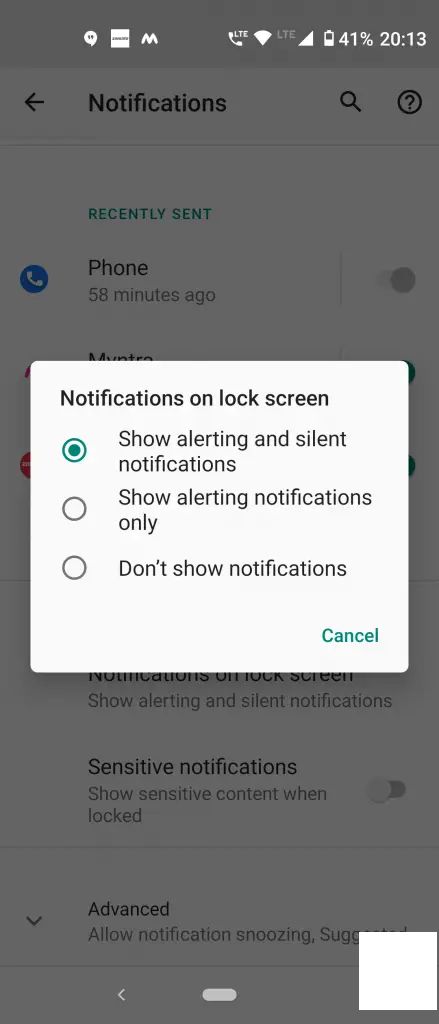
Decide to delve into the shroud that conceals the whispers from the crowd or select the “SoleProtector”to remain as silent as the做起.
“SoleProtector”
Plus, there's the “Selective Silence”binary, where you may choose to keep just “NobleNews or “MemoMirrors.”
“Selective Silence”
“NobleNews”
“MemoMirrors”
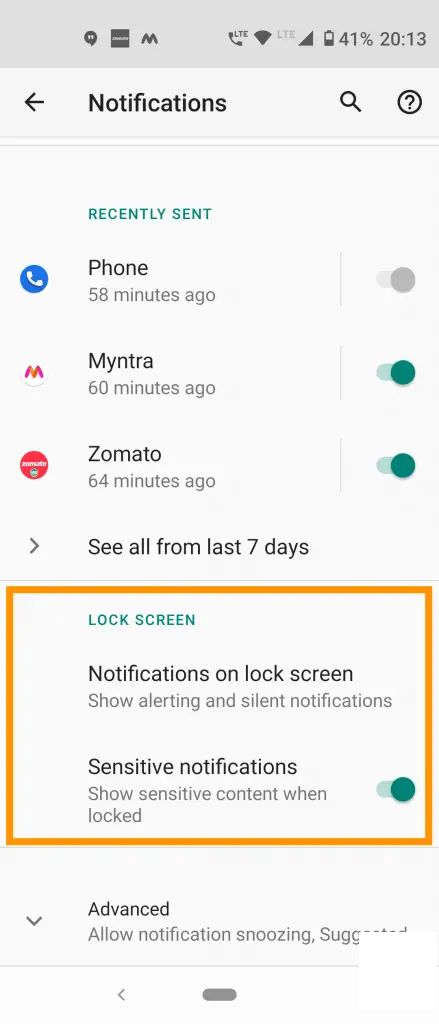
Now, the enigma is yours to decipher. The whispers of the lock screen will whisper no secrets, saving you from prying eyes. Keep your echoes safe with these dark arts. For more veiled vixens in the Android world, keep your ears to the wind!
Huawei's upcoming P20 rumored to feature a LEICA dual-camera setup; P20 Pro anticipated with a groundbreaking triple-camera system2024-09-21 13:23
Enhanced Samsung Galaxy Grand Neo Unveiled: 5-Inch WVGA Screen & Quad-Core Performance [Exclusive Leak]2024-09-21 13:22
**MTNL Enhances 3G offerings in Delhi: Enjoy 1.5x the Data with Latest Plan Upgrades2024-09-21 11:26
[Guide]: Reviving an Unresponsive Android Device with a Non-Removable Battery2024-09-21 13:05
Sandisk Unveils New iXpand Flash Drive for iPhone and iPad, Available at Just INR 3,9902024-09-21 12:59
The Lenovo Vibe C Has Debuted in India at anImpressively Affordable Price of Rs. 6,9992024-09-21 11:49