您的当前位置:首页 > Paper Plane > Enhance Graphics Superpowers with Manual Refresh Rate Control on OnePlus Nord, OnePlus 8, and OnePlus 8 Pro 正文

Enhance Graphics Superpowers with Manual Refresh Rate Control on OnePlus Nord, OnePlus 8, and OnePlus 8 Pro

时间:2024-09-21 09:51:29 来源:网络整理 编辑:Paper Plane

核心提示

EmpowerYourOnePlusscreenwithtailoredrefreshrates.CustomizeyourOnePlus8,8Pro,orNordbyintegratingathir

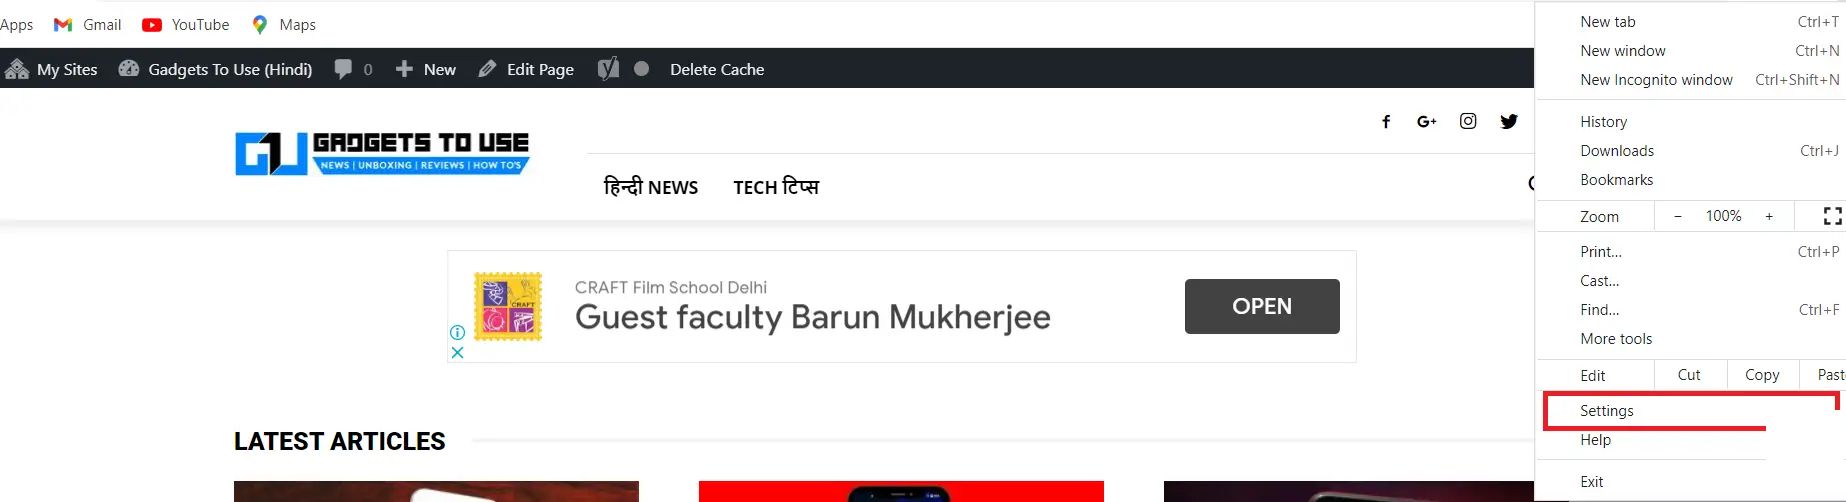
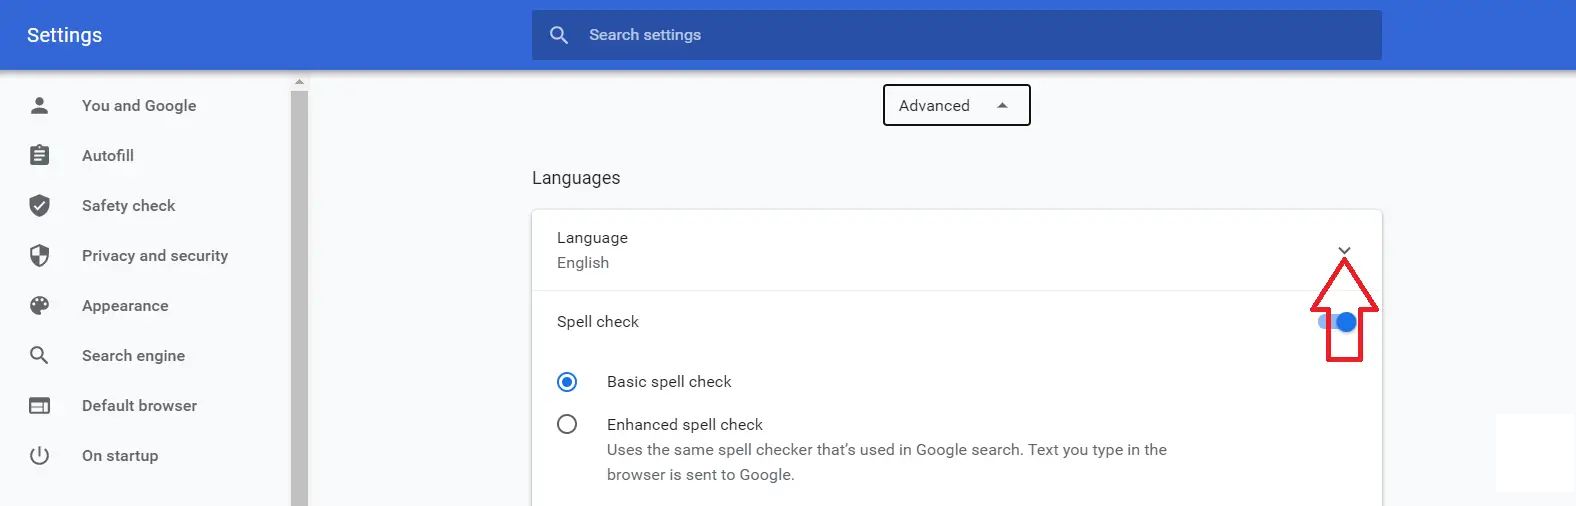
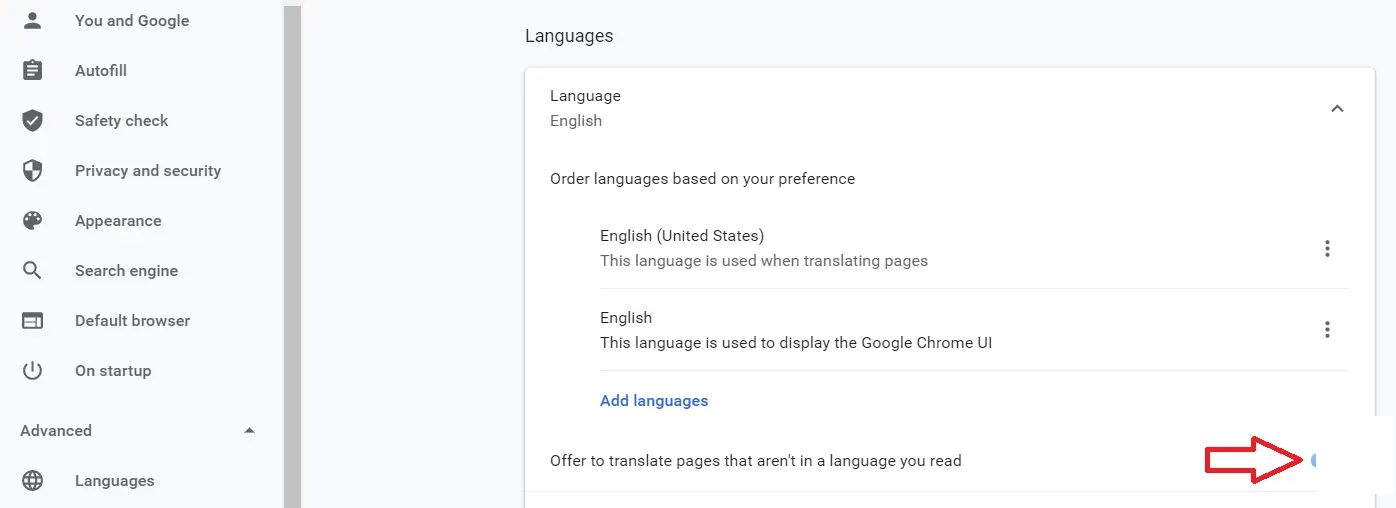
Empower Your OnePlus screen with tailored refresh rates. Customize your OnePlus 8, 8 Pro, or Nord by integrating a third-party gem. Switch seamlessly between 60Hz, 90Hz, and 120Hz refresh settings to personalized per-app tuning. Dive into the SOP beneath for OnePlus refresh control excellence.

Read: Decode the High Refresh Rate Apps on Your Device

Read:Discover the Core Apps with Enhanced Refresh Rates on Your Phone

Master Custom Refresh Settings on OnePlus Nord, 8, and 8 Pro

Meet AutoHz – a masterpiece crafted by XDA afficionado arter97. This tool empowers you to personalize screen刷新率 on your OnePlus device. Initially paired with 8 and 8 Pro, it now graces the OnePlus Nord. Buoyant on Android 11’s waves, it sails with OxygenOS 11 Open Beta.

Chart your course if your device is orange ticketed:

  • Install and configure ADB on your digital station.
  • Integrate AutoHz from the digital market - it’s premium sailing.
  • Embark on the one-time sea voyage through ADB. Pair your gadget with your PC with the USB magic. Then command “adb shell pm grant com.arter97.auto90 android.permission.WRITE_SECURE_SETTINGS”.Customize Refresh Settings on OnePlus Nord, 8, and 8 Pro
  • Roll out the invite list as granted, AutoHz will unveil your App registry.
  • Set sail with the toggles to manually alter each app’s refresh pace. Chart them any speed from 60Hz, 90Hz, to 120Hz.

For navigation guidance or if ADB is foggy, the developer’s treasure map awaits.

For a system nature’s pace or mode to take the helm again, just de-activate that toggle. Uninstall, the复位, ADB chart a new course.

上一篇:### Refresh Your YouTube Watch History: 6 Effective MethodsErase Past Browsing and Take Control of Your Viewings with These Simple Steps**1. Accessing Your Watch History**To begin managing your watch history, follow these steps:- Click your profile picture in the top right corner of YouTube.- Select **‘History’** from the dropdown menu.- Navigate to **‘Watch History’** on the left-hand side.**2. Clearing Your Watch History**To delete all or specific videos from your history:- After accessing your watch history, scroll to the bottom of the page and click **‘Clear all watch history’**.- Alternatively, tick the boxes next to the videos you want to remove, then click **‘Remove’** at the bottom of the page.**3. Disabling Watch History**For a more personalized streaming experience, you can disable your watch history:- In the **‘History’** settings, toggle the **‘Save watch history’** button to off.- This option will prevent YouTube from saving the videos you watch for future viewing sessions.**4. Managing History Through Google Account Settings**If you prefer to manage your history directly through your Google account, do the following:- Go to **[Google’s Activity Controls](https://myactivity.google.com/myactivity)**.- Navigate to **‘YouTube & Video’** from the left-hand menu.- Here, you can review and manage your activity history.**5. Clearing YouTube App History on Mobile Devices**On your smartphone or tablet:- Open the YouTube app.- Go to the account icon in the top right corner.-Tap **‘History’** and then **‘Manage Watch History’**.- To clear history, select **‘Clear watch history’**.**6. How to Manually Remove Videos from the Recommendations Section**Occasionally, YouTube might recommend videos similar to what you’ve watched. Below are steps on how to discontinue these suggestions:- In the YouTube app or on the website, look for the **‘Recommended’** section.- Click the three vertical dots next to any recommended video.- Select **‘Ignore’** in both the app and on the website to discontinue such recommendations.By following these straightforward steps, you can easily manage and maintain your privacy on YouTube.
下一篇:### Recharging Your Mobile Number with the Facebook AppAre you looking to add more talk time or data to your mobile number using the convenience of the Facebook app? Follow these easy steps to recharge and exceed your communication needs:---**Step-by-Step Guide to Recharge Your Mobile Number via the Facebook App**1. **Open the Facebook App**: Ensure the latest version of the Facebook app is installed on your mobile device. Launch the app to access your profile page.2. **Access the App Settings**: Tap on the three horizontal lines in the top right corner of the app to open the menu. Scroll down and select 'Settings & Privacy,' then choose 'Settings.'3. **Navigate to Payments Settings**: In the 'Settings' menu, look for the ' Payments' section and tap on it. Here, you will find all payment and recharge-related options.4. **Select Mobile Recharge**: Under the Payments menu, select 'Mobile Recharge.' This is where you can manage and view your recharge history as well.5. **Choose Your Mobile Network and Country**: In the recharge section, select the mobile network that provides your mobile service. You will also need to choose the correct country to ensure the recharge is processed accurately.6. **Enter Your Mobile Number**: Enter the mobile number you wish to recharge. Double-check that the number is accurate to avoid any inconvenience or loss of service.7. **Choose Recharge Amount**: Browse through the available recharge options and select the amount that fits your needs. You can typically pick different plans depending on the data and balance increments.8. **Confirm the Transaction**: Once you’ve selected the recharge plan, review the details carefully, including the amount and internet pack, if applicable. Confirm the transaction by tapping on 'Pay' or a similar confirmation button.9. **Complete Recharge**: The Finance app or service you linked with Facebook will prompt you for payment authorization. Follow their instructions to complete the recharge payment. 10. **Verify Recharge Status**: After completing the payment, a confirmation message will be sent to your mobile number. This message should verify that your recharge has been processed successfully.---By following these straightforward steps, you can quickly recharge your mobile number using the Facebook app—adding more value to your mobile experience without any hassle.