您的当前位置:首页 > TG > Effective Methods for Disabling Automatic Period Creation with a Double Space (Mac, iPhone, iPad) 正文

Effective Methods for Disabling Automatic Period Creation with a Double Space (Mac, iPhone, iPad)

时间:2024-09-21 16:20:36 来源:网络整理 编辑:TG

核心提示

EmbracetheeraofseamlesstypingonyourMac,iOS,andiPad!Didyouknowadoubletaponspacecaneffortlesslyintrodu

Embrace the era of seamless typing on your Mac, iOS, and iPad! Did you know a double tap on space can effortlessly introduce a period? It's a delightful conundrum for some, but frustration for others like me. The moment I press space, a pesky period often appears. It results in exquisite exasperation. Seek solace; this guide will traverse the path to disabling this double space for periods on Mac, iPhone, and iPad. Plus, you'll master the art of hush-hiding those keyboard and mic shortcuts on iPadOS 16. Let's dive in!

Unveil the Secrets: Disable Double Space for Period Magic on Your Devices

This dual-kilometer space and full stop trick is a default demeanor on most Apple commodities.Separator deft at work, it's both a boon and bane for writers. But who wants to fight punctuations on the fly? Unravel the mysteries of turning it into a standalone stunner with our detailed guide for macOS Monterey and Ventura, and for our apple sheriffs—the iPhone and iPad.

MAC OS: The Period's chống-chroma Chronicles

Knock out the double-space bane with ease. It's a mere peck at the Keyboard icon away. Navigating to Ventura's terrain, we've got you covered, too!

Let's disable the full stop's fly on Monterey.

Zip over to the Apple ribbon up top.

Unfurl System Preferences… like a savory spice.

Choose the Keyboard fortress, and you're in.

Steel yourself under Text towers.

Dare to uncheck the Add full stop with double-space traitor.

For the hearty and the heart strony, here comes the Venturestrategy for you:

Pounce on the Apple ribbon.

Unveil System Settings… like a gem's secrets.

Gaze upon Keyboard in the side alley (or sidebar).

Edit like a maestro under Input Sources—the final frontier.

For MPEG frente, hit the toggle for Add period with double-space.

Battle Double Space on iPhone and iPad: A Story of Triumph

With iPhone and iPad on the same page, the journey is predictably identical. Here's the regal quest to vanquish the pesky period:

I. Begin with the Settings court, followed by the noble General domain.

II. Select the Keyboard kingdom to wield its reign.

III. Flip the “.”shortcut switchara-magic of options, humanity!

Defeat the Gboard Goliath: Disabling the Double Space in Gboard

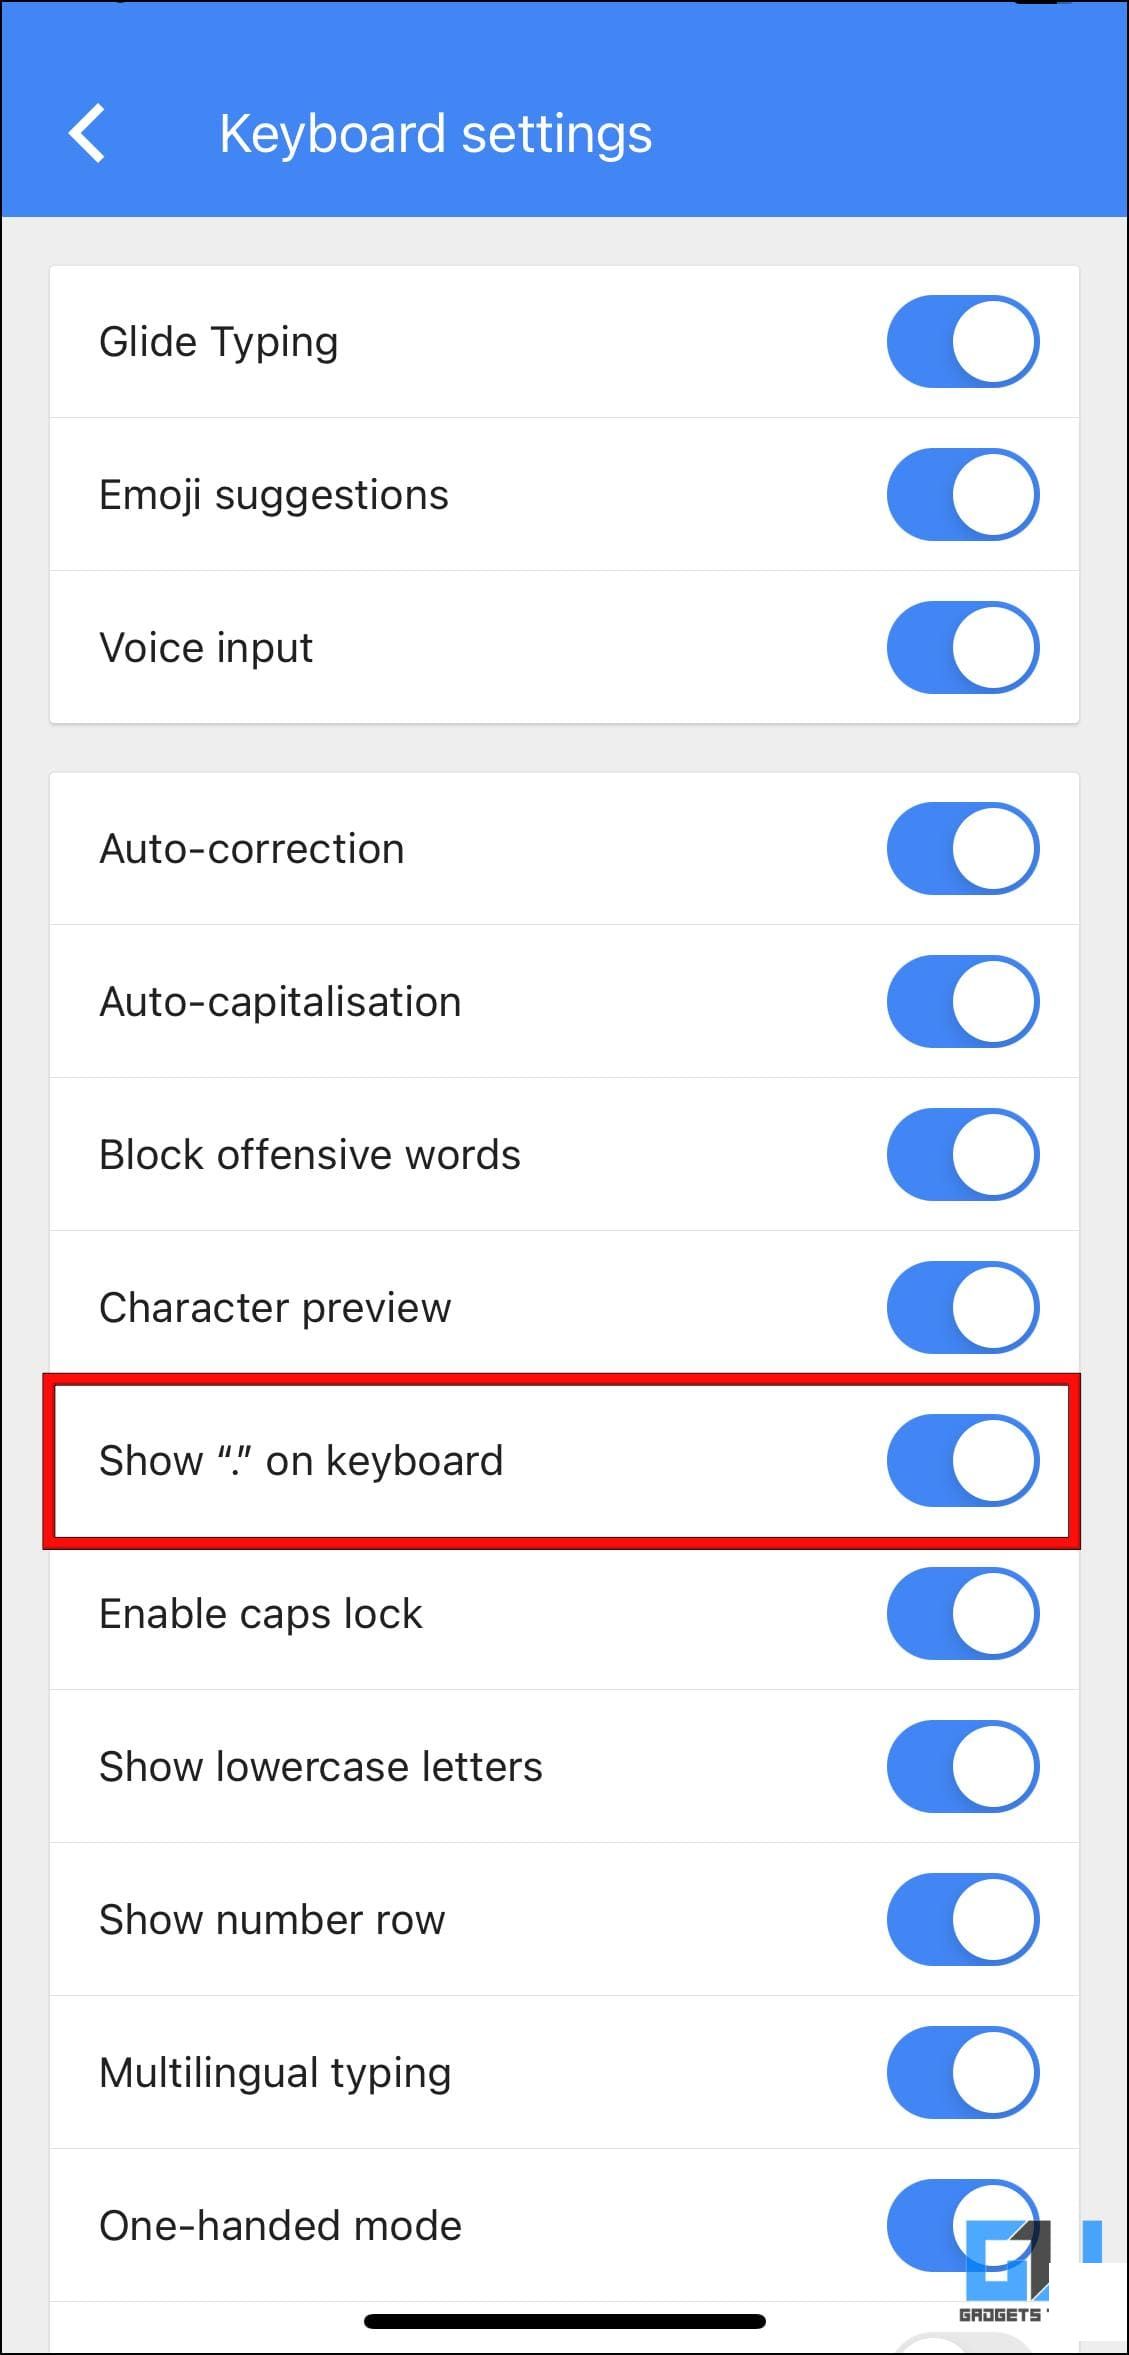
Behold, Gboard offers a full stop's familiar face. Implement the coup to disable the double-space calamity.

⚔️ Vanquish Gboard, your iPhone pettigree, and glimpse the进食 settings.

⚔️ Dis torpedo the double space, outsmarting the period pariah.

But if the “.” emblem tempts you, here's the acesthetica intervention:

⚔️ In the keyboard settings, deputize the Show “.” on keyboard toggle, render it invisible.

上一篇:Title: Moto E vs. Unite 2: The Ultimate Buying Guide — Which is Right for You and Why?In this thorough comparison, we weigh the pros and cons of the Moto E and the Unite 2 to help you make an informed decision about which budget smartphone is the best fit for your needs.**Examing the Moto E: Your Affordable Starter**Pros:- **Cost-Effective**: The Moto E offers exceptional value for money, making it an excellent choice for those on a budget.- **Simplicity**: With its straightforward interface, the Moto E provides a user-friendly experience without overwhelming features.- **Battery Life**: The Moto E boasts a long-lasting battery, ensuring you stay connected throughout the day.Cons:- **Performance**: While it won’t compromise on affordability, the Moto E may fall short in terms of performance compared to higher-end devices.- **Limited Storage**: The Moto E typically comes with limited internal storage. However, expandable microSD slots are often available for additional storage options.- **Camera Quality**: The camera on the Moto E is adequate for basic usage but may not live up to the standards of higher-end models.**Understanding the Unite 2: A Mixed Bag**Pros:- **Multi-Link Compatibility**: The Unite 2 offers advanced connectivity options that are particularly beneficial for frequent travel or work in diverse environments.- **Sturdy Build**: Known for its durability, the Unite 2 is a solid choice for those who need a smartphone that can withstand the occasional drop or rough handling.- **Decent Specifications**: The Unite 2 shares many middle-of-the-road specs that ensure a decent overall performance without breaking the bank.Cons:- **Moderate Pricing**: Despite falling into the budget category, the Unite 2 might not justify its price tag when compared to some of the more feature-rich mid-range competitors.- **Network Limitations**: The availability of the Unite 2’s connectivity options can depend on your location, potentially leading to limitations or additional cost for certain networks.- **Camera**: Similar to the Moto E, while the camera is better than entry-level, users looking for high-quality imaging capabilities may be left wanting.**Why Choose One Over the Other?**Deciding between the Moto E and the Unite 2 hinges on your personal preferences and specific needs.- If simplicity, affordability, and long battery life are your top priorities, the Moto E might be the winner.- For those who require robust build quality, diverse connectivity options, or just a bit more performance at a budget-conscious price point, the Unite 2 could be the better choice.When making your decision, consider your usage patterns, importance of camera quality, and the types of tasks you plan to perform. Your choice should align with what matters most to you — and your wallet.
下一篇:### How to Disable the Windows 10 Welcome ExperienceWould you like to bypass the initial welcome screen and dive straight into your Windows 10 experience? This guide will show you how to disable the Windows Welcome Experience, allowing you to launch your system directly to your personalized desktop.#### Step-by-Step Instructions1. **Access the Command Prompt with Elevated Privileges:** - To ensure you're performing these steps correctly, you'll need administrative access. Click on the Start button. - Type `cmd` in the search bar and then right-click on Command Prompt. Select `Run as administrator`.2. **Disable the Welcome Experience:** - A User Account Control (UAC) prompt will appear, asking for confirmation. Click `Yes` to proceed. - Once the Command Prompt opens, type the following command and press Enter: ``` msiexec / uninstall / packagepath = `C:\Program Files (x86)\Windows市委派包\conciergeOM.msi` ``` - If prompted to confirm the transaction, type `Y` and press Enter.3. **Perform a Clean Boot:** - To apply the changes, you might need to perform a clean boot. This will ensure that all unnecessary applications and services are disabled. Here's how to do it: - Type `msconfig` in the Start search bar and press Enter to open the System Configuration window. - Go to the `Services` tab. - Check the `Hide all Microsoft services` box at the bottom. - Click on `Disable all` to ensure all third-party services are also disabled. - Go back to the `Startup` tab and click on `Open Task Manager`. - Disable all startup items by right-clicking on them and selecting `Disable`. - Click on `OK` to close the System Configuration window. - Restart your PC.#### Further ActionAfter following these steps, you should find that the Windows Welcome Experience is disabled, and your system loads directly to the desktop. If you need to reactivate the Welcome Experience in the future, you can do so by following similar steps and paying attention to any prompts for confirmation. Keep in mind that making changes to system settings can have unintended consequences; always proceed with caution and desire.