您的当前位置:首页 > Telegram Download Tutorial > Enhanced Title: "Top 12 Google Photos Tips & Techniques You Can't Miss in 2023" 正文

Enhanced Title: "Top 12 Google Photos Tips & Techniques You Can't Miss in 2023"

时间:2024-09-21 07:54:35 来源:网络整理 编辑:Telegram Download Tutorial

核心提示

GooglePhotos:TheEssentialToolforAndroidandiPhoneUsersWhyrelyonjustapicture-viewerappwhenGooglePhotos

Google Photos: The Essential Tool for Android and iPhone Users

Why rely on just a picture-viewer app when Google Photos offers a treasure trove, including free backups, swift sharing, and more? Dive into the rich features hidden within and unlock the full potential with our 2022 tips and tricks guide.

Discover More: Explore 5 Free Storage Alternatives to Google Photos

Delve deeper into the convenience of Google Photos, discovering daily enhancements that'll elevate your photo app experience.

1. Discover Photos with a Glimpse

Photo DiscoveryPhoto DiscoveryPhoto Discovery

Thanks to the magic of AI, Google Photos effortlessly locates and labels shots of faces, pets, landmarks, and more. Find those hard-to-pick photos with precision searches, even without tags.

From the family dog, to your car, and every ephemeral detail like a receipt, Google Photos has it all within reach.

2. Search with a Chuckle

Emoji SearchEmoji SearchEmoji Search

Express your whimsy with emoji-powered searches. Whether joyful faces, moonlit scenes, or celebrations, Google Photos has a gallery to match your mood.

Emojis aren’t just for decor; they can whisk you back to moments worth a laugh or reflection.

3. Personalize Your People Portfolio

Photos automatically aggregates similar face shots into social circles, and you can further identify loved ones with name labels. Once tagged, these cherished faces become a beacon in your photo search.

Find stories through faces; simply open the 'Search' tab, and let them roam free or name tag for instant retrieval.

[h2]Enhancing Your Google Photos Odyssey

4. Manual Label Magic

Manual LabelingManual LabelingManual Labeling

Embark on a tweak journey for the AI’s slightest misstep. Whether it’s a misplaced label or an unnoticed backslap, dive into the 'Edit' mode and it's game on for customization.

5. Assistance in the Palm of Your Hand

Google AssistantGoogle AssistantGoogle Assistant

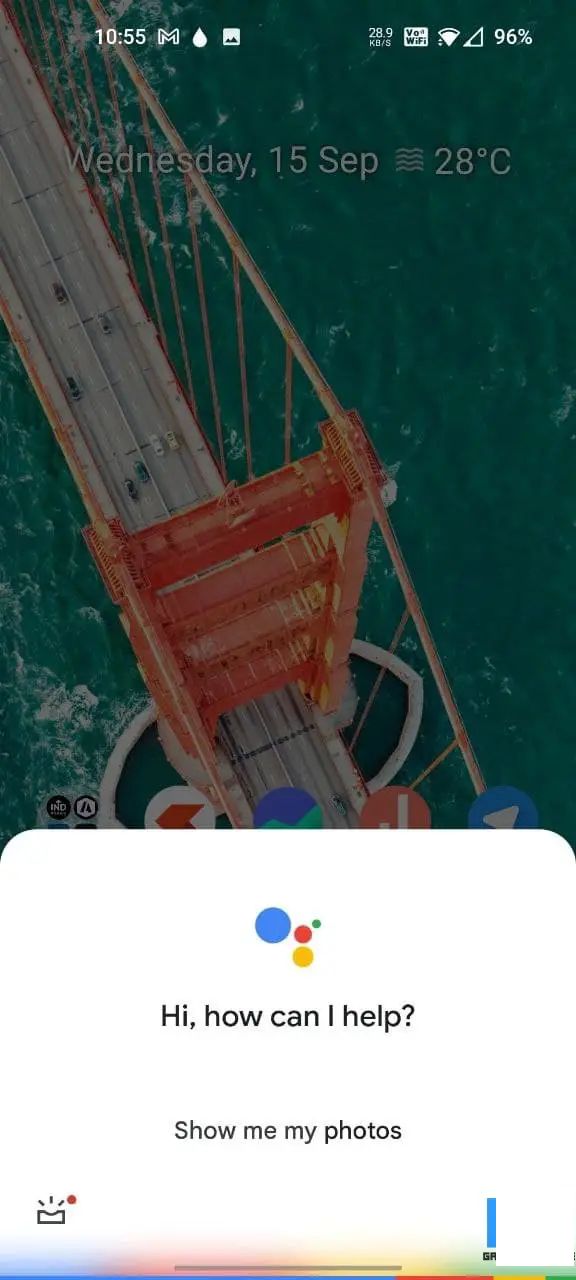
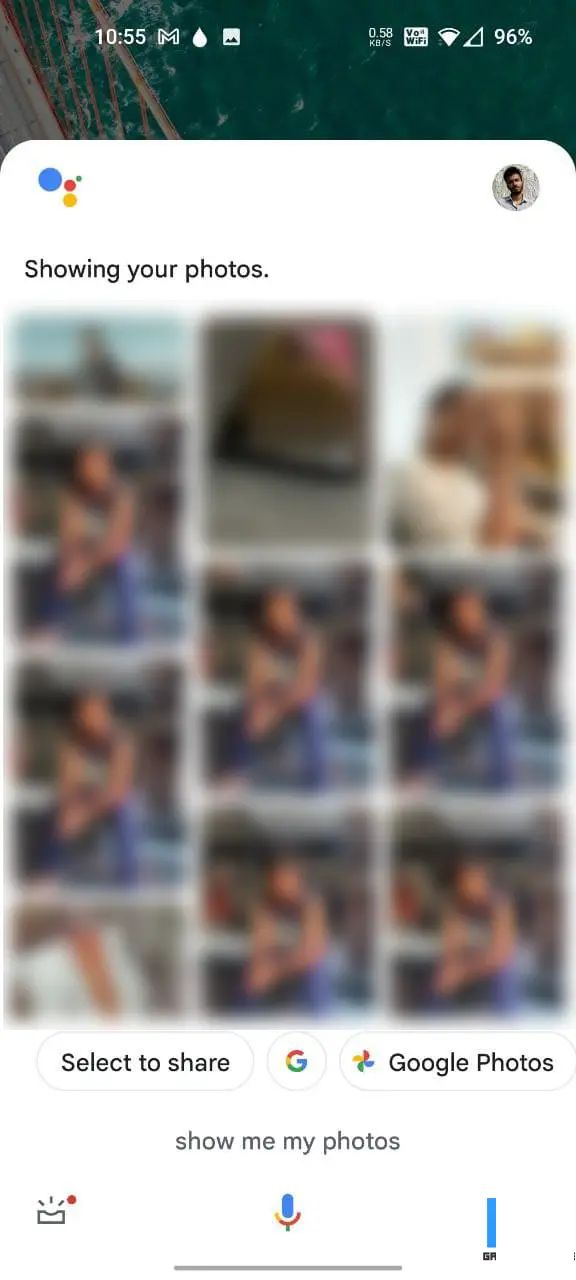
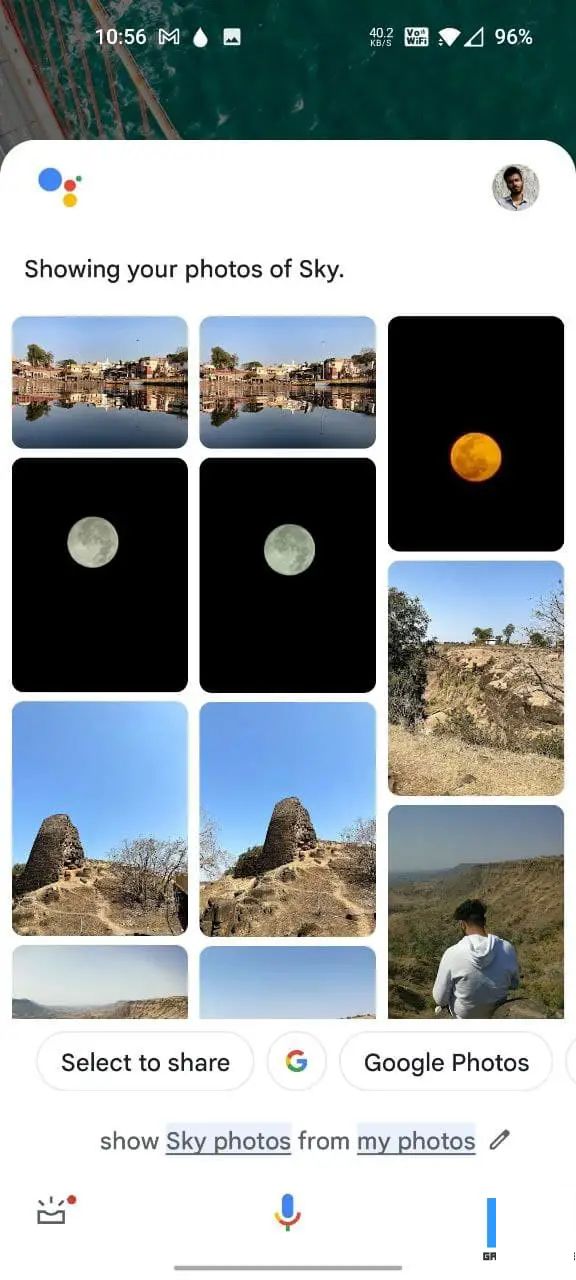
With the command of your voice, Google Assistant lets you flick through your photo collection with a 'Hey Google, show me my photos'

Never let a memory get lost in the digital shuffle. Remember to always specify 'my photos' to magnify the right images.

6. Craft Your Memories into Art

Transform your stories into panoramas and motion with just a few taps in the 'Creations' section. Whether it’s a montage of your favorites or a short film with background music, your memories are mere clicks away from becoming a masterpiece.

oker up to the possibilities of 'Collages' and 'Animations' for a visual collage of years or an enchanting dance of moments.

7. Let the Movie Magic Begin

Recap your adventures with a cinematic flair. Unleash the power of 'Movies' to create themes or craft your stories with tailored choices, keeping the narrative in your hands.

With just a little homework, your cherished travels can transform from a CLIP to a montage.

8. Scan with a Grain of Truth

Lens ScanningLens ScanningLens Scanning

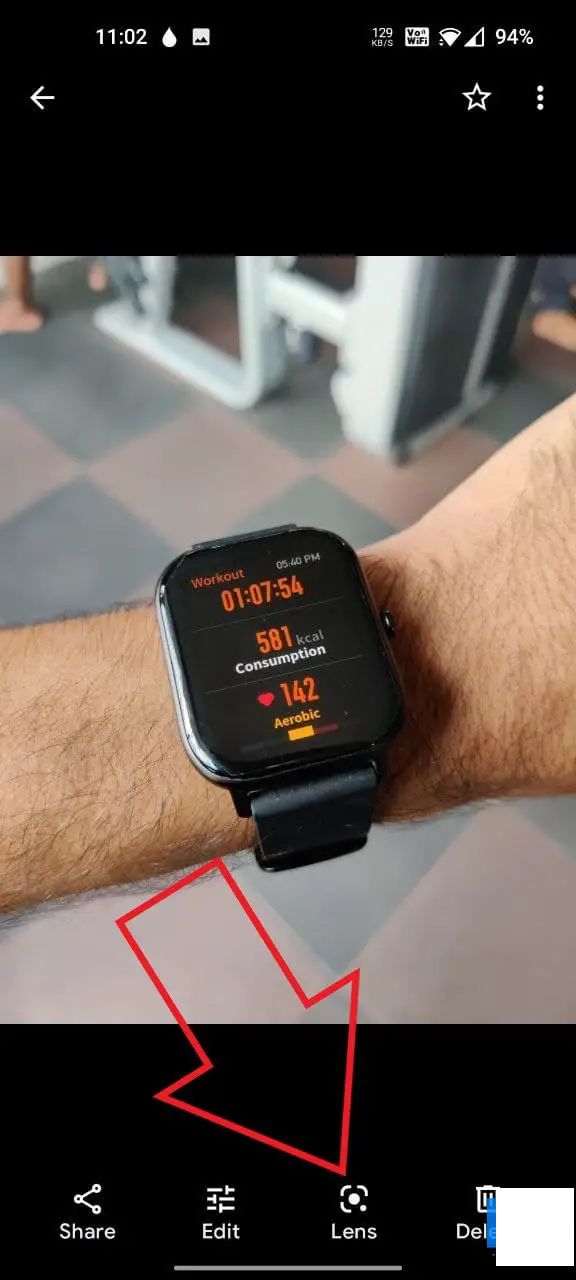
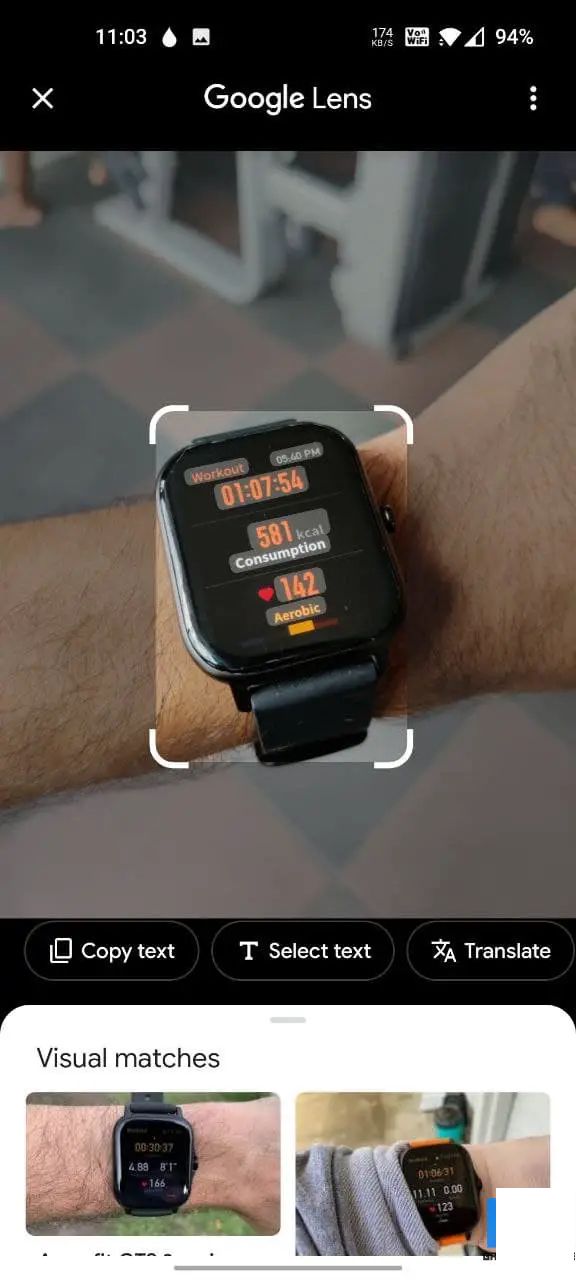
Take your inner detective on a quest with Google's Lens, for scans and translations alike. Unveil obscured text, match similar images, or go on that digital treasure hunt.

9. Flatter Your Portraits with Precision

Portrait BlurPortrait BlurPortrait Blur

Whether portraiture or pet enthusiast, blur the background and sharpen the focus of your subject with seamless editing.

This feature, reserved for the Google One enthusiasts, adds a professional touch that’s at your fingertips.

10. Calm the Photo Storm

Archive PhotosArchive PhotosArchive Photos

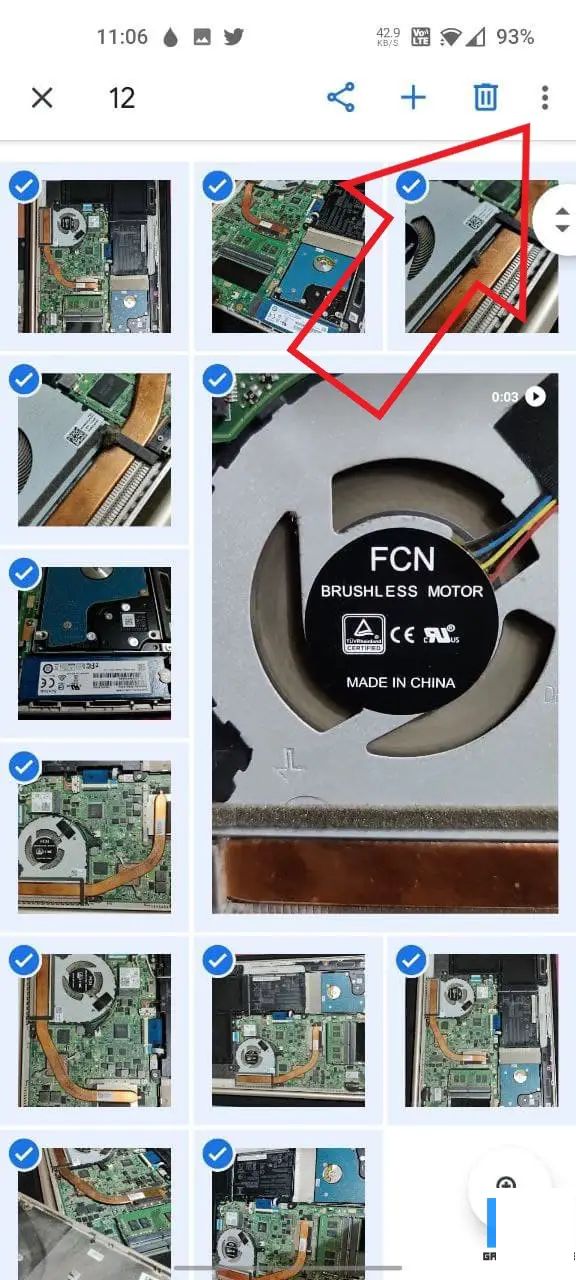
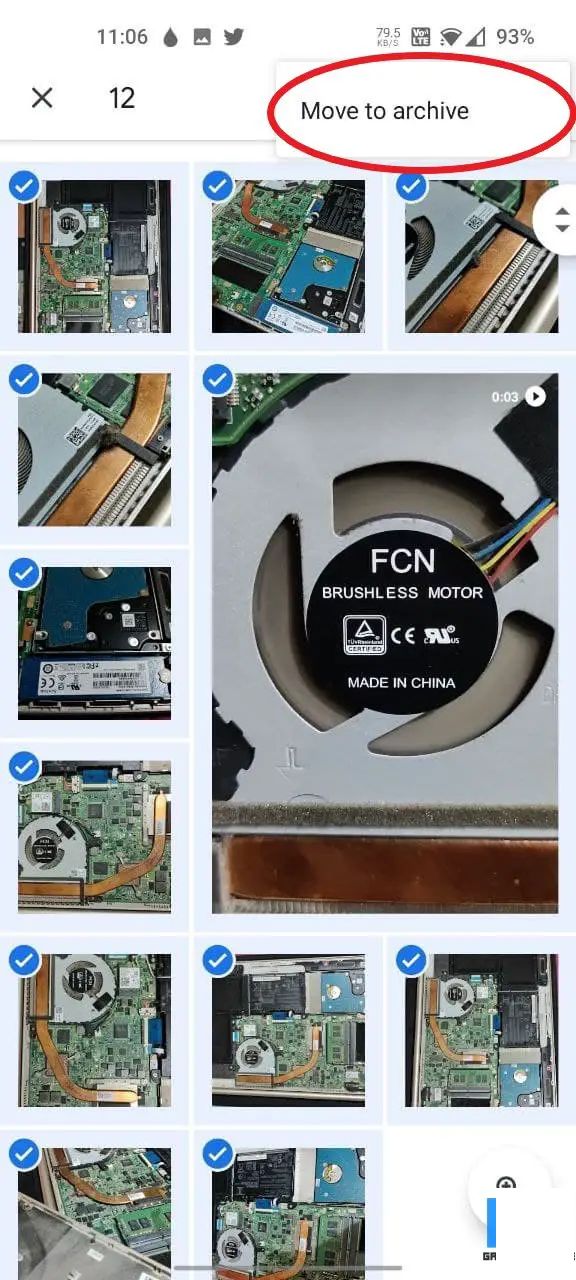
Battle the storm of your ever-growing photo library with the Archive feature. Hide yet save yesteryears with the click of an icon, easy to retrieve when memory calls.

11. Share Your Stash, Location Secure

Photos might whisper tales of your travels, but keep those secrets to yourself or choose when to let them out. Our guide on location removal ensures your privacy is yours to protect.

Shield your privacy with a simple Edit, and your travel secrets stay yours and yours alone.

12. Unleash the Video Zoom

Double down on the details of your videos with a gentle pinch or a reassuring tap. Whether you're seeking a snippet or wrapping your eyes around the grandeur of a scene, Google Photos’ zoom is at your service.

Photos: A Journey into Tips and Tricks Territory

As you navigate the vast expanse of the Google Photos universe, these tips cast a refraction of light that may illuminate a path to fresh photo pleasure or a deeper level of user astuteness.

What's the one Google Photos feature that has wowed you? Ready to share another tip? Drop your insights below. If your quest for more extends beyond this article, stay tuned for our further explorations!

上一篇:### 2 Tactics toSecretly Hide Your Instagram Story from Everyone But Your Chosen ViewerWondering how to share your Instagram Story with a select audience, keeping your posts private while still engaging with your most cherished followers? Follow these two discreet strategies to ensure your content is only seen by the person you’ve meant to share it with:#### **Method 1: Direct Messaging Your Story**1. **Create Your Story**: Start crafting your Instagram Story as you normally would. 2. **Add Text or Anonymise**: Consider adding words or symbols that could password-protect your Story. This way, the chosen recipient will need to know the designated password or hint to view the content.3. **Save the Story**: Instead of posting it publicly, save it to your Camera Roll by swiping up while you're editing. This retains the story's integrity without revealing it to others.4. **Direct Message Them**: Open a Direct Message with the individual you wish to share this Story with. Record a two-second video that reveals the password or instructions on how to find the Story in your Camera Roll.5. **Upload Saved Story**: Before sending, upload the saved Story to the Direct Message. You can also narrate a quick message reminding them to view the Story.#### **Method 2: Use Third-Party Tools**1. **Find a Reliable App**: Look for a trusted third-party app from the App Store that allows you to password-protect or tag specific friends for viewing your Stories.2. **Install the App**: Download the app and install it on your device.3. **Configure Settings**: According to the app's instructions, set your privacy settings to allow for selective Story sharing.4. **Use the App To Share Your Story**: Create and save your Story following the steps provided. Use the app to tag your chosen viewer, ensuring only they’ll have access.5. **Verify with the Viewer**: Make sure that the person understands the sharing mechanism and can view the Story as intended.Always remember that implementing such privacy measures can sometimes come with security risks. Proceed with caution, and only share with the most trusted individuals.
下一篇:### How to Install iOS 12 Beta on Your iPhone and iPad**Streamline Step-by-Step Guide to Experience the Latest Features Before Everyone Else!**Ready to dive into the future of iPhone and iPad functionality? This comprehensive guide walks you through the process of installing iOS 12 Beta on your device. Follow these simple steps to get your hands on a first-peek at Apple’s cutting-edge features.#### Prerequisites:1. **Enrolled in the Beta Program:** Make sure you have joined Apple’sBeta Software Program.2. **Backup Your Data:** Ensure you back up all important data to iCloud or iTunes—it’s better safe than sorry!3. **Free Space:** Your device must have sufficient storage space available.#### Step-by-Step Installation:1. **AppleID Activation:** - Go to [beta.apple.com](http://beta.apple.com) using your web browser. - Log in with your Apple ID. - Sign up for the iOS Beta Program by entering your email.2. **Downloading the Configuration Profile:** - Return to your device, launch the iOS Settings app. - Tap on your name at the top of the screen. - Select iTunes Store & App Store. - Tap Statistics & Privacy. - Scroll down and tap Get a Beta. - Choose Download Profile. - Confirm by tapping Download when prompted.3. **Installing the Profile:** - The iPhone or iPad will notify you of a software update; tap Install. - Enter your passcode to confirm the process. - If prompted, tap Agree to Terms and Conditions.4. **Reboot Your Device:** - Your device may automatically restart. If not, manually restart it. - Once rebooted, your device will ask you to choose your Wi-Fi network.5. **Downloading the iOS 12 Beta:** - Open the [Beta Software Program](https://beta.apple.com) app on your device. - Tap Agreed, if you haven't already. - Your device will begin downloading the iOS 12 Beta software. - Connect your device to a power source to ensure it's charged during the download.6. **Completing the Installation:** - Once the download is complete, your iPhone or iPad will automatically install the new version of iOS. - The process may take 15-30 minutes.7. **Reboot Your Device:** - After installation, your device will restart.#### Post-installation Notes:- **Return to the Beta Program**: Don’t forget to return to the Beta Software Program website after the installation to sign out of the beta profile to revert to a stable version if desired.- **Regular Backups**: Keep your device backed up after installing the beta. Unexpected bugs can occur, and regular backups will protect your data.- **Support Community**: Consider joining the [Apple Support Community](https://discussions.apple.com/) for tips and troubleshooting assistance.With these instructions, you're on your way to embracing the innovation of iOS 12 Beta! Happy beta testing!