您的当前位置:首页 > Twitter > ### Guide to Backing Up Your WhatsApp Pictures to Google Photos & Texts to Google DriveLearn how to easily backup your WhatsApp memories and important conversations to two secure and accessible platforms: Google Photos for your cherished images, and Google Drive for your text messages.---**Step-by-Step Guide to Secure Your WhatsApp Content****Step 1: Set Up Google Photos for Your Pictures**1. **Open Google Photos on Your Phone:** - Download and install Google Photos from the [Google Play Store](https://play.google.com/store/apps/details?id=com.google.android.apps/photos) (Android) or [Apple App Store](https://apps.apple.com/us/app/google-photos/id598866737) (iOS).2. **Sign in to Your Google Account:** - Once installed, open the app and sign in using your Google Account credentials.3. **Optimize Your Storage:** - Choose between "High Quality" to save storage space or "Original" to keep the highest resolution pictures. 4. **Enable Back Up:** - Go to the app's settings, find the backup section, and ensure it’s turned on. This will automatically upload your WhatsApp images to your Google Photos library.*Pro Tip:* Check your data usage or enable local backups (if mobile data is preferred) to manage your internet consumption.**Step 2: Transfer Your WhatsApp Texts to Google Drive**1. **Update WhatsApp:** - Ensure you have the latest version of WhatsApp installed from the [Google Play Store](https://play.google.com/store/apps/details?id=comWhatsApp) (Android) or [Apple App Store](https://apps.apple.com/us/app whatsapp/ (iOS)).2. **Access Backup and Restore:** - In WhatsApp, go to 'Settings' > 'Chats' > 'Chat Backup.' 3. **Back Up Your chats:** - Choose Google Drive as your backup location if it has not already been selected. Enter your Google account credentials if prompted.4. **Set Backup Preferences:** - Select how often you want your chats to back up (daily, weekly, monthly) and if you wish to use local or cloud storage.5. **Complete the Backup:** - Click "Backup" or "Back Up Now" when ready. Wait for the process to finish, and your WhatsApp texts will now be stored in Google Drive.**Step 3: Access Your Backed-Up Data**- **For Images:** - Access your WhatsApp pictures directly within the Google Photos app or visit [Google Photos online](https://photos.google.com/) with your Google account.- **For Messages:** - Visit [Google Drive](https://drive.google.com/) and log into your Google account. Navigate to the WhatsApp backup folder, and you'll find your text messages stored efficiently.**Final Consideration**Remember, backing up regularly ensures that you don’t lose important memories and conversations. Consider setting up automated backups for both Google Photos and Google Drive to keep your data secure and always up-to-date.:Telegram移动版 正文
时间:2024-09-24 03:11:04 来源:网络整理 编辑:Twitter
WhatsAppreignssupremeintherealmofinstantmessaging,adigitalcornerstoneforcountlessconversationsandmem
WhatsApp reigns supreme in the realm of instant messaging, a digital cornerstone for countless conversations and memories. How tragic would it be to misplace those cherished screenshots or texts with a simple slip of the finger? Fret not, for safeguarding your cherished digital preserves through Google Drive and Google Photos is an effortless endeavor.
Join us as we delve into the art of securing your WhatsApp moments: a symphony of photos and texts seamlessly consolidated with Google's digital sanctuary.
Typically, WhatsApp doesn't natively offer a pathway to Google Photos for storing your images—until now. Here’s our expert maneuver to bridge the gap.
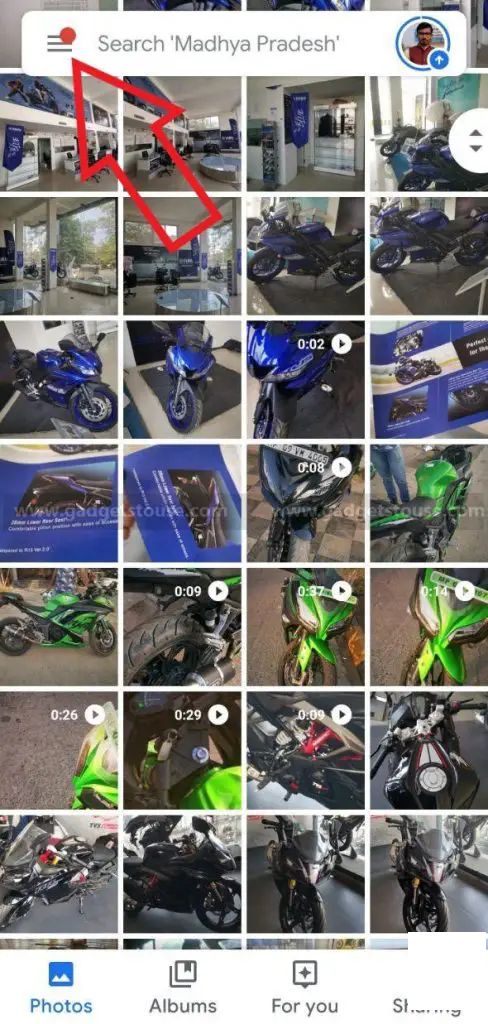
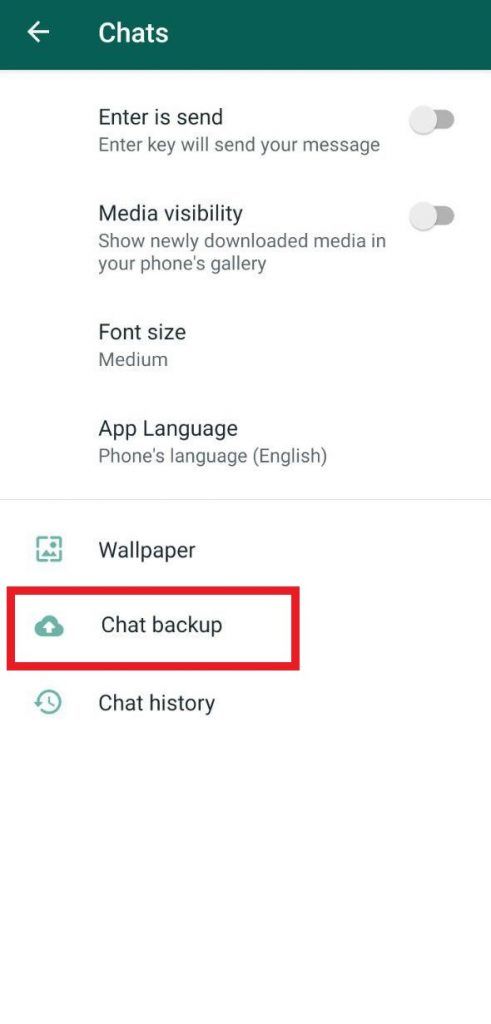
Step 1: Launch WhatsApp, activate the upper right-hand triple dots, and journey to Settings > Chats. Activate the Media Visibility toggle to ensure WhatsApp becomes a part of your phone’s gallery.
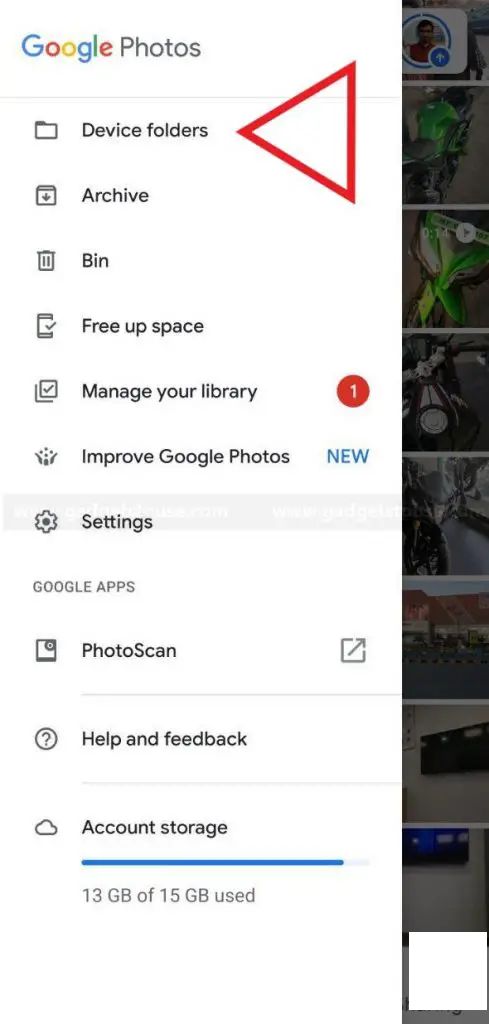
Step 2: Traverse to the Google Photos wonderland and in the sidebar, select Device Folders.
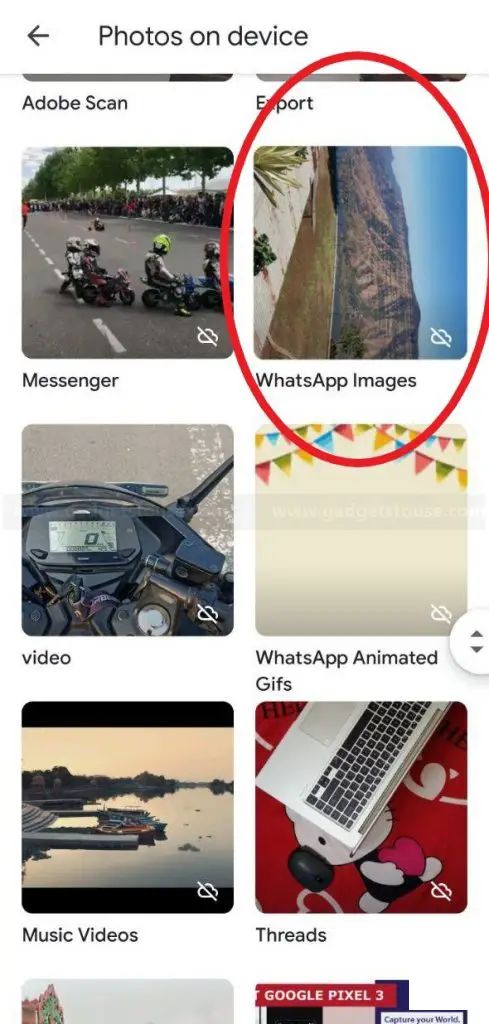
Step 3: Navigate to the WhatsApp Images haven and toggle the Back up & sync feature alive. It's as simple as that; your WhatsApp gallery becomes an eternal canvas in the Google Photos gallery.
With this, your WhatsApp imagery is in constant harmony with your Google Photos cloud, ensuring accessibility even when lounging online through photos.google.com. Voilà, backups for professional WhatsApp and各式存储夹一一就绪,只需一点指尖魔法即可。
Google Drive IOUs your WhatsApp messages with a seamless agreement, thanks to its innate functionalities. Here's how to engage with it:
Step 1: With WhatsApp active, explore the three dots'ܚ hidden treasure, then dive into Settings.
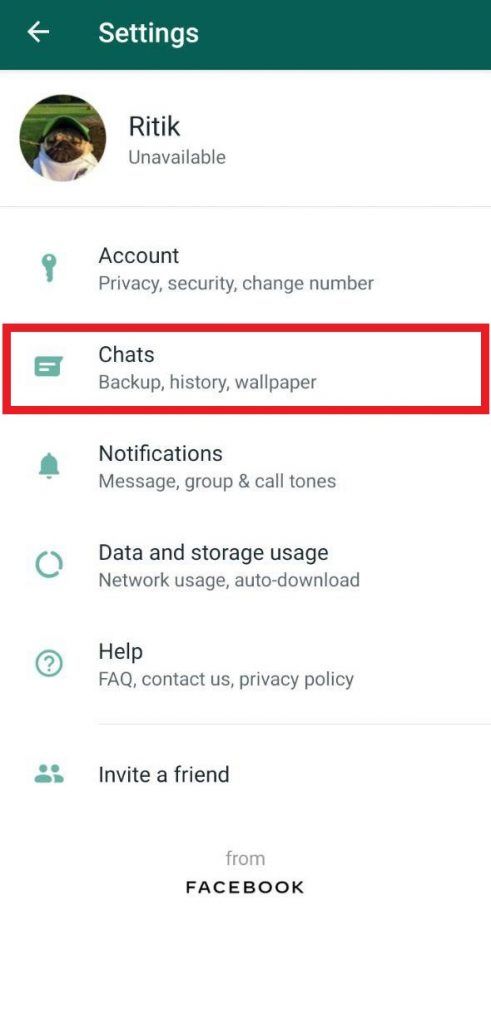
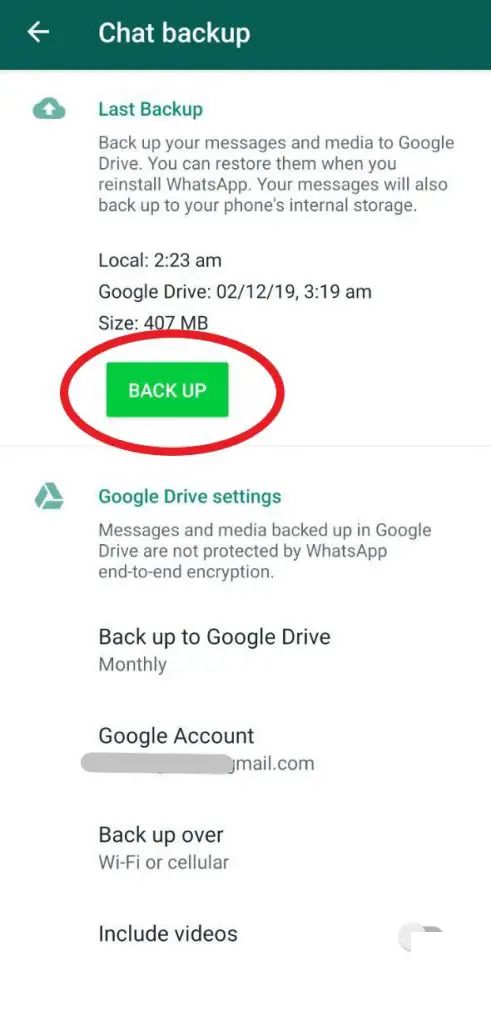
Step 2: In the realm of chats, pinpoint the alchemist's stone—Chat Backup.
Step 3: After selecting your Google Drive domain, decide your connection method and frequency. Opt for daily, weekly, monthly, or by manual rule. Add videos with a mere flick of the switch.
Step 4: With settings tailored as per your profoundly personal preference, hit the Back Up button, and let the data dance to its stored privilige.
Thus, WhatsApp’s secrets sit quietly in the embrace of Google Drive's cloud. Although visible, they are but placeholders for restoration, as the archived media may not respirate amidst human eyes.
Moreover, a local duplicate within the 'WhatsApp'囊肿 keeps its spirit. If cloudalia自身 is not your cup of tea post-reinstallation, you're副教授 of an ancient scroll containing just enough info to invoke your memories.
[Guide]: Reviving an Unresponsive Android Device with a Non-Removable Battery2024-09-24 02:12
Front and Center with Precision: The Vivo X21, Featuring an In-Display Fingerprint Sensor, Set to Debut in India on May 29th2024-09-24 02:09
[GRATIS] Unleash Android 12: Mastering Toggles, Material UI Cards, and Essential Features Installation2024-09-24 00:40