您的当前位置:首页 > TikTok > Title: Navigating the New Normal: Booking a COVID-19 Test Online in India During the Pandemic---Are you looking to get a COVID-19 test and want to do so with the utmost convenience? With the ongoing pandemic, online services have become essential for a seamless testing experience. Here’s a comprehensive guide on how to book a COVID-19 test online in India, ensuring you stay safe and informed.---In the wake of the global COVID-19 pandemic, obtaining a test has become a critical step in ensuring public health and safety. India, like many countries, has made the process of booking a COVID-19 test online easier and more efficient. Follow these steps to arrange your test quickly and reliably:### 1. Choose a Testing Platform- **State Government Websites**: Visit the official state health department websites where a list of authorized testing centers and online booking forms are typically available.- **Health Apps**: Download reputable health and wellness apps that offer COVID-19 testing services, such as MyHealth or CoWin.- **Third-party Platforms**: Consider platforms that facilitate test bookings such as Practo or Apollo 24/7, ensuring they are recognized and government-endorsed.### 2. Create an Account or Log In- Register or sign in to the chosen platform using your personal details.- Verify your identity with the necessary documents, typically your PAN card, Aadhaar card, or passport, as required.### 3. Select Your Test Center- Look for testing centers near your location using the filter options provided by the platform.- Check the center’s details such as contact number, operating hours, and types of tests offered.- Confirm if the center is acknowledged by your state’s health department.### 4. Choose a Test Type- Opt for the type of test you require—PCR, Rapid Antigen, or CBNAAT—based on your symptoms, exposure history, or pre-departure requirements.- Specify if you need a test report certificate, which is often necessary for travel or workplace purposes.### 5. Schedule Your Test- Specify the date and time slot that suits your convenience for the test.- Remain flexible with appointments as high demand may lead to limited availability.### 6. Review and Confirm- Carefully review all the details entered, including your personal information, test type, and time slot.- Confirm your booking and review any payment options available for the service.### 7. Pay for the Test- Some platforms require payment at the time of booking; others may invoice you later after the test is taken.- Securely manage your payments using trusted and safe payment gateways.### 8. Prepare for Your Test- Keep an eye out for any instructions or locations indicated for report collection or download after the test.- Arrange transportation to and from the test center, ensuring you take all necessary precautions to minimize exposure to others.By following these steps, you can effectively book a COVID-19 test online in India, streamlining the process and allowing you to continue with your daily activities while contributing to the collective effort to contain the virus. Stay safe and stay informed. 正文

Title: Navigating the New Normal: Booking a COVID-19 Test Online in India During the Pandemic---Are you looking to get a COVID-19 test and want to do so with the utmost convenience? With the ongoing pandemic, online services have become essential for a seamless testing experience. Here’s a comprehensive guide on how to book a COVID-19 test online in India, ensuring you stay safe and informed.---In the wake of the global COVID-19 pandemic, obtaining a test has become a critical step in ensuring public health and safety. India, like many countries, has made the process of booking a COVID-19 test online easier and more efficient. Follow these steps to arrange your test quickly and reliably:### 1. Choose a Testing Platform- **State Government Websites**: Visit the official state health department websites where a list of authorized testing centers and online booking forms are typically available.- **Health Apps**: Download reputable health and wellness apps that offer COVID-19 testing services, such as MyHealth or CoWin.- **Third-party Platforms**: Consider platforms that facilitate test bookings such as Practo or Apollo 24/7, ensuring they are recognized and government-endorsed.### 2. Create an Account or Log In- Register or sign in to the chosen platform using your personal details.- Verify your identity with the necessary documents, typically your PAN card, Aadhaar card, or passport, as required.### 3. Select Your Test Center- Look for testing centers near your location using the filter options provided by the platform.- Check the center’s details such as contact number, operating hours, and types of tests offered.- Confirm if the center is acknowledged by your state’s health department.### 4. Choose a Test Type- Opt for the type of test you require—PCR, Rapid Antigen, or CBNAAT—based on your symptoms, exposure history, or pre-departure requirements.- Specify if you need a test report certificate, which is often necessary for travel or workplace purposes.### 5. Schedule Your Test- Specify the date and time slot that suits your convenience for the test.- Remain flexible with appointments as high demand may lead to limited availability.### 6. Review and Confirm- Carefully review all the details entered, including your personal information, test type, and time slot.- Confirm your booking and review any payment options available for the service.### 7. Pay for the Test- Some platforms require payment at the time of booking; others may invoice you later after the test is taken.- Securely manage your payments using trusted and safe payment gateways.### 8. Prepare for Your Test- Keep an eye out for any instructions or locations indicated for report collection or download after the test.- Arrange transportation to and from the test center, ensuring you take all necessary precautions to minimize exposure to others.By following these steps, you can effectively book a COVID-19 test online in India, streamlining the process and allowing you to continue with your daily activities while contributing to the collective effort to contain the virus. Stay safe and stay informed.

时间:2024-09-21 10:36:35 来源:网络整理 编辑:TikTok

核心提示

EmbarkonseamlessCOVID-19testbookingwithPracto,asweteamupwithThyrocareforeasyonlineaccess.Endorsedbyt

Embark on seamless COVID-19 test booking with Practo, as we team up with Thyrocare for easy online access. Endorsed by the Government of India and the Indian Council of Medical Research, this service is now live in Delhi, Pune, and Mumbai, with future growth spanning further across the nation.

Let's delve into the essentials of securing your online COVID-19 test, from understanding the procedure to recognizing the telltale signs.

COVID-19 Test Necessities

Here are the fundamental requirements by Practo for scheduling your COVID-19 test:

  • A valid doctor's recommendation
  • Completion of signed Form 44 by a certified medic, detailing travel history and potential exposure
  • A photo ID for verification

Online Booking Guide for Coronavirus Test

Not an app user? No problem, visit Practo's official COVID-19 SARS-CoV-2 detection test webpage instead.

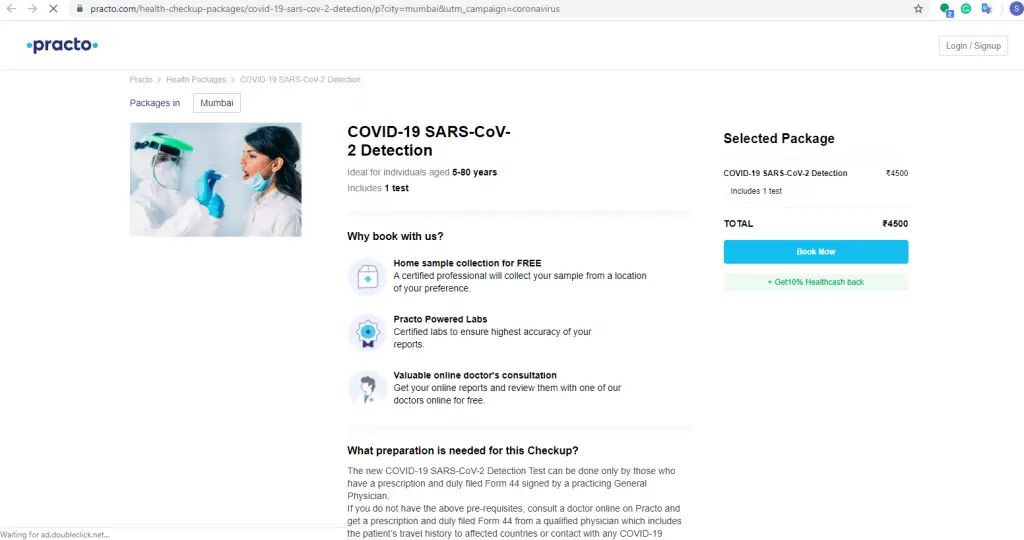
Proceed with the 'Book Now' button, and provide necessary patient information like name, contact, collection address, and more.

ID the slot that suits your schedule and finalize your booking with a payment of Rs. 4,500. Our team, ready and trained, will arrive at your doorstep as scheduled to collect the sample. Expect your results in no more than 48 hours, and they'll be conveyed to you and the authorities promptly.

Spotlight on Coronavirus Symptoms

Use these symptoms as a guide when considering taking the COVID-19 test:

  • Feverish condition,
  • Thoracic咳嗽 oluştur or sore throat,
  • Congested or throbbing head,
  • Lung-straining breath,
  • Any signs of chest discomfort,
  • And other breathing hiccups.

And remember, if symptoms arise, reach out to the Government of India at 1075 or your state's designated coronavirus helpline for expert guidance.

上一篇:### Introducing Facebook Gaming App; Get Ready to Stream Live from Your Mobile Device!Elevate your gaming experience to a new level with the newly launched Facebook Gaming App. Whether you're an aspiring streamer or just want to share your gaming adventures with friends, here’s everything you need to know to start live streaming from your smartphone.#### Step-by-Step Guide to Live Streaming with Facebook Gaming App1. **Download the Facebook Gaming App:** - Head to your app store on iOS or Android, search for “Facebook Gaming,” and download the app. 2. **Log in or Create an Account:** - If you already have a Facebook account, sign in using those credentials. - If not, create a new Facebook account to start streaming on your mobile device. 3. **Set Up Your Stream:** - Open the app, and navigate to the live stream feature. - Allow the app to access your camera and microphone to get started. 4. **Customize Your Stream:** - Personalize your stream with fun filters, effects, and overlays. - Add a custom title to catch viewers’ attention, and cover image to represent your brand or gaming persona.5. **Start Broadcasting:** - Once your settings are in place, tap on the “Go Live” button. - Choose whether to use video or go for an audio-only stream, then hit “Start Streaming.”6. **Interact with Viewers:** - While live, engage with your audience by using the chat feature to answer questions, acknowledge likes, and react to comments in real-time. - Encourage your friends to drop in and chat.7. **End Your Stream:** - When you’re ready to wrap up, tap on the “End Stream” button in the app. - Facebook will save your live video so you can share it later, or choose to delete it after the session.#### Join the Gaming Community TodayWith the Facebook Gaming App, there’s never been a better time to share your passion for gaming. Whether you stream casual gameplay, pro-level tournaments, or let your followers in on your game hours, the Facebook Gaming App makes it easy to engage with a global gaming audience. So, grab your smartphone, and get ready to amplify your gaming experience live!
下一篇:### 3 Methods to Revive Your Twitter Account Without Using Your Phone Number or Email AddressHave you found yourself locked out of your Twitter account and desperate to reclaim access without the usual phone verification? Fret not, as there are alternative methods to get back on track. Here’s how you can reset your Twitter account, without relying on your phone number or email:#### 1. Via Twitter Support**Step 1:** Navigate to the Twitter Support page.**Step 2:** Based on your issue, use the search bar or carefully select the correct category to report a problem. For account recovery, choose Help me get back into my account.**Step 3:** Follow the prompts and provide all necessary information to authenticate your identity. The support team may ask you to provide additional details to verify your account ownership.**Step 4:** Be prepared for the process to take a few days since support cases are often handled manually.#### 2. Using User Interface Options**Step 1:** Log into Twitter.**Step 2:** Go to your profile settings or click on your profile icon to access the Twitter drop-down menu located in the upper right corner of the account page.**Step 3:** Select “Support” from the options available.**Step 4:** Look for a Find My Account or similar feature within the Support section. Follow the instructions, which might involve answering account security questions or stating your issue in a text box.**Note:** This option might not always be available, so it's worth checking with the current Twitter user interface in case it has been updated.#### 3. Utilize Twitter's Password Reset Feature**Step 1:** Head to the Twitter sign-in page on your web browser or mobile device.**Step 2:** Select “Forgot password?” or similar words on the login screen.**Step 3:** You will be prompted to enter your username, Twitter handle, or email地址 associated with the account.**Step 4:** In the case that you do not have access to the email, you may find a 'Create an account with mobile phone number' option as a workaround. Enter your mobile number and continue with the verification process.**Pro Tip:** If you have previously linked your Twitter account to other social media platforms that allow you to log in, you might be given an option to sign in using those services, bypassing the email verification step.In conclusion, while the standard methods of verifying your account through a phone number or email are often readily available and quick, having alternative routes can be invaluable in overcoming access hurdles. Try these steps to systematically regain access to your Twitter account without relying on your primary contact methods.