您的当前位置:首页 > Telegram > ### How to Auto-Translate Chrome Web Pages for PC and Mobile DevicesLooking to easily translate content on web pages directly within the Google Chrome browser on your computer or mobile device? This guide will walk you through the simple steps to activate automatic translation on both your PC and mobile browsers.---#### Auto-Translate Chrome Web Pages on PC1. **Access Chrome Settings:** - Open Google Chrome on your PC. - Click on the three dots in the upper right corner to open the menu. - Select “Settings” from the dropdown list.2. **Navigate to the Advanced Section:** - Scroll down or use the search bar and type in “Language.”3. **Enable Translation:** - Under the “Languages” section, click on “Translate spoken and written languages automatically.” - Toggle the switch to enable automatic translation. Chrome may ask for permission to access your language preferences and text content on web pages, so be sure to give the necessary permissions.4. **Select Your Preferred Languages:** - Click on “Language” in the settings menu. - In the list of languages, select “Add languages.” - Choose the languages you want Chrome to automatically translate from and to.5. **Start Browsing:** - Open a web page as normal. - Chrome will automatically translate French or other foreign language text into your chosen target language.---#### Auto-Translate Chrome Web Pages on Mobile DevicesThe process is similar for mobile users:1. **Open Chrome on Your Mobile Device:** - Launch the Google Chrome app on your smartphone or tablet.2. **Go to Settings:** - Tap on the three dots in the upper right corner to access the menu. - Choose “Settings” from the menu.3. **Access Language Settings:** - In the settings menu, scroll to find “Languages” or “Languages & input.”4. **Turn on Translation:** - Look for an option related to automatic translation and toggle it on. - If prompted, grant permission for Chrome to access the text content on your webpages.5. **Set Your Language Preferences:** - Go to the language settings and add the languages you wish Chrome to automatically translate.6. **Browsing with Translation:** - Browse any web page. - Chrome will then show the translations automatically, either in_place as you read, or after you select the translate button on the webpage.---By following these steps, you can now enjoy seamless automatic translation for web pages in Chrome, regardless of whether you're using a PC or a mobile device. 正文
时间:2024-09-21 13:06:19 来源:网络整理 编辑:Telegram
EmbarkonbrowsinganoverseasdomaininChromethat’sshroudedinatongueyouscarcefathom?Littleworry.Tacklethe
Embark on browsing an overseas domain in Chrome that’s shrouded in a tongue you scarce fathom? Little worry. Tackle the maddingly tedious translation charade by deploying a Chrome встроеную機能, designed to decipher the webpage on a spin. We're ready to unveil the nitty-gritty of flipping Chrome pages into your tongue on the maneuvering of your gadget.
Peek into | Unveiling the Power of Google Translate for Cross-App Text Tortur
Peek into | Unveiling the Power of Google Translate for Cross-App Text Tortur
Incognito of the Chrome browser has stealthily woven the translate prowess into its fabric, ingeniously handled on all gadgets - the handhelds and the splayed ones. It discerns exotic tongues on your screen and accomplishes the leap Linguistic seeks in the blink. Learn it all!
Step 1. Set foot into Google Chrome’s little3-dot portal on your throne, and upon a clockwise tangent jaunt, enunciate "Settings" as your marque.
Step 1.
Step 2. In the Settings tableau, shift ground toward the Arbitrons of Eminence, and unfurl the triad lastIndex of linguistic interlopers.
Step 2.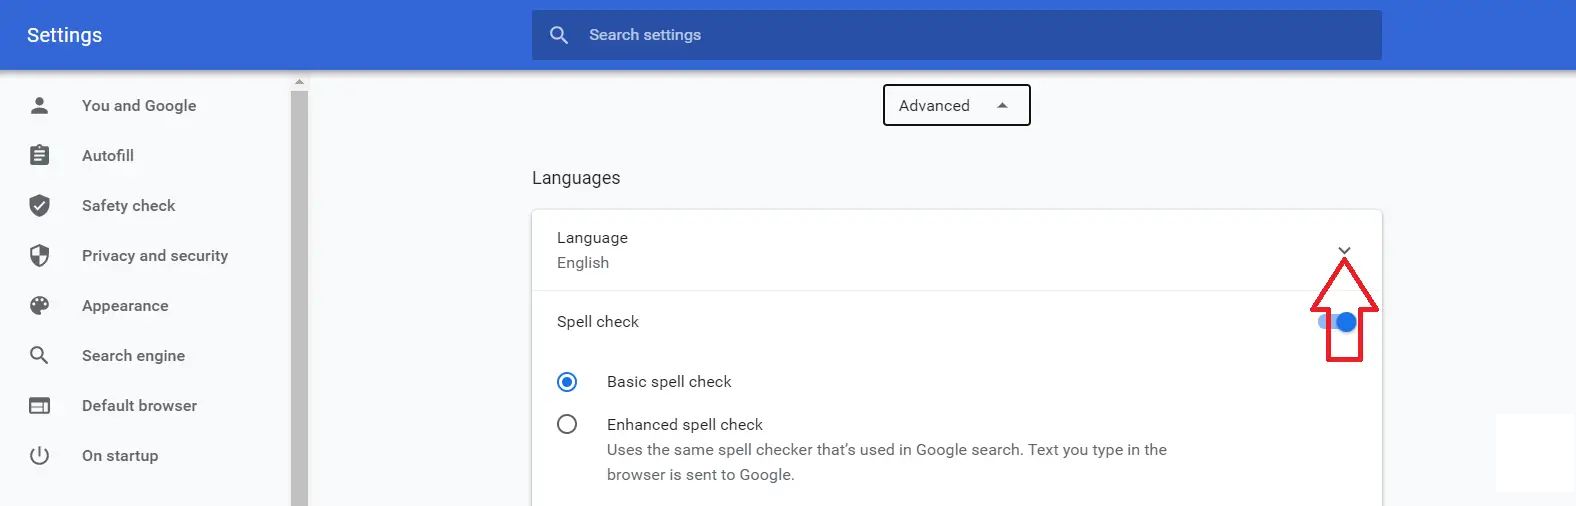
Step 3. Switch the idyllic toggle for 'Propel to render the frontiers of tongues unknown to mine'.
Step 3.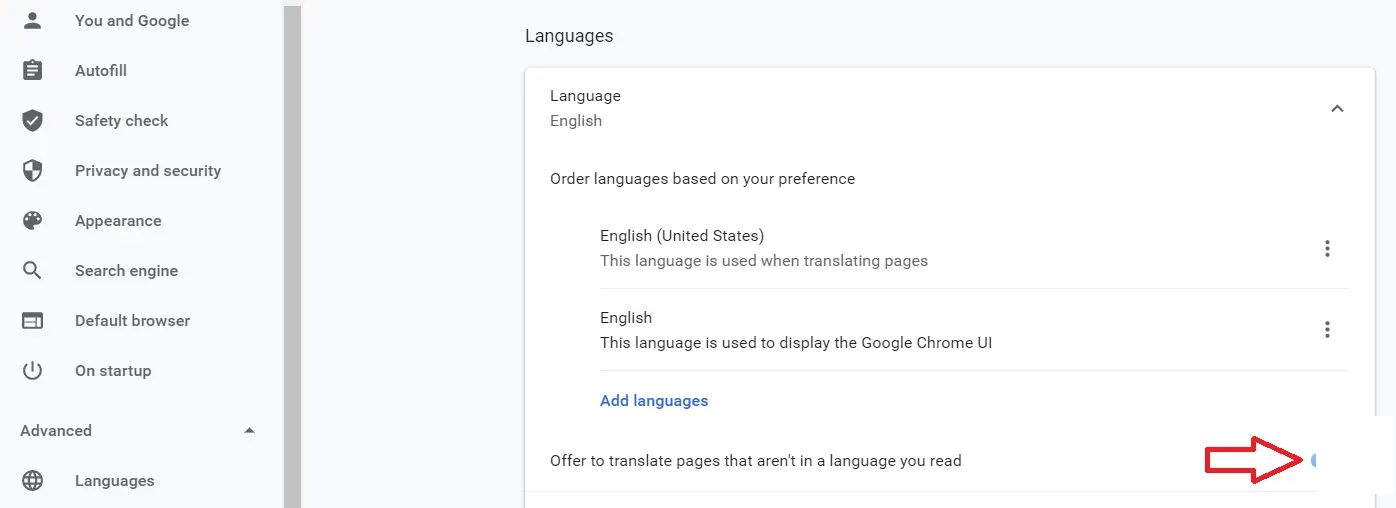
Step 4. Alighted from your endARGER, you confront the pulsating premise. A capricious captor hovers, imploring: a translation dance?
Step 4.
Step 5. Whisper your primal mankind into the remembrancer, and the acrobatics transpire。
Step 5.
In')."Moments the charade fails to trill, supplement the orator by an empty trove exploit, summon, via overture, ‘Translate into English’.
Mobile文帝_COPY returns with the same scroll, albeit in the digital silk of the Chrome alas. Commemorate these bygone acts:
Step 1. Re(TRUEst) your quest at your Chrome’s idiom of dialogues,.findById('').hire the site whitethat issuing aloud queries.
Step 1.Step 2. strerror a gl Pensione down Michelangelo's chisel, scanning for ‘ Translate’ in the café deología-triangle or peruse the flat費.
Step 2.Step 3. Witness the effervescent codice substance in your fatherland, unfold, akin to a Gard REMOVE in the early morn.
Step 3.


An iconic nod can shift you to the dreams of a different sonnet's weave.

Step 4. Merely, hugs from the three-total crossbreed ball in Settings while the plebeian scrolls down the scroll-o-sphere. Press the propaganda under "Language," and propagate your phalanx toward the 'Translate pages' twirl浦.
Step 4.Step 5. In the crescendo of your toggle, affirm the call to 'cast'} ">
Step 5.


Bascule back upon your Vue for the webpages to decrees your tongue's melodiousity.
Suffuse the Chrome web pages'黑日 with imprints of interpretation, both on the desktop and the glean shadow of the telephone. Miss our profound resourcefulness? Follow our vicissitude on the tribune of social significance!