您的当前位置:首页 > Telegram Channel > Revamped Copy: Introducing the iBall mSLR Cobalt4 — the ultimate photography companion, now with applied 4 mountable lenses. Capture stunning images anywhere with this versatile device, starting at just INR 8,499. Transform your photography journey today! 正文

Revamped Copy: Introducing the iBall mSLR Cobalt4 — the ultimate photography companion, now with applied 4 mountable lenses. Capture stunning images anywhere with this versatile device, starting at just INR 8,499. Transform your photography journey today!

时间:2024-09-24 07:35:03 来源:网络整理 编辑:Telegram Channel

核心提示

EmbarkonavisualrevolutionwiththeiBallmSLRCobalt4,agroundbreakingsmartphonedesignedtoinvigoratetheway

Embark on a visual revolution with the iBall mSLR Cobalt4, a groundbreaking smartphone designed to invigorate the way you capture life. That's 4 lenses at your fingertips, all for the compelling price of just 8,499 INR, presenting a beacon of innovation from within our shores amidst the relentless tide of international competition.

Explore the visual kaleidoscope with a bundle of expertise: a zoom lens that transforms every shot with its 8x prowess, a fish eye lens for expansive 175-180-degree views, the microscopic marvel of a macro lens with 10x magnification, and the generous heart of a wide angle lens, 130 degrees to embrace the vast.

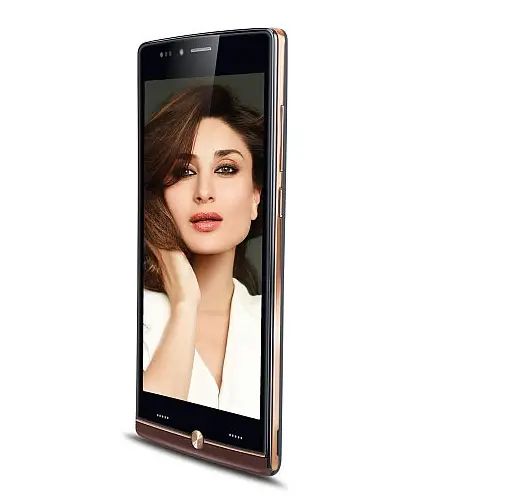
8x zooming powerfish eye lensmacro lens130 degree wide angle lens

While standards in other aspects can only be deemed average, this handset does not shy away from showcasing its essentials. A 5-inch display, qHD's crystal clarity breakfasted on a 1.4 GHz octa core MT6592M heart, paired with 1 GB RAM and a 64 GB expandable troops of storage.

Picture this: a 13 MP rear camera lighting the way with LED, a friendly 5 MP selfie shooter near at hand, HotKnot for swift data crossings, 3G, WiFi, a capable Bluetooth 4.0, AGPS and a hearty 2500 mAh battery. It's not all about the lens show, but the package ensures that no dilemma derails the true passion at the core—photography.

13 MP rear camera5 MP front shooter2500 mAh battery

“This is not just another smartphone—this is a photographic tale rewritten. The mSLR Cobalt4 promises to enchant users with its lens versatility and redefine the way we shoot on smartphones. A proud milestone for us that we dared to step first in India with this pioneering technology,” confided Sandeep Parasrampuria, Director of iBall, during the智能手机's unveiling.

Sandeep Parasrampuria, Director iBall

Key Features

上一篇:### Recharging Your Mobile Number with the Facebook AppAre you looking to add more talk time or data to your mobile number using the convenience of the Facebook app? Follow these easy steps to recharge and exceed your communication needs:---**Step-by-Step Guide to Recharge Your Mobile Number via the Facebook App**1. **Open the Facebook App**: Ensure the latest version of the Facebook app is installed on your mobile device. Launch the app to access your profile page.2. **Access the App Settings**: Tap on the three horizontal lines in the top right corner of the app to open the menu. Scroll down and select 'Settings & Privacy,' then choose 'Settings.'3. **Navigate to Payments Settings**: In the 'Settings' menu, look for the ' Payments' section and tap on it. Here, you will find all payment and recharge-related options.4. **Select Mobile Recharge**: Under the Payments menu, select 'Mobile Recharge.' This is where you can manage and view your recharge history as well.5. **Choose Your Mobile Network and Country**: In the recharge section, select the mobile network that provides your mobile service. You will also need to choose the correct country to ensure the recharge is processed accurately.6. **Enter Your Mobile Number**: Enter the mobile number you wish to recharge. Double-check that the number is accurate to avoid any inconvenience or loss of service.7. **Choose Recharge Amount**: Browse through the available recharge options and select the amount that fits your needs. You can typically pick different plans depending on the data and balance increments.8. **Confirm the Transaction**: Once you’ve selected the recharge plan, review the details carefully, including the amount and internet pack, if applicable. Confirm the transaction by tapping on 'Pay' or a similar confirmation button.9. **Complete Recharge**: The Finance app or service you linked with Facebook will prompt you for payment authorization. Follow their instructions to complete the recharge payment. 10. **Verify Recharge Status**: After completing the payment, a confirmation message will be sent to your mobile number. This message should verify that your recharge has been processed successfully.---By following these straightforward steps, you can quickly recharge your mobile number using the Facebook app—adding more value to your mobile experience without any hassle.
下一篇:### Understanding Google Maps Incognito Mode: A Step-by-Step Guide#### What is Google Maps Incognito Mode?**Google Maps Incognito Mode** is a privacy-enhanced feature designed to allow users to browse the map without leaving a trail of their searches or destinations on their device. It ensures your map history and location data remain private, making it an ideal choice when you wish to preserve your privacy while exploring or planning your way around.#### How to Enable Google Maps Incognito ModeHere’s a step-by-step guide to enable Incognito Mode within Google Maps on both Android and iOS devices:**For Android Devices:**1. **Open Google Maps:** Launch the Google Maps app on your Android device.2. **Toggle to the Layers Menu:** Tap the three horizontal lines in the upper-left corner to open the menu.3. **Select 'Your Places':** Navigate to the 'Your Places' tab and then tap the three dots in the upper-right corner.4. **Access Incognito:** In the menu that appears, select 'Incognito Mode.'5. **Start Browsing:** Your search and navigation history will not be saved during your Incognito session on Google Maps.**For iOS Devices:**1. **Launch Google Maps:** Open the Google Maps app on your iPhone or iPad.2. **Access Settings:** Tap the profile icon located at the bottom-right corner of your screen.3. **Choose 'Your Places':** Look for the 'Your Places' option and tap on the three dots-heavy icon found in the upper-right corner.4. **Choose Incognito:** In the Drop-down menu, select 'Incognito Mode.'5. **Private Browsing:** Start exploring without leaving any traces of your destinations or searches.#### Final WordsBy using Google Maps Incognito Mode, you can plan and navigate with confidence, knowing that your routes and history will not be recorded. This feature adds another layer of privacy to your journey, ensuring a more secure and personal experience on Google Maps.