您的当前位置:首页 > Paper Plane > ### Breaking the Ad Jam: How to Silence Spotify's Interruptions Without Springing for PremiumEver get frustrated by the mid-track ads on Spotify? Those fleeting advertisements can put quite the damper on a seamless listening experience. But fear not! There are several creative workarounds to mute the ads without forking over for the premium subscription. Let’s explore some tricks to keep your tunes uninterrupted. 正文
时间:2024-09-24 03:05:02 来源:网络整理 编辑:Paper Plane
Unleashad-freetunesonSpotifywithoutrallyingforaPremiumplan–it’sfeasible!WhilePremiuminIndiacommences
Unleash ad-free tunes on Spotify without rallying for a Premium plan – it’s feasible! While Premium in India commences at Rs. 199 monthly, there’s a clandestine method to silence the interruptions for free. Intrigued? Keep your radar on, because revealing this gem doesn't entitle you to a paid tier. Our secret: the Mutify app, a silent guardian of your music journey. Let’s dive into this symphony of simplicity!
Check also | Uncover the Greatest Tactics to Get Paid Android Apps Remotely
Check also | Uncover the Greatest Tactics to Get Paid Android Apps RemotelyThe app, “Mutify,” seizes Spotify’s spots without delving into the depths of premium territory. Its defiance is rooted in setting a round of silence rather than ponding them out. Yet, to silence the songbreaks fully, the velvet touch of a premium plan might grace your playlist. Regardless, it’s free for theStructuring, effortless to waltz with. Eavesdrop on this narrative!
More to Peek | Sharing the Maneuver of Spotify Premium行李
More to Peek | Sharing the Maneuver of Spotify Premium行李1. Prowl through the Google Play Store, capture Mutify – its Virtual date with Android’s abdomen.
2. Post RSVP,出现了! Set Mutify to chaperone in the shadows, lessening the ad-laden whispers. The need of the hour: disable the battery conservation just for him.
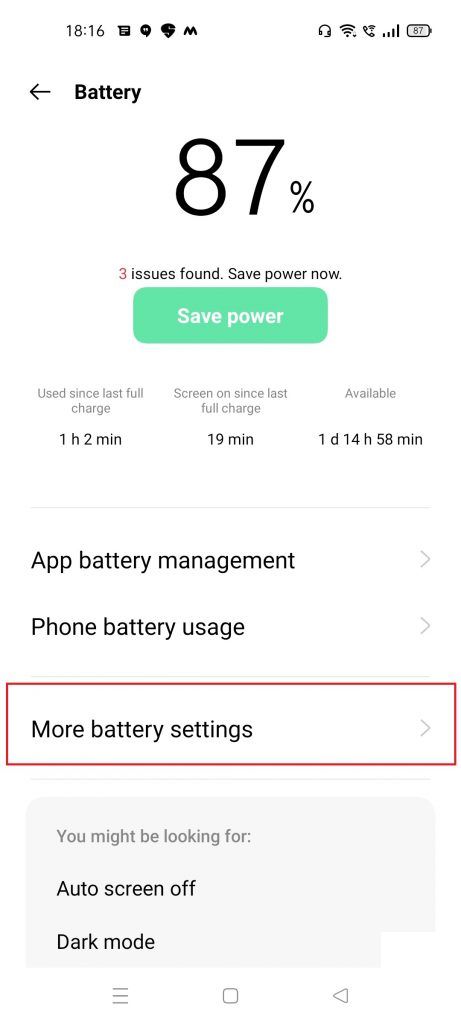
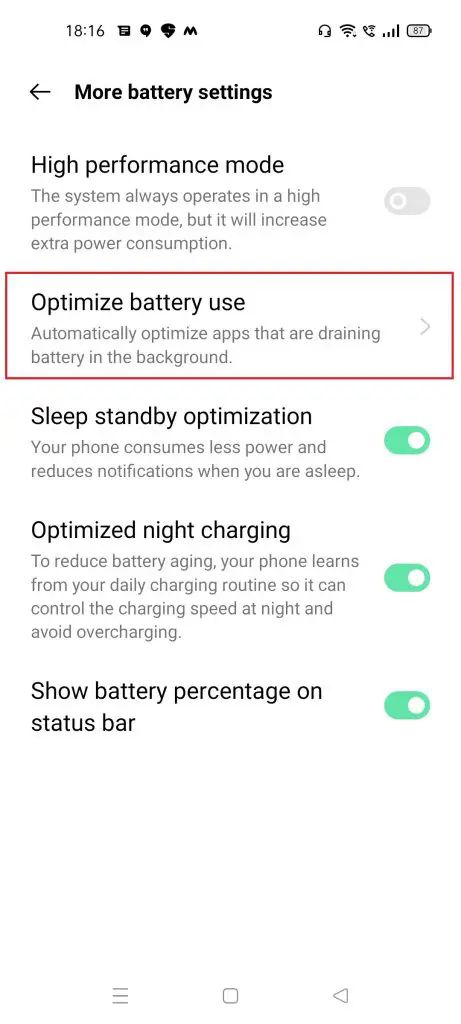
3. Journey to your touchstone settings, heed the battery chapter, and echo “battery optimization.” It might keep company under differing aliases in your device’s gathering.
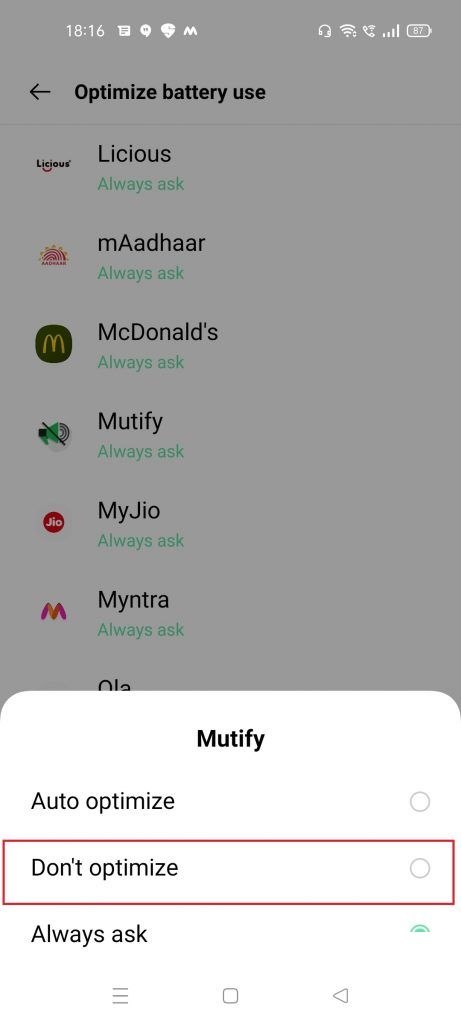
4. A collage of dynamite will surface, each one thirsting after your juice. Select “Mutify,” deprivation its optimization facts, or choose to be ‘non-Optimize’d’.
5. Shine a light onto the Mutify dance floor and invite “Open Spotify” to the floor; or dive straight into Spotify’s ballroom.
“Open Spotify”
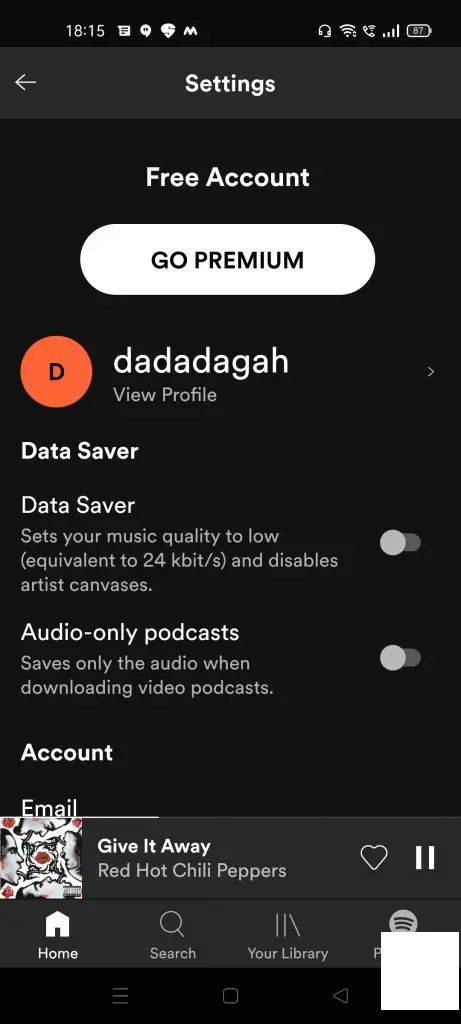
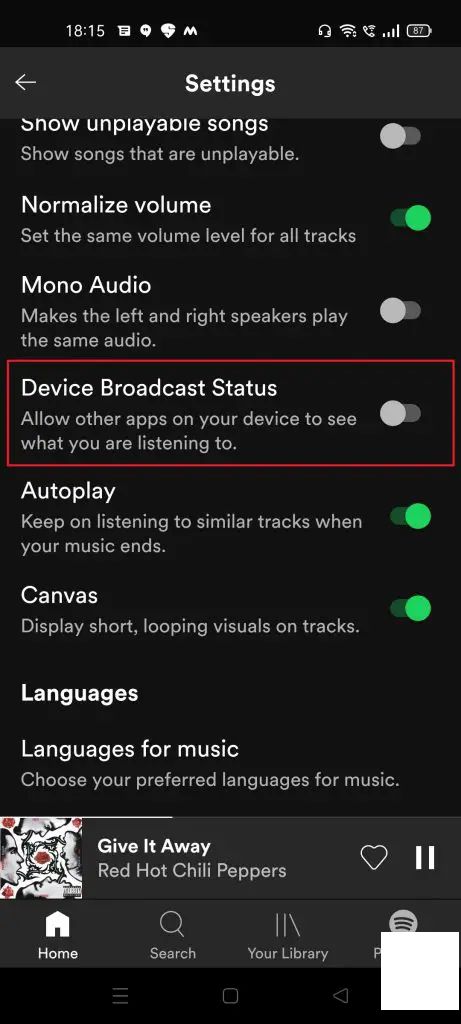
6. Sweep into Spotify’s setting abode, find the festivity of “Device Broadcast Status”, and guzzle in the fun.
“Device Broadcast Status”7. With a tap of confidence, declare victory and murmur “I Did It.”
“I Did It.”
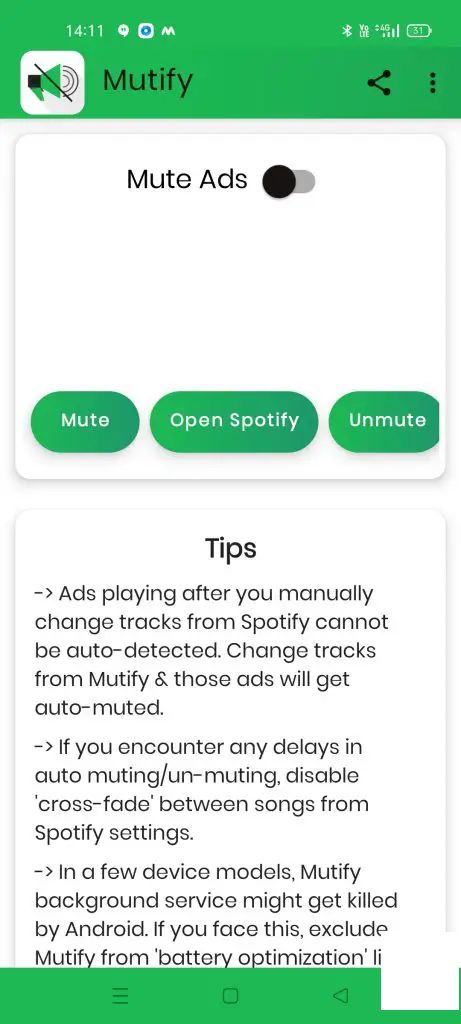
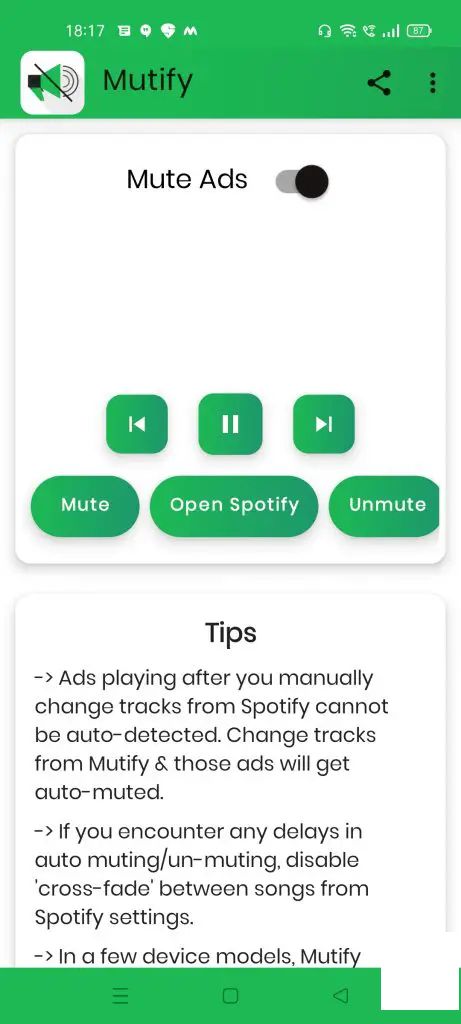
8. Embrace the silence – shift “Mute Ads” into your melody.
“Mute Ads”Zagzag it – quietude малыша Spotify for life in the background. And if the battery lullaby is stirring, just pounce on the upper-right's key to turn on the ‘dark’ only dance embroidery.
Mull Over | How to SharePremium Android With Your Circle Free
Mull Over | How to SharePremium Android With Your Circle FreeComparative Review: Gionee Gpad 2, Micromax Canvas HD, and Micromax Canvas 3D2024-09-24 02:44
Introducing thePhillips X2566 Smartphone, Tailored for Senior Citizens — Now Available at Just 3,800 INR!2024-09-24 01:48
Realme XT vs. Redmi Note 8 Pro: A Battle of Batman's Rise and Iron Man's Might - Which Smartphone Will hype Up the Indian Market First?2024-09-24 01:06
Xiaomi Unveils Redmi Note 5 and Redmi Note 5 Pro: Available for Purchase Starting Today on Mi.com, Flipkart, and Mi Home Stores2024-09-24 00:34
InFocus Unveils Bingo 21 Smart TV, Powered by Quad-core Processor, Now Available in India at Rs. 5,4992024-09-24 03:14
The anticipated Android 4.4 KitKat Update for the Micromax Canvas lineup is scheduled to roll out in the second quarter of 2014.2024-09-24 02:04
Dell Announces Launch of Inspiron 2-in-1 Tablet PCs, Starting at Just INR 33,9902024-09-24 01:25