您的当前位置:首页 > Twitter > ### Efficient Tactics for Eliminating Multiple Android Bloatware: Top 3 SolutionsUnchain your Android device and reclaim its full potential with our guide to the top three strategies for eliminating unwanted bloatware. Say goodbye to clutter and enhance your device's performance today:1. **Use a Custom Recovery and Flash Custom ROMs** - Step out of the confines of manufacturer bloat by installing a custom recovery like TWRP (Team Win Recovery Project) or CWM (ClockworkMod Recovery). Once you have a custom recovery, you can flash a custom ROM, which typically eliminates most carrier-installed and OEM bloatware. This not only cleans up your interface but can also unlock additional performance optimizations.2. **Manage Permissions and App Usage with Task Managers and Safety Apps** - Take back control over your device using advanced task management applications. Apps such as Greenify help keep background apps under control, reducing their footprint on your system. Furthermore, bloatware often has extensive permissions that can compromise your privacy. Use app permission management tools and secure safety apps to gain insight into what bloatware is doing on your device, and selectively disable or block the permissions it doesn’t need.3. **Backup and Delete Applications Individually** - Last resort, given its simplicity, is manually deleting the apps you don’t use. For Android, you can simply long-press an app's icon and select 'Uninstall'. Duplicate apps found between your App Drawer and Google Play Store should also be crossed off the list. However, while immediate, this approach doesn’t always ensure removal of every aspect of the app 技术上,有些 bloatware leaves behind remnants that require further cleansing using a root cleaner or application like CCleaner for Android.By implementing these steps, you'll be well on your way to a leaner, meaner Android device—free from unnecessary bloatware. Enjoy the enhanced speed and performance of your Android device with these troubleshooting techniques! 正文
时间:2024-09-24 03:04:58 来源:网络整理 编辑:Twitter
Androidsmartphonesoftencomewithso-calledbloatware,softwareloadedbycarriersormanufacturersthatmayseem
Android smartphones often come with so-called bloatware, software loaded by carriers or manufacturers that may seem unnecessary and inefficient for users. This unused software eats up valuable storage space and constantly runs in the background, sapping battery life. However, there's a straightforward way to manage this on Android 4.0 ICS and newer devices. Let’s delve into how to remove it without much trouble.
Disabling bloatware on newer Android phones is a breeze. Just head to your Settings, and dive into Applications -> All Category. Here, you'll find a list of all installed apps, and you can easily disable the ones you don't want. Plus, if they're cluttering your App Drawer, you can long-press the icon and drag it to the App Info option.

Once in the App Info screen, simply tap the 'Disable' button. Beware, as disabling some may cause other apps to act up. For instance, turning off Messaging might disrupt your communications until you switch to a third-party app.
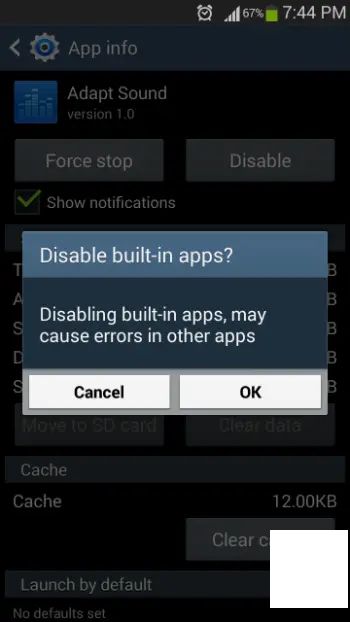
After disabling your chosen apps, you might see them listed at the bottom of the All apps section. To turn them back on, just tap Enable app. However, keep in mind that this method merely hides the apps, freeing space and preventing background processing. The bloatware remains installed, though, taking up system storage and potentially affecting a factory reset’s ability to clear it away.
Not ready to deal with the potential risks of deletion? Disabling apps can do the trick if all you want is to declutter your App Drawer. But, if you really want to free up that system space, there are several strategies to remove bloatware from your Android completely.
Flashing a custom ROM, like Cyanogenmod, can replace the original software with a cleaner version, ridding your device of bloatware and its storage footprint.

Rooting your device allows direct system-level access. With apps like NoBloat or Titanium Backup, you can delete bloatware applications outright, ridding your phone once and for all of unnecessary software that consumes space.

For the less brave, non-rooting scripts are available on the XDA Developers forum. They can eliminate bloatware without taking root, though some tinkering with them is necessary. Miscalcalculations could leave you without a bootable device, so proceed with extreme caution.
For those on older Android versions, rooting your device and employing apps like Titanium Backup Pro or Gemini App Manager can also disable bloatware. These 'freeze' apps, blocking their access.
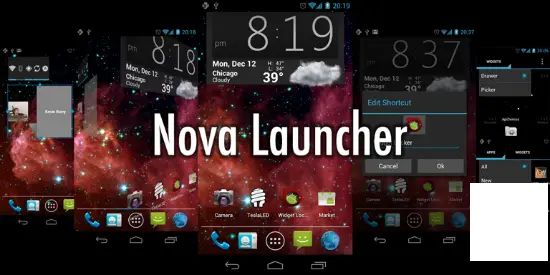
Or, for those leaning towards a less drastic approach, third-party launchers like Nova can tuck away app icons in the App Drawer, reducing clutter without necessarily disrupting battery life.
By following the outlined steps above, you can clear up your device of a lot of unnecessary apps, save battery, and make the most of your precious storage. Remember, while going after bloatware is beneficial, avoid disabling any core pieces of your phone’s functionality to ensure you stay fully operational.
The Selfie-Centric OPPO A57 Set to Debut in India This February2024-09-24 05:17
Absolutely! Please provide me with the原有text you'd like to have revised, and I'll integrate the new content accordingly.2024-09-24 05:03
Brother Introduces Innovative Ink Refill Tank Printers to the Indian Market, Starting at Just 11,100 INR2024-09-24 04:06