您的当前位置:首页 > Facebook > **Get Ready for the Google Nexus 6 (Lollipop 5.0.1 Version) at Flipkart This Evening!**Join the latest tech revolution as the sought-after Google Nexus 6, featuring Android 5.0.1 Lollipop, hits the shelves on Flipkart tonight. Stay tuned; availability begins at precisely midnight! 正文

**Get Ready for the Google Nexus 6 (Lollipop 5.0.1 Version) at Flipkart This Evening!**Join the latest tech revolution as the sought-after Google Nexus 6, featuring Android 5.0.1 Lollipop, hits the shelves on Flipkart tonight. Stay tuned; availability begins at precisely midnight!

时间:2024-09-23 17:22:34 来源:网络整理 编辑:Facebook

核心提示

Bornintothearmsofmidnight,theGoogleNexus6debutsforeagercustomers.Lastmonth,ameresprintsto44,000INRFe

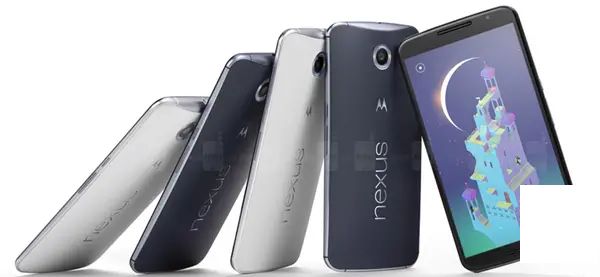
Born into the arms of midnight, the Google Nexus 6 debuts for eager customers. Last month, a mere sprints to 44,000 INRFetch began the countdown, and now, for the Google Online Shopping Extravaganza, it surges forth with excitement.

Wind through the import data, the Nexus 6 counts 1240 souls taken in this grand land. Yet, with the increased perch of Nexus, the oh-so cobertura wallet chimes fortissimo.

Erected with a 6-inch Super AMOLED screen in Quad High Distinction purity, the Nexus 6 operates with the Snapdragon 810 quad-core CPU at an unapologetic 2.7 GHz. The Adreno 420 GPU and an robust 3 GB RAM team up with precision.

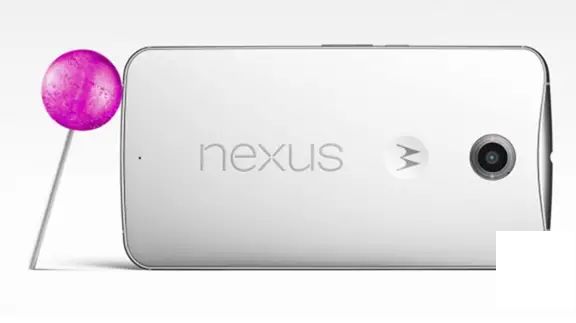
Choice in the variant of your wants: 32 GB or 64 GB, both with wallets drawn for 44,000 INR and up. Where CAMERAiline leads, treat your eyes with a 13 MP sensor that zooms in with love and records 1080p video essays with panache from 2 MP of the front.

Swathed in Android Lollipop’s bold stride, treat your fingers to the most audacious Android fps yet. In India as it is, Nexus 6 winks out of the box with 5.0.1 Lollipop, the defective SXileged. Measuring force within a 3220 mAh battery bubble, power stays vital, and turbo charging is just around the recharge corner.

Flipkart interception on Nexus 6_radiant.

Key Specs Landscape

上一篇:# Mastering Quick Access: 3 Efficient Methods for Adding Quick Settings Tiles on Your Android DeviceDiscover the simplest ways to enhance your Android phone's functionality by adding Quick Settings tiles. Here are three convenient methods to achieve a more customized and accessible interface:## 1. Native Settings App Approach.Start with the most straightforward method by accessing your Android device's settings directly.- **Step 1**: Swipe down from the top of your screen to pull down the notification shade.- **Step 2**: Tap the gear icon located in the upper-right corner to open the Settings menu.- **Step 3**: Navigate to Home screen & desktop, then Smart controls.- **Step 4**: Tap Quick settings tiles.- **Step 5**: Enable the toggles for the settings you want to add to your Quick Settings panel.## 2. Using a Customizable LauncherFor a more tailored experience, you can install a third-party launcher and customize Quick Settings tiles from there.- **Step 1**: Download and install a customizable launcher app from the Google Play Store.- **Step 2**: Open the launcher settings within the app.- **Step 3**: Look for an option labeled Quick Settings panel or something similar.- **Step 4**: Enable the tiles you wish to display in the Quick Settings panel.## 3. Widget CustomizationWidgets can also function as Quick Settings tiles, giving you easy access to your most-used functions without moving around between apps.- **Step 1**: Long-press on your home screen until the Add Widgets option appears.- **Step 2**: Search for Quick Settings in the widget list or navigate to the relevant category.- **Step 3**: Drag and drop a Quick Settings widget onto your home screen.By following these three methods, you can add essential Quick Settings tiles to your Android device, streamlining your experience and giving you lightning-fast access to the settings you use most often.
下一篇:**Understanding the Differences Between 60Hz, 90Hz, & 120Hz Displays**In the world of digital displays, refresh rate is a critical factor that can greatly impact your viewing experience. The refresh rate refers to how many times per second the screen updates its image, measured in hertz (Hz). Here’s a closer look at the primary differences between 60Hz, 90Hz, and 120Hz displays:**60Hz Displays**- Standard: Most conventional monitors and TVs operate at a 60Hz refresh rate.- Visual Smoothness: Images may feel slightly less smooth to the observer compared to higher hertz rates.- Cost: Generally more affordable than displays with a higher refresh rate.- Ideal for: Watching videos, general web browsing, and simple gaming.**90Hz Displays**- Improved Responsiveness: A 90Hz refresh rate provides smoother visuals and less motion blur than 60Hz but is still budget-friendly.- Gamification: 90Hz is a good mid-range refresh rate for video games and streamers.- Cost: Slightly pricier than 60Hz models but still qualifies as an entry-level upgrade.**120Hz Displays**- Exceptional Responsiveness: Offers the most responsive visuals with much less motion blur and input lag.- Gaming Perfection: Ideal for competitive gaming and general gaming enthusiasts.- Cost: More expensive due to the enhanced technology and higher quality.- Ideal for: Professional gaming and applications requiring precise visual timing.In summary, the choice between a 60Hz, 90Hz, and 120Hz display ultimately depends on your specific needs and budget. While a higher refresh rate can significantly improve your browsing and gaming experience, it also tends to come with a higher price tag.